Understanding what data you have and where it is located is a critical step in complying with industry and government regulations, like the European Union’s GDPR directive.
Microsoft introduced the File Classification Infrastructure (FCI) in Windows Server 2008 R2 to help organizations classify data stored on Windows file servers. Using FCI, system administrators can set up rules that automatically classify files based on various factors, such as location or content. Once files have been classified, FCI can perform specified actions on them, such as moving them to a specified directory or encrypting them.
Classification methods
The easiest way to classify files with FCI is to use its built-in engine. FCI uses Windows Search to crawl your file servers and automatically classify the files based on the classification properties and rules you set up. Users can also manually classify files using the Classification tab that Windows Server 2012 and Windows 8 add to Windows Explorer. If you classify your organization’s Microsoft Office templates, users can create documents with the necessary metadata already in place.
In addition, applications can use the FCI API to analyze files and enable users to manually classify documents from within the applications in which they are created. There’s also a Windows PowerShell classifier module that lets system administrators access the API and classify files using any properties they like, without needing to code in C# or C++. The PowerShell classifier module is part of the Windows Software Development Kit (SDK).
Classification properties
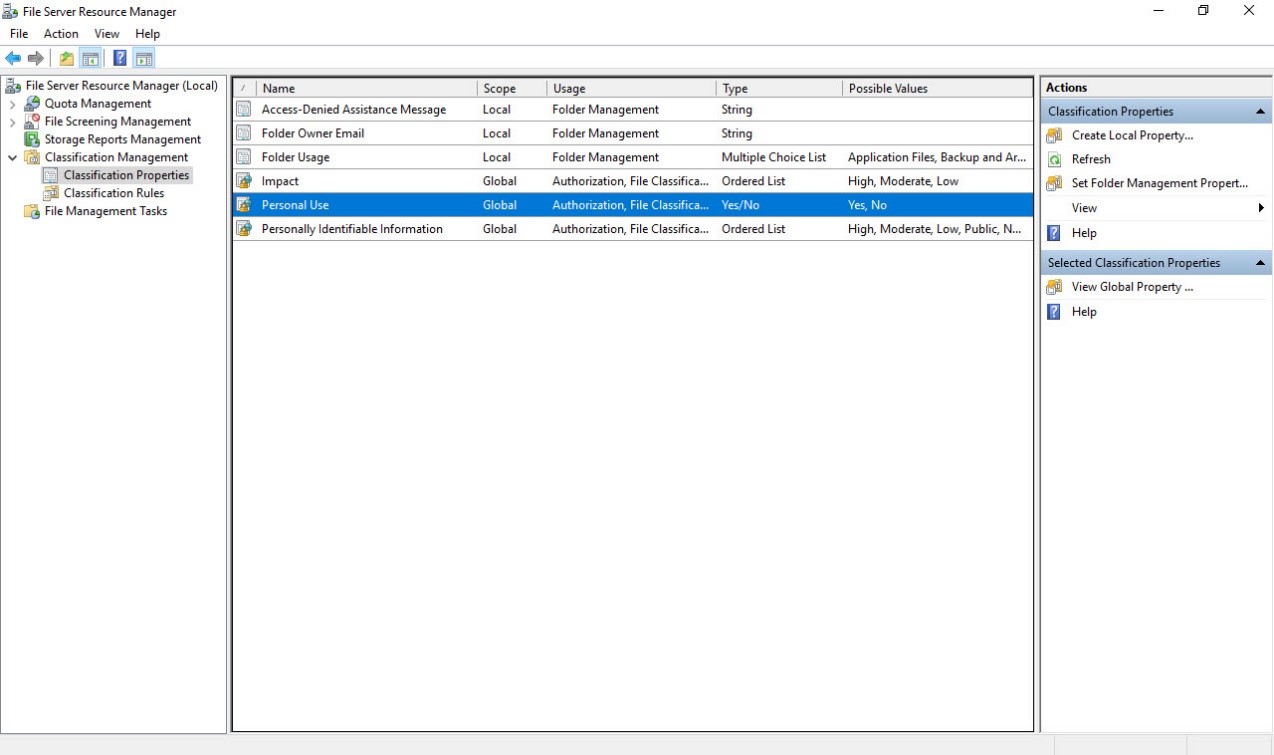
File server administrators create classification properties to define how metadata will be used to classify files. There are eight types of classification properties in Windows Server 2016, including yes/no, date/time and multiple-choice list. Each classification property has a predefined set of possible values types. Some are simple; for example, the Personal Use property can be only Yes or No, and the Retention Start Date property accepts only date/time values. Other properties have more complex value types; for instance, the Folder Usage property accepts multiple values, and the Impact property is an ordered list.
The classification process
Classification metadata is added to files using the NTFS Alternate Data Stream (ADS). Files retain their classification provided that they are stored on an NTFS volume. If a file is moved to a FAT32 or ReFS volume, it loses its classification. One exception to this rule is Microsoft Office files; because classification metadata is stored in the files and the NTFS ADS, classification is not lost when files are moved to the cloud — think SharePoint.
Dynamic Access Control (DAC) in Windows Server 2012 works with FCI to provide classification properties that are centralized in Active Directory (AD), rather than set locally on each file server. Unlike Windows Server 2008, Windows Server 2012 provides a set of default DAC classification properties that organizations can use to get started. Additionally, the Data Classification Toolkit provides more classification properties for meeting common regulatory compliance standards, like HIPAA and GDPR.
Getting started with FCI
Let’s step through the process of creating and testing a classification rule using FCI.
Prerequisites
For this example, you’ll need a Windows Server 2016 file server that is a member of an Active Directory domain (Windows Server 2012 forest functional level or higher).
Since FCI is part of File Server Resource Manager (FSRM), make sure that the FSRM server role is installed on your file server. The easiest way to install FSRM is to use the following PowerShell command:
Add-WindowsFeature FS-Resource-Manager -IncludeManagementTools
Step 1: Enable some classification properties
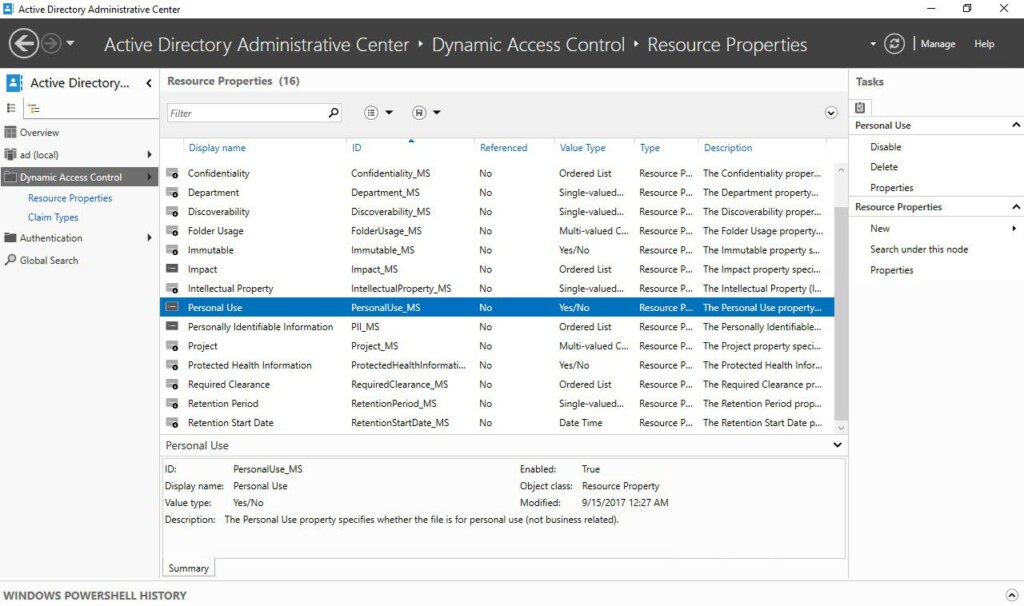
Windows Server 2012 and later versions come with several global classification properties already configured, but before you can use them, you must enable them in the Active Directory Administrative Center. Let’s enable one of them:
1. Open Server Manager.
2. Open the Active Directory Administrative Center from the Tools
3. Click Resource Properties under Dynamic Access Control.
4. In the list of properties in the central pane, right-click Personal Use, and select Enable from the menu.
5. Close the Active Directory Administrative Center.
Step 2: Create a classification rule
Now we’ll create a classification rule using File Server Resource Manager:
1. Open File Server Resource Manager from the Tools menu in Server Manager.
2. Under Classification Management, right-click Classification Rules and select Create Classification Rule… from the menu.
3. In the Create Classification Rule dialog, give the new rule a name in the Rule name
4. Switch to the Scope Click Add… and select the folder where you want to apply the rule.
5. Switch to the Classification Make sure that Content Classifier is selected under Classification method.
6. Under Property, select the Personal Use classification property from the dropdown menu.
7. Under Specify a value, select No from the dropdown menu.
8. Click Configure… below Parameters.
9. In the Classification Parameters dialog, click in the Expression field to the right of Regular expression, and enter the following:
^d{3}([s-])?d{3}1d{3}$
This regular expression will search files for Social Security numbers in the format XXX-XXX-XXX. You can use strings or regular expressions in your classification rules.

10. Click OK to close the Classification Parameters dialog.
11. Click OK in the Create Classification Rule dialog. The new rule will appear in the central pane.
Step 3 (Optional): Create a task to have FCI automatically take action based on file classification
If we wanted FCI to automatically encrypt or move any files containing Social Security numbers, or take some other action based on the classification, we would now click File Management Tasks in File Server Resource Manager (see the options at the left in Figure 2) to create the appropriate task and schedule it to run.
For example, to encrypt all files in the Accounts directory classified as No for personal use, you would take the following steps:
1. Under Classification Management, click File Management Tasks.
2. On the right, under Actions, click Create File Management Task.
3. On the General tab, give the task a name.
4. Switch to the Scope tab and select a folder, like C:Accounts.
5. On the Action tab, select RMS Encryption. (Note that Active Directory Rights Management Services (RMS) must be installed on a server in your domain before you can use RMS Encryption.)
6. Select an RMS template or manually add at least one email address that is permitted to read the encrypted documents.
7. On the Condition tab, click Add to add a condition.
8. In the Property Condition dialog, select Personal Use for the Property, set the Operator value to Equals and set the Value to No.
9. On the Schedule tab, specify when you would like the task to run, and then click OK.

Step 4: Test the classification rule
Finally, let’s test the new rule. Suppose we have a folder called Accounts that contains two files: one with a Social Security number and the other without.
1. In File Server Resource Manager, in the Actions panel on the far right, click Run Classification With All Rules Now…
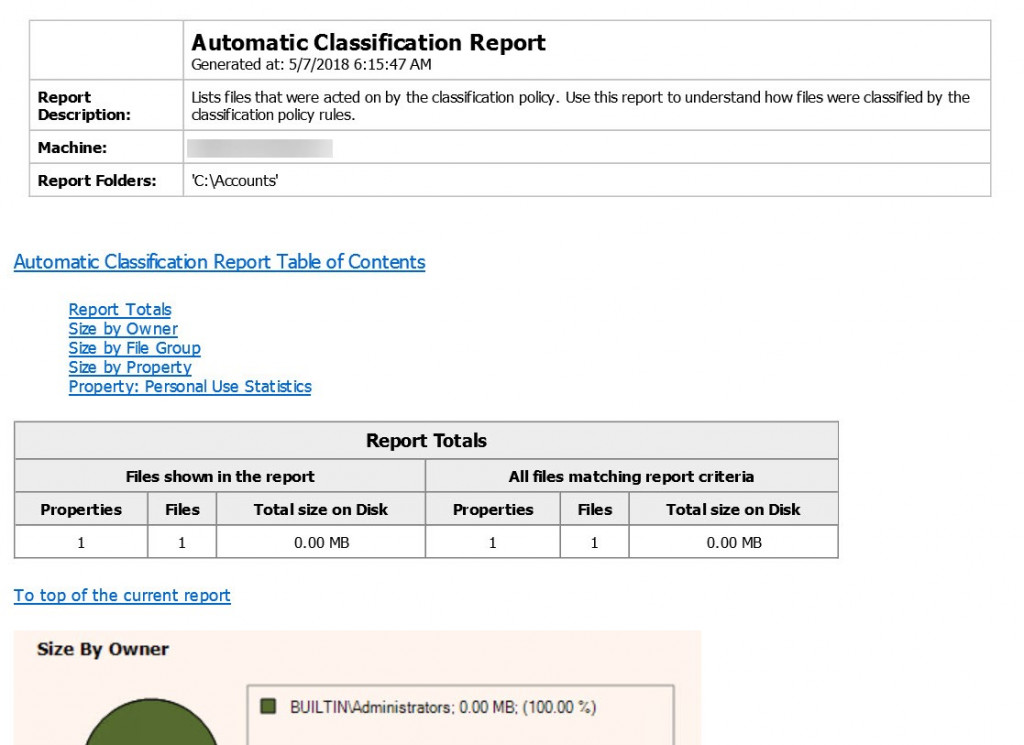
2. In the Run Classification dialog, select Wait for classification to complete and click OK.
3. A report will be displayed once the classification process is complete. The report below shows that one file has been classified, as expected.
Checking a file’s classification or manually classify a file
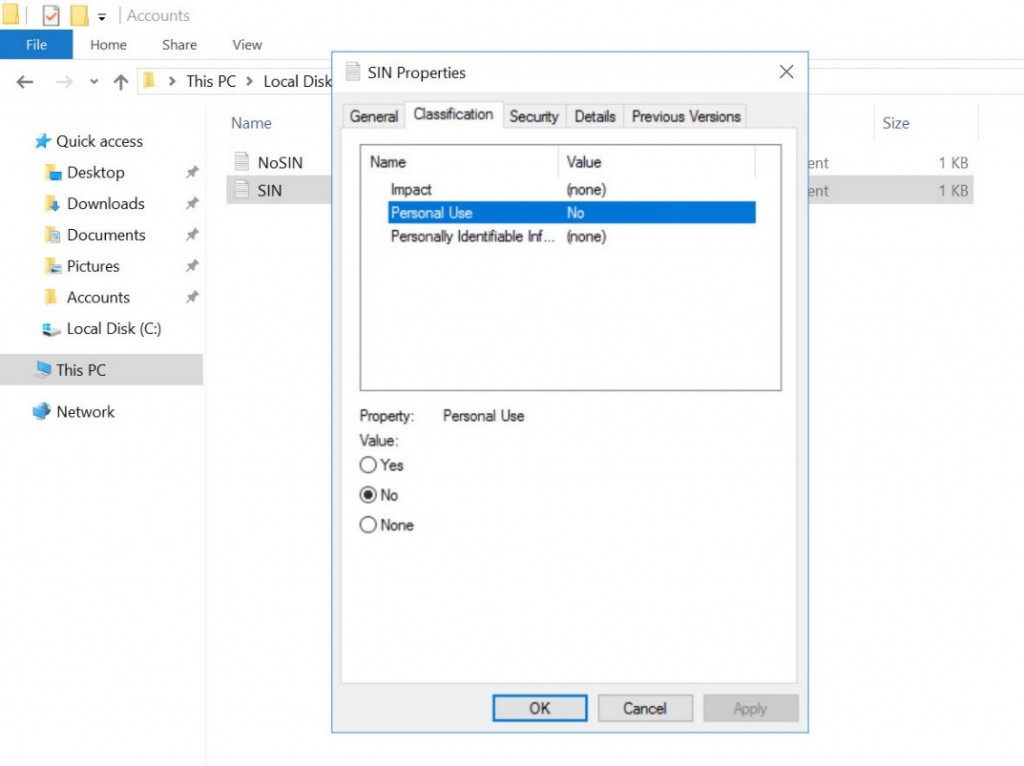
To check a file’s classification, or to manually classify a file, right-click the file in Explorer, click Properties in the menu, and switch to the Classification tab. Notice that all enabled classification properties appear in the file’s metadata, regardless of whether values are set.
Pros and cons of Microsoft FCI
FCI technology will certainly help organizations get started with data classification. It is available in all editions of Windows Server and doesn’t require any additional licensing beyond what is needed to use Windows as a file server. Because FCI relies on the Windows Search service and Dynamic Access Control, the necessary infrastructure is likely already in place in your organization. Integration with Windows Explorer means that there’s no need to install a client on end user devices.
However, FCI has numerous limitations when compared to third-party data classification tools. First and foremost, the tool works with Windows-based file servers only. Organizations that use EMC, NetApp, SharePoint, Office 365 and other systems to store data won’t be able to classify that content using FCI.
There are other drawbacks as well. While classification properties can be managed centrally in Active Directory, classification rules must be set on each file server, a tedious process that can be automated using PowerShell. You’ll also need to make sure that Windows Search is able to index the files you want to classify, which might mean installing the Microsoft Office Filter Pack, and iFilters for other file types, on your file servers. Reporting isn’t centralized, so you’ll need to touch each server to generate a report.
FCI can help organizations locate and classify the data they store on Windows-based file servers, so it can be a useful tool for getting started with data classification. However, to implement the comprehensive data classification and management required to ensure security and regulatory compliance, organizations need to invest in file classification software.