Active Directory Users and Computers (ADUC) is an MMC snap-in used to manage AD objects like users, groups, OUs, and computers. On Windows Server, it installs via Server Manager; on Windows 10/11, it’s part of RSAT (enabled through Optional Features). Once installed, admins can create OUs, reset passwords, move users, delegate control, and run saved queries. For simpler, web-based self-service and role-based delegation, tools like Netwrix Directory Manager extend ADUC’s capabilities securely.
ADUC is a Microsoft Management Console (MMC) snap-in that enables administrators to manage Active Directory objects and their attributes. For example, they can:
- Change passwords.
- Reset user accounts.
- Add users to security groups.
- Create and delete organizational units (OUs)
- Assign FSMO roles like RID Master, PDC Emulator and Infrastructure Master to domain controllers.
- Create and manage computers, groups and users and their attributes
- Delegate control of objects.
- Define advanced security and auditing in AD.
You can find more information about Active Directory in our AD tutorial for beginners. Majorly, Active Directory domain controllers will have ADUC installed by default in Windows. However,in some instances it may not be present, which would require you to opt for different ways you may add them in your current version of windows.
Following are the ways that enable you to add Active Directory Users and Computers in current version of windows.
Adding ADUC via Remote Server Administration Tools (RSAT)
In current version of Windows, Remote Server Administration Tools includes ADUC. Hence, to enable ADUC in current version of windows install Remote Server Administration Tools (RSAT).
Note: RSAT can be installed only on computers that are running the Professional or Enterprise versions of Windows.
RSAT enables administrators to run snap-ins and tools to control features, roles and role services on a remote server or other computer. RSAT comes bundled with the operating system starting with Windows Server 2008 R2. For earlier versions of Windows Server, as well as Windows 7 and Windows 8, RSAT is available as a package for download with installation instructions.
The remote administration tools included in the RSAT package include the following:
- Active Directory Users and Computers (ADUC) — Widely used by system administrators to create and manage Active Directory objects
- Active Directory Administrative Center — Used to manage the AD trash can and password policies and to display your PowerShell history
- Active Directory Module for Windows PowerShell — Provides PowerShell cmdlets for administering AD
- Active Directory Domains and Trusts — Allows you to manage functional level, forest functional level and user principal names (UPNs), as well as trusts between forests and domains
- Active Directory Sites and Services — Lets you view and manage your sites and services
- ADSI Edit — Provides some functionality for managing AD objects, though most experts recommend using ADUC
How to fix RSAT errors in Windows 10
RSAT can crash for various reasons, including a failed update, a corrupt installation file or operating system incompatibility. In addition, issues can occur if a server administrator attempts to modify any of its administration tools, especially the Active Directory Administrative Center (ADAC) component of RSAT. Here are some troubleshooting tips:
First, make sure you have the right RSAT version for your operating system. If not, uninstall RSAT and install the correct version.
If you get RSAT installation error 0x800f0954:
- Right-click the Start button > Choose Run > Type msc > Click OK.
- In the local group policy editor, navigate to Computer Configuration > Administrative Templates > System.
- Right-click the Specify settings for optional component installation and component repair policy > Set it to Enabled and check the box Download repair content and optional features directly from Windows Updates instead of Windows Server Updates Services (WSUS).
- Click Apply > Click OK.
- Right-click the Start button > Choose Run > Type gpupdate > Click OK.
RSAT installation error 0x80070003 is usually related to installation from an uncommon location. Copy the installation files to the target machine’s local drive and proceed.
How to Install ADUC on a Windows member server
To install ADUC, use the wizard in Server Manager, a management tool included with Windows Server, as follows:
- Launch Server Manager in one of the following ways:
- Click the Server Manager icon on the taskbar, as shown below:

- Click the Windows Start button and type Server Manager in the search box. Then click the Server Manager icon.
- Click the Server Manager icon on the taskbar, as shown below:
- To open the wizard, click Add roles and features.

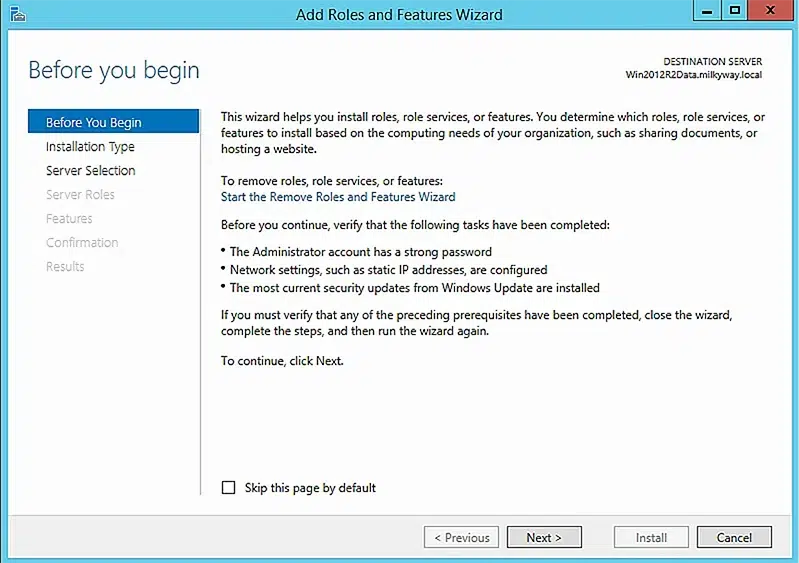
- The first page describes what you can do with the wizard and the prerequisites for using it. Click Next to proceed.

- On the next page, select Role-based or feature-based installation and click Next.
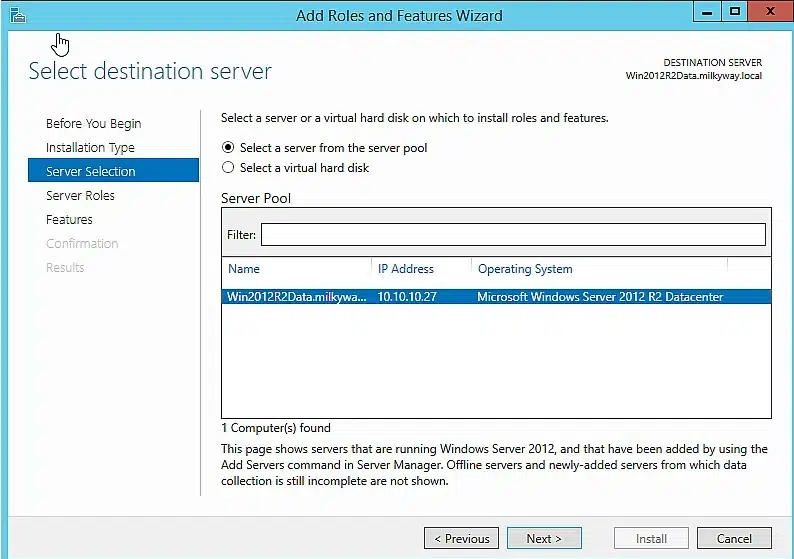
- Select either a server from the server pool or a virtual hard disk. Click Next.

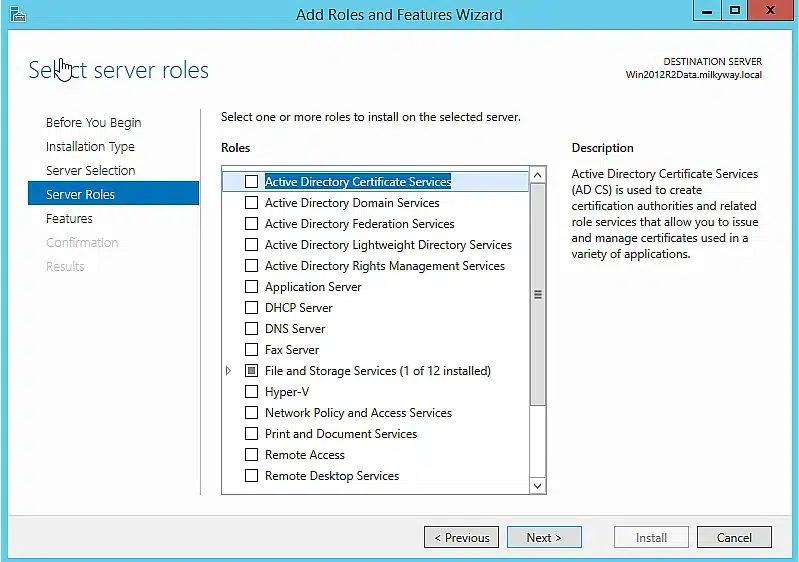
- The next page lists the roles you could install. We will skip this and simply click Next.

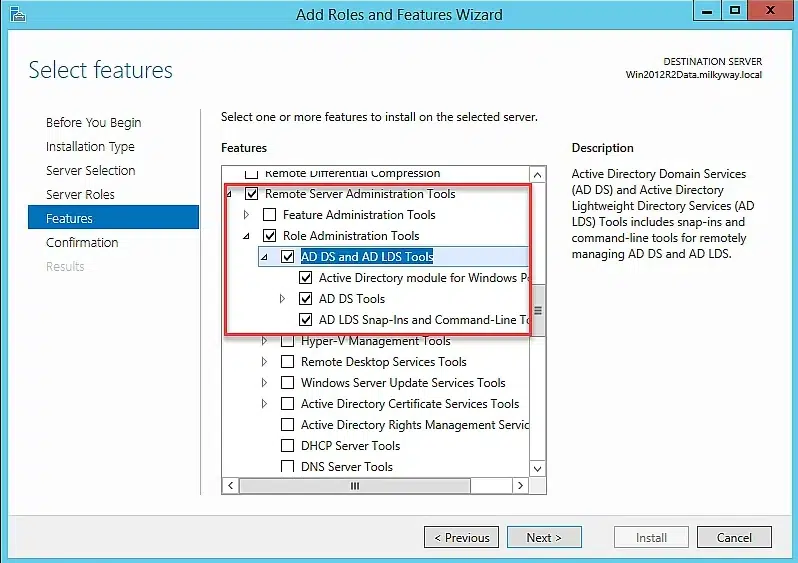
- On the next page, select Remote Server Administration Tools and AD DS and AD LDS Tools, which will automatically select the other Active Directory management tools. Click Next.

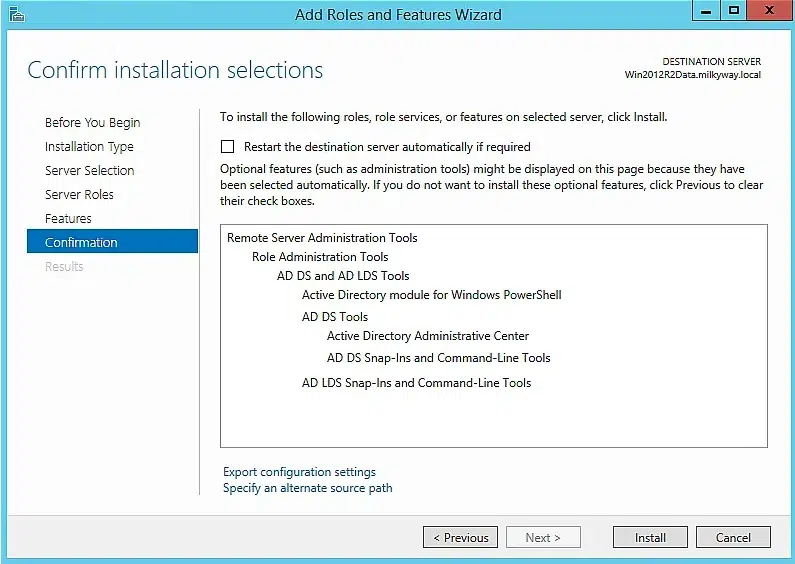
- The next page displays a summary of the tools being installed. Select the Restart the destination server automatically if required checkbox because some of the roles and features require a server restart. Click Install to start the installation.

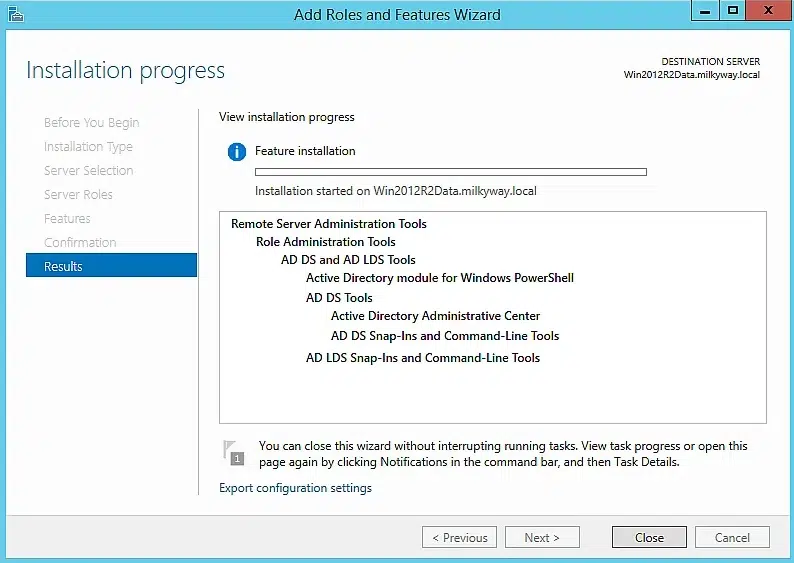
- On the next page, you can view the installation progress. Click Close at any time to close the wizard; the installation will continue as a running task.

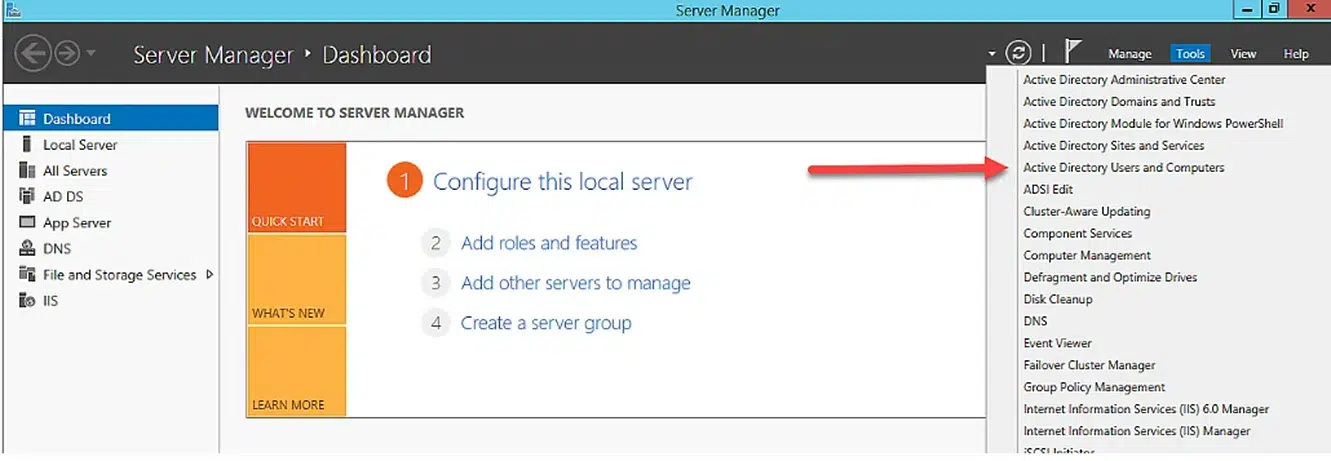
- After the installation succeeds, open Server Manager and click the Tools menu to see the installed tools. The following screenshot shows Active Directory Users and Computers along with other management tools:


How to find Windows version before installing ADUC
You can determine the Windows version by following any of the steps below.
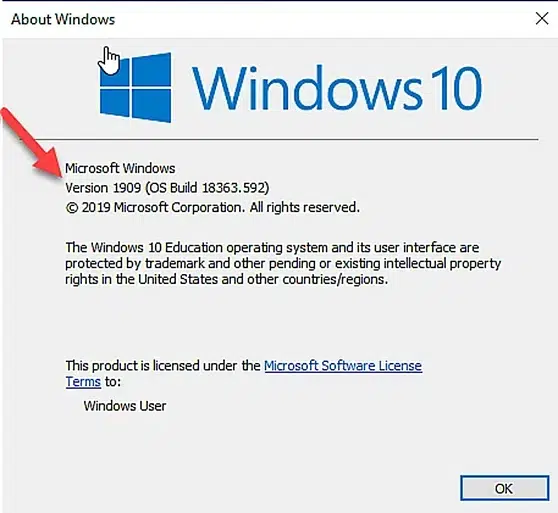
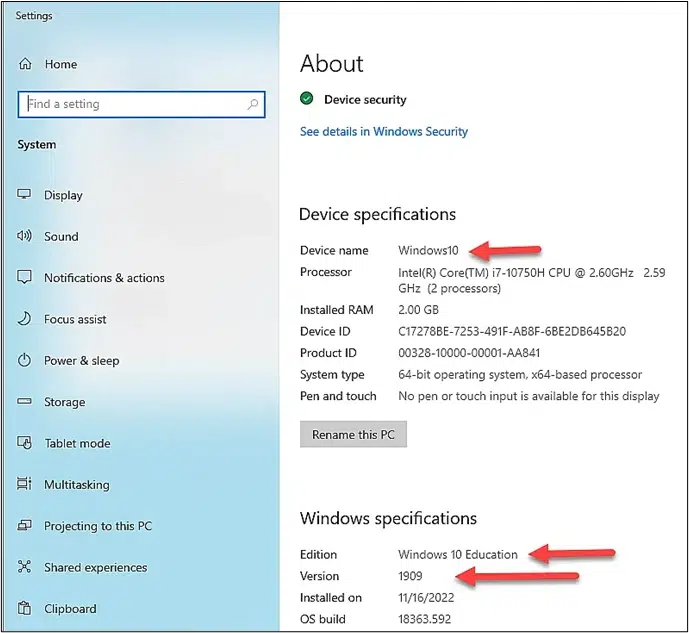
- In the left navigation pane, click Start > Settings > System > About. You will see the edition, version and OS build information, like the following:

- Right-click the Start menu and then click System. You’ll see edition, version and OS build information like the following:

Install ADUC on Windows 10 version 1809 and above
Following are the steps to install ADUC on Windows 10 version 1809 and above:
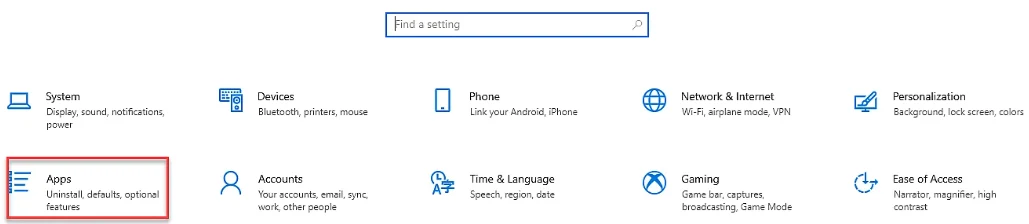
- Click the Start menu and then click Settings > Apps.

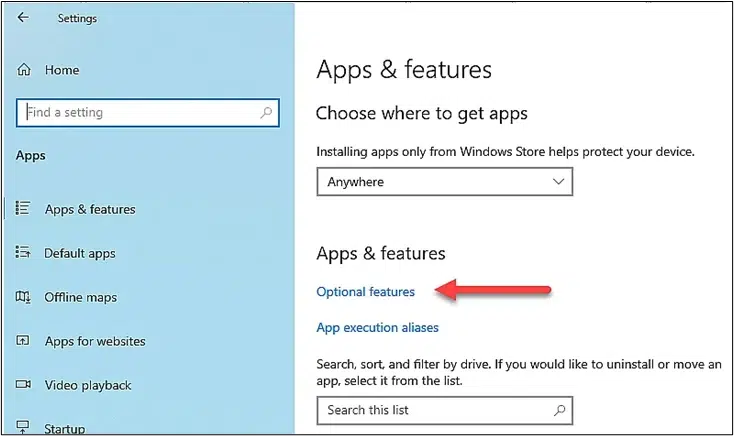
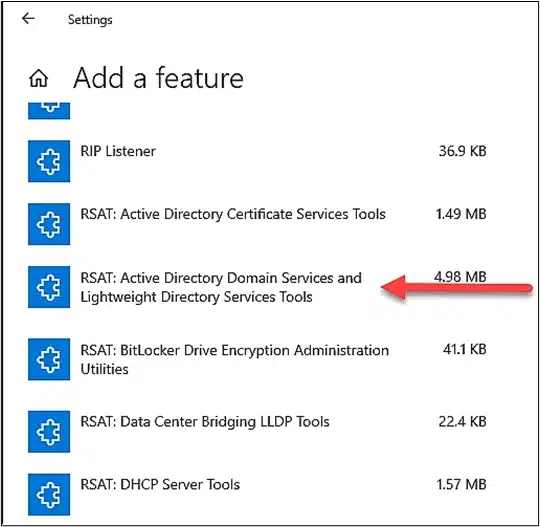
- Click Optional Features, and then click Add a feature.

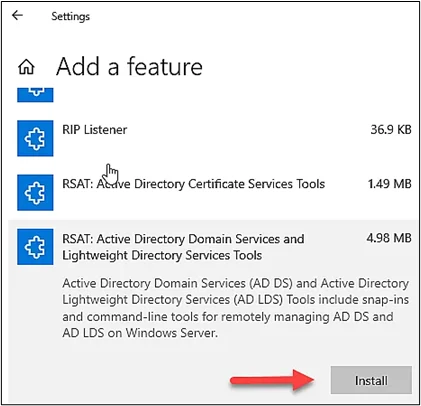
- Click RSAT: Active Directory Domain Services and Lightweight Directory Services Tools.

- Click Install.

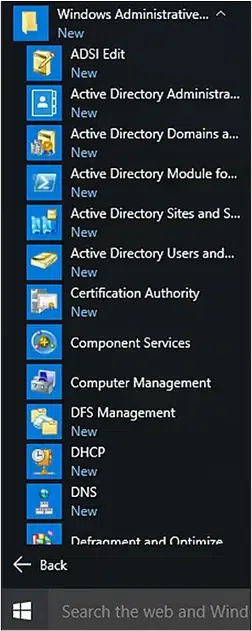
When the installation completes, you will see a new item in the Start menu under Windows Administrative Tools.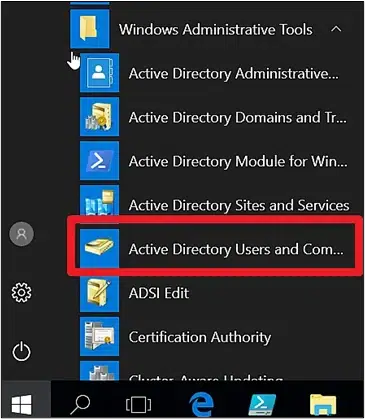
Install ADUC using the command line
Alternatively, if you’re using Windows 10 version 1809 or later, you can install ADUC from the command line as follows:
- Click Start (or press Win+R). Type cmd and click Enter.
- Run following commands:
dism /online /enable-feature /featurename:RSATClient-Roles-AD
dism /online /enable-feature /featurename:RSATClient-Roles-AD-DS
dism /online /enable-feature /featurename:RSATClient-Roles-AD-DS-SnapIn
Install ADUC on Windows 8 or Windows 10 version 1803 and below
- Download Remote Server Administrator Tools for Windows 10 version 1803 and below from the Microsoft Download Center and install it.


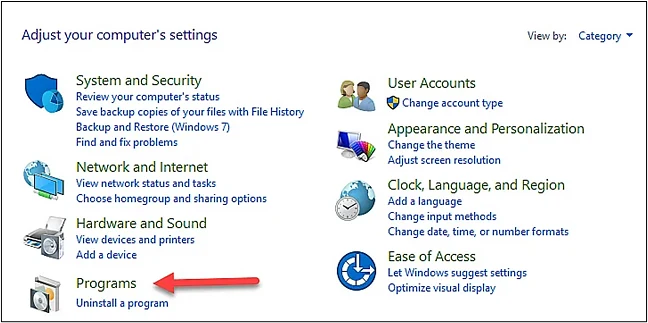
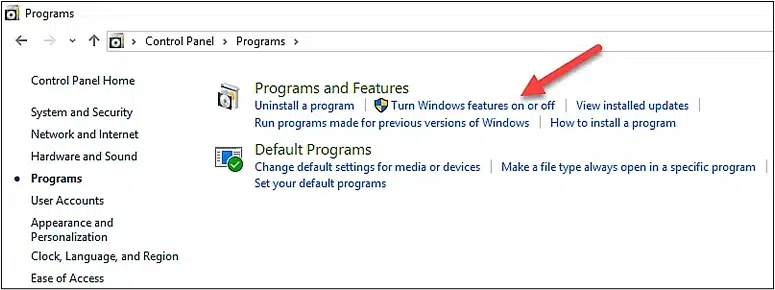
- Click the Windows Start button and then click Control Panel > Programs. Under Programs and Features, click Turn Windows features on or off.


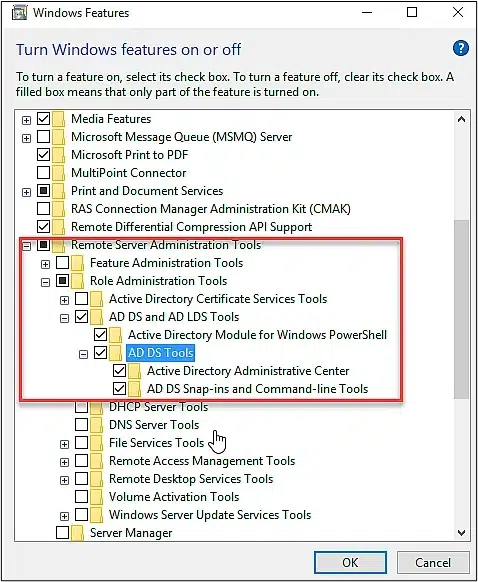
- Scroll down in the list of features and expand Role Administration Tools -> AD DS and AD LDS Tools. Check AD DS Tools. Then click OK.

- Once the system has installed the tools, click Restart now.

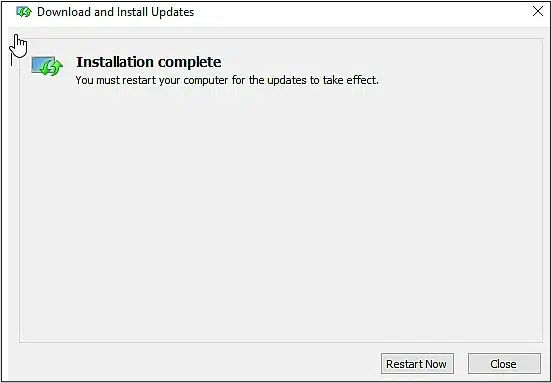

When the installation completes, the folder Windows Administrative Tools will appear in the Start menu, and ADUC will be in this folder.
Install ADUC on older versions of Windows
If you have an older version of Windows, you can download the appropriate RSAT package and then use Add Windows features in the Control Panel to add the necessary MMC snap-ins.
Note that if you install RSAT on a computer running Windows 7, you must enable the tools manually after RSAT installation.
Go to Start > Control Panel > Programs and Features and use Turn Windows Features On and Off.
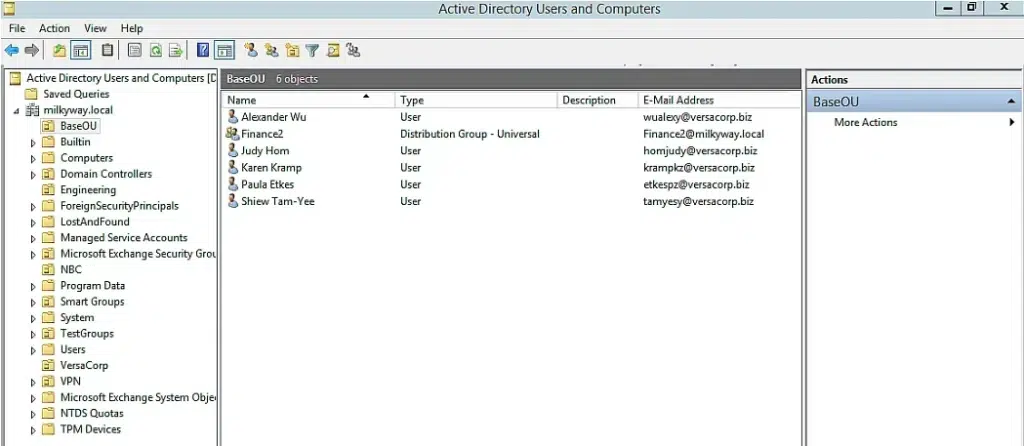
ADUC console components
The Active Directory Users and Computers console has some key component that make it easy for system administrators to manage objects:
- Menu bar: Contains the File, Actions, View and Help menus
- Toolbar: Contains buttons to perform quick actions, such as create a new user or group and show/hide the Directory and Action panes
- Directory (Console Tree) pane: Shows the hierarchy of the domain you are connected with, as well as a list of the available containers and OUs
- Objects Pane: Show the objects and their attributes; you can edit the columns using the View menu
- Actions Pane: Shows the details of the selected object and offers a More Actions option
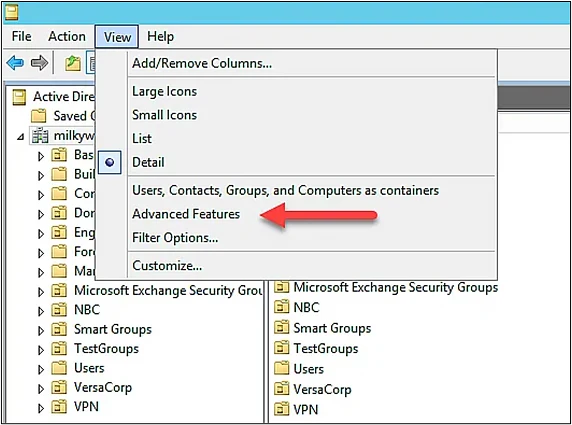
ADUC advanced settings
By default, ADUC shows some OUs and other containers. To work on other containers, click on the View menu and click Advanced Features.
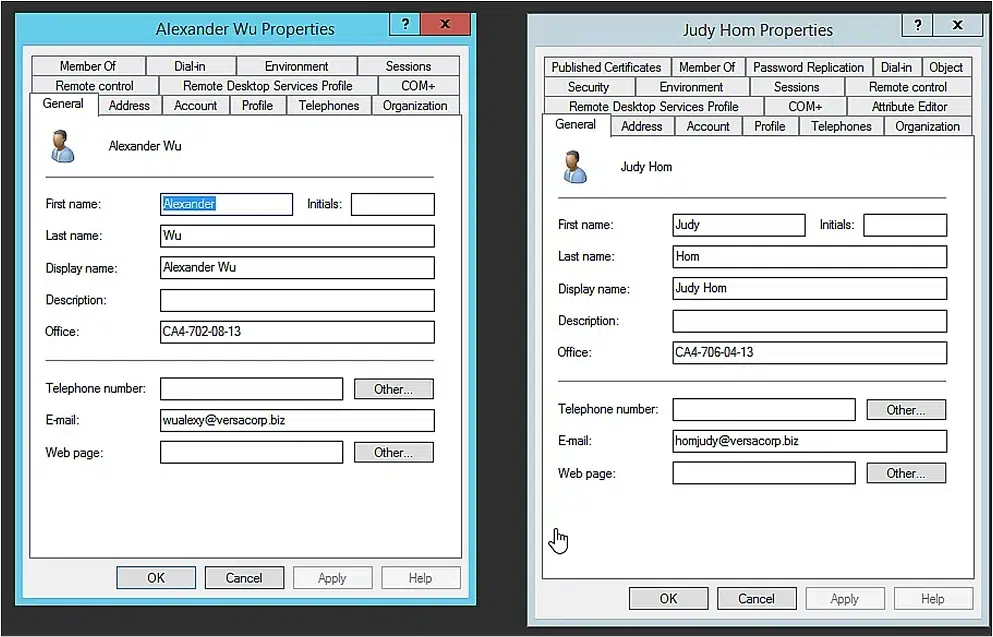
Then you will see additional properties. Below, you can compare the tabs available in the normal view (on the left) with those in the advanced view (on the right):
How to use Active Directory Users and Computers (ADUC)
Create an organizational unit (OU)
Follow these steps to create an organizational unit:
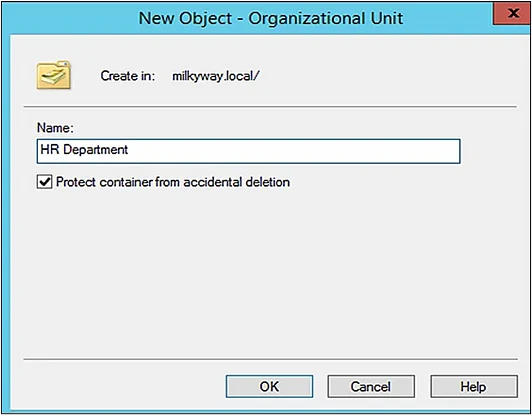
- Right-click the domain or the OU under which you want to create the desired OU; then click New > Organizational Unit.

- Type a name for the new OU in the Name field, and specify whether to protect the OU from accidental deletion. Click OK to create the organizational unit.

Add a user account
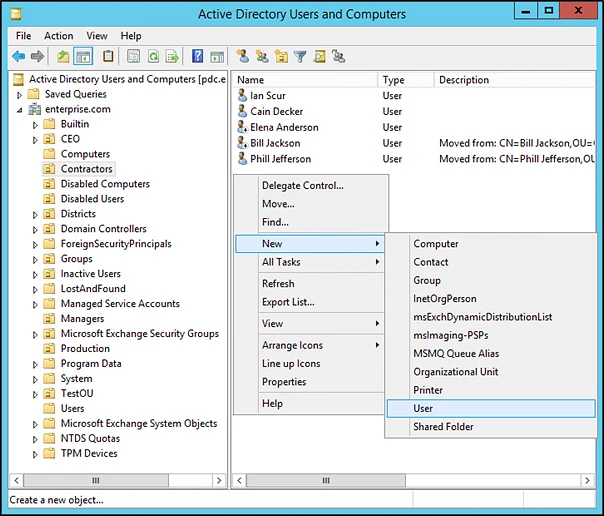
- Select the domain where you want to add the user, and then expand its contents.
- Right-click the container you want to add a user to (usually Users), select New and then click User.

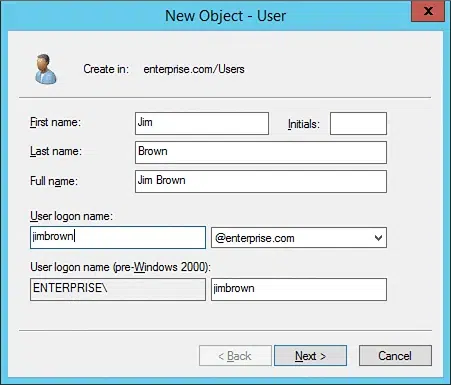
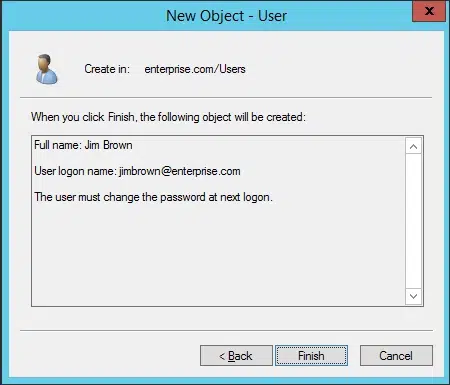
- Type the new user’s first name, last name and logon name. Then click Next.

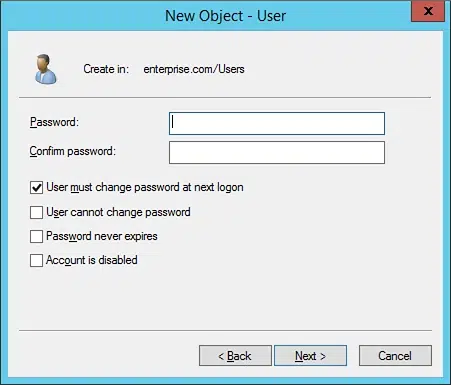
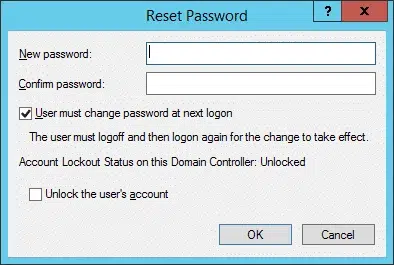
- Type and confirm a new password for the user. Make sure you enable one of the following options to control how the user must manage their password:
- User must change password at next logon
- User cannot change password
- Password never expires
- Account is disabled
Click Next.
- Make sure everything you entered is correct and then click Finish.

Enable and disable user accounts
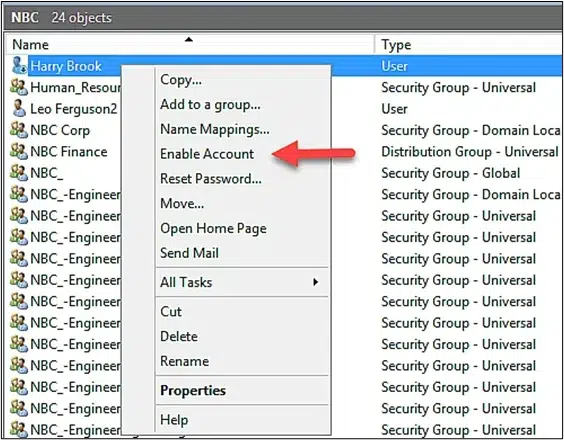
You can easily disable or enable a user account using the context menu in ADUC.
To enable a user account:
- Right-click a disabled user and click Enable Account.
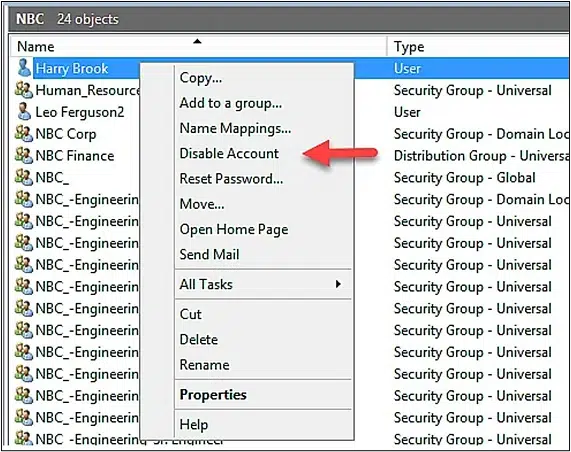
To disable a user account:
- Right-click the user object you want to disable and click Disable Account.
Create a group object
Follow these steps to create a group using ADUC:
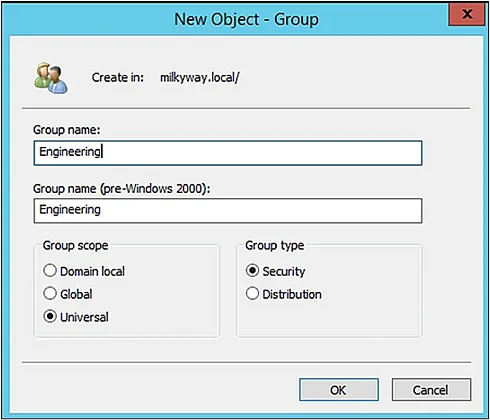
- Right-click the domain or the OU under which you want to create the new group.
- Specify the following:
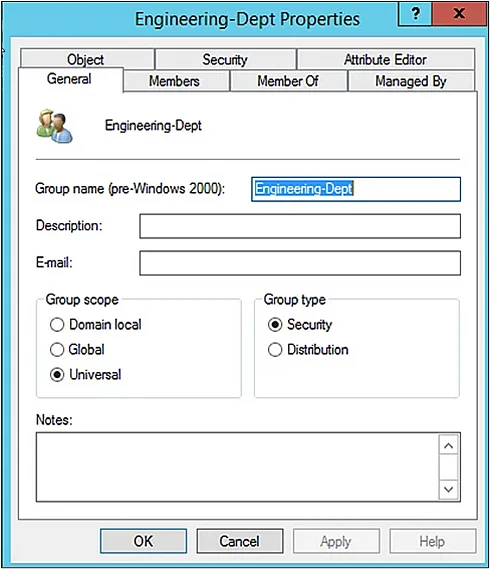
- A name and a pre-Windows 2000 name for the group
- The group type: distribution or security
- The group scope: domain local, global or universal

- Click OK to create the group.
Add a user to a group
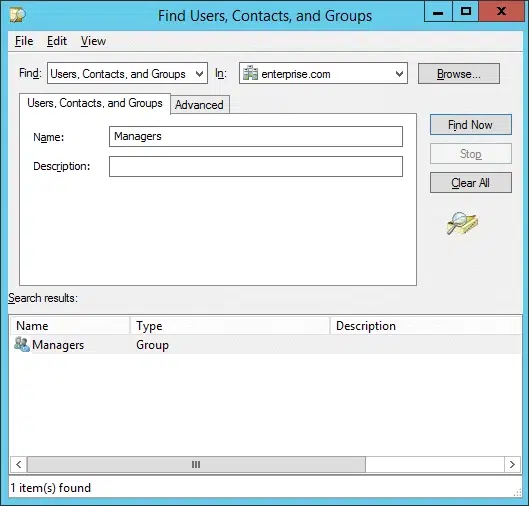
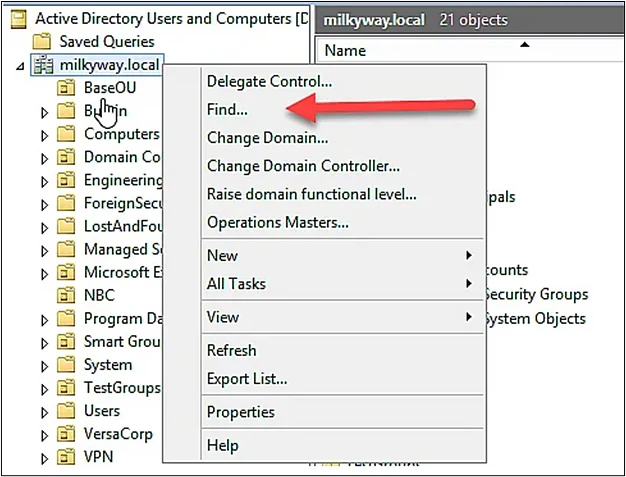
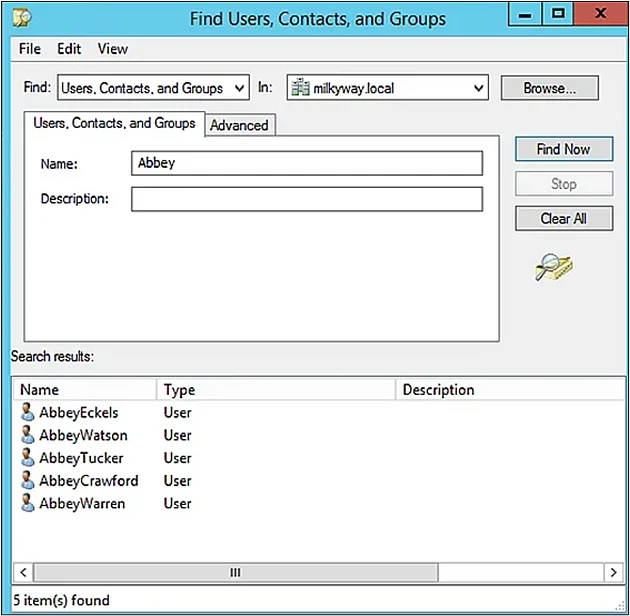
- Right-click the domain in which you want to add a user to a group and then select Find.
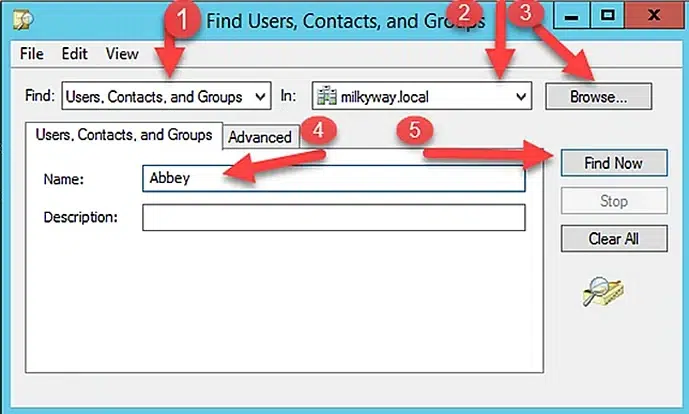
- Select Users, Contacts, and Groups in the Find dropdown list.
- Enter the name of the group you want to add the user to, click Find Now, select the desired group in the search results and click OK.

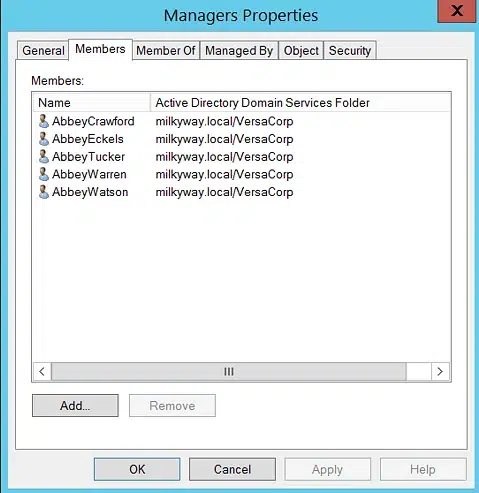
- Go to Action > Properties and click the Members tab. click Add.

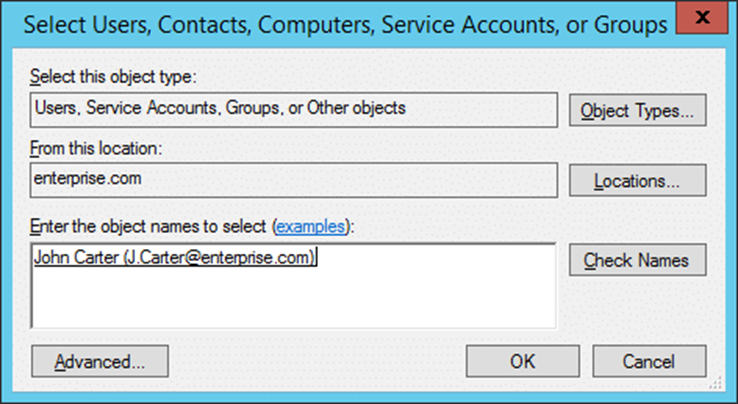
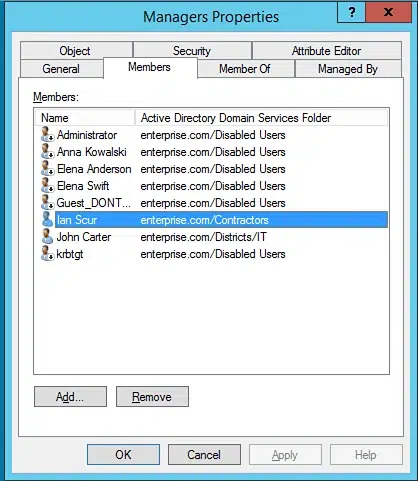
- Type the name of the user you want to add and click Check Names. (Alternatively, you can use the Advanced button to search for the users one by one. If you specify multiple users, separate their names using semicolons.) Then click OK to confirm the addition.
Remove a user from a group
- Right-click the domain from which you want to remove the user and select Find.
- Select Users, Contacts, and Groups in the Find dropdown list.
- Enter the name of the group you want to remove the user from and click Find Now.
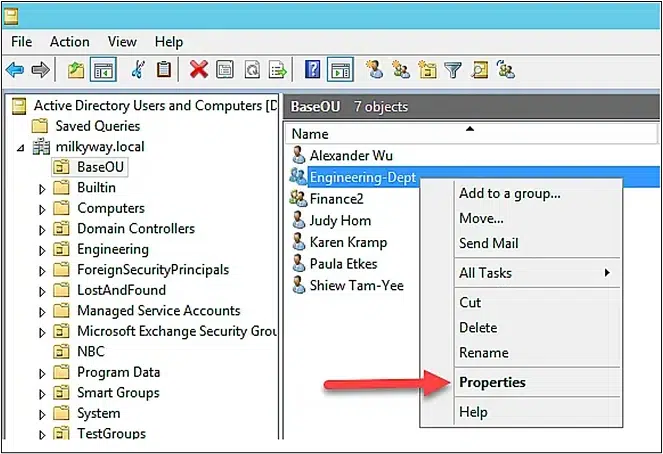
- Right-click the desired group and select Properties.
- Go to the Members tab, highlight the user and click Remove.

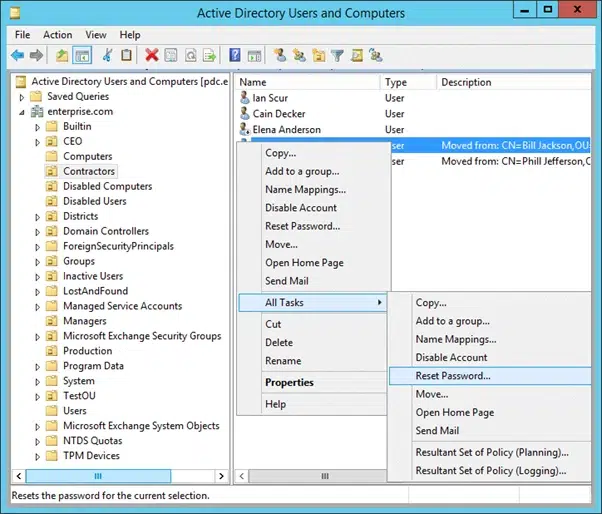
Reset a user’s password
- Navigate to the Users folder of the user’s domain.
- Right-click the user’s name, choose All Tasks and select Reset Password.

- Type a new password, type it again in the Confirm password box, and then click OK.

Move a user to another OU
- Right-click Active Directory Users and Computers and select Connect to Domain.
- Enter the name of the user’s domain and click OK.
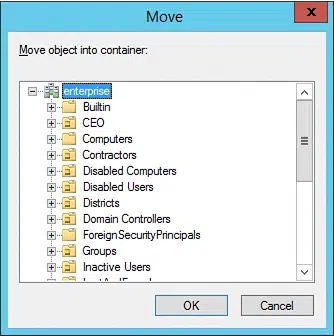
- Right-click the user and select Move.
- Choose the container you want to move the user to and then click OK.
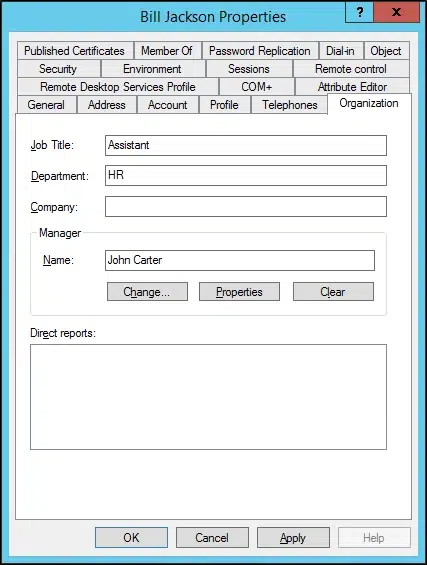
Change a user’s data
- Right-click Active Directory Users and Computers and select Connect to Domain.
- Enter the name of the user’s domain and click OK.
- Right-click the user and select Properties.
- Navigate to the tab containing the data you want to change, make your edits, and click OK.
Change a group’s type and scope
To change a group’s type or scope, take these steps:
- Right-click the desired group and select Properties.

- On the General tab, specify the new group type and/or scope. Then click OK.

Find objects in the directory
ADUC provides a powerful search for finding objects in the entire directory. You can find users, contacts, groups and OUs using the Find dialog box:
- Right click either the domain or an OU and click Find.

- In the Find dialog box, specify the following:
- In the Find drop-down, select Users, Contacts, and Groups.
- Using the In drop-down, select where to search: either a domain or the entire directory.
- To narrow your search, use the Browse button to select a particular OU.
- In the Name field, type the first or full name of the user or the name of the group you want to find.
Click Find Now.
- Review the search results. You can double-click an object to view its properties.
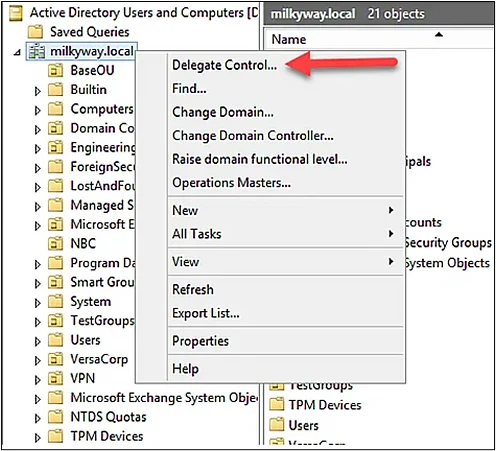
Delegate control to users
Using the Active Directory Delegation wizard, you can enable a user or group to perform specific tasks, such as creating user objects or managing specific domain controllers.
Take the following steps to delegate permissions to a specific user:
- Right-click the domain or the OU where you want to assign permissions to an object. Click Delegate Control to launch the Delegation of Control wizard.

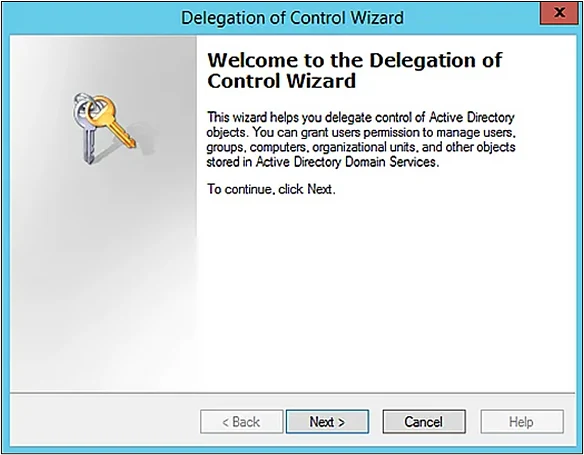
- The Welcome page describes what you can do with this wizard. Click Next.

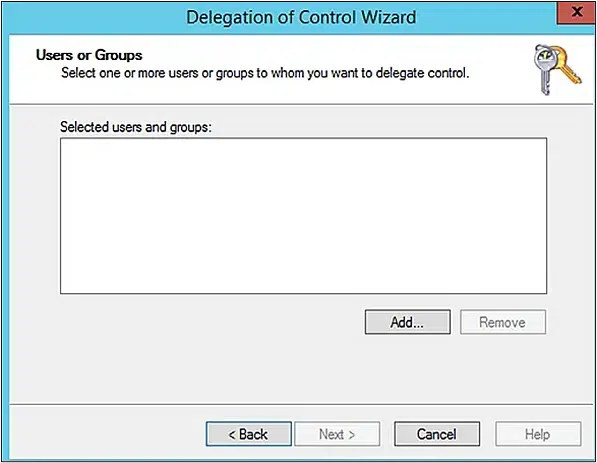
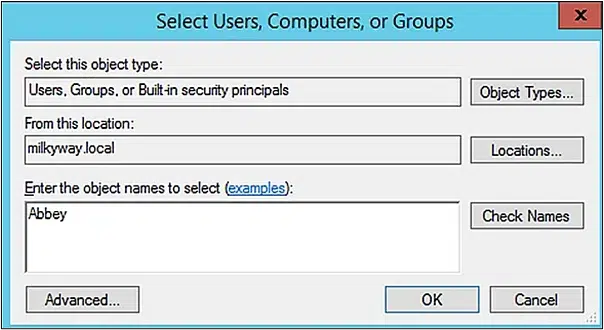
- On the next page, click Add to search for the user or group object you want to apply permissions on.

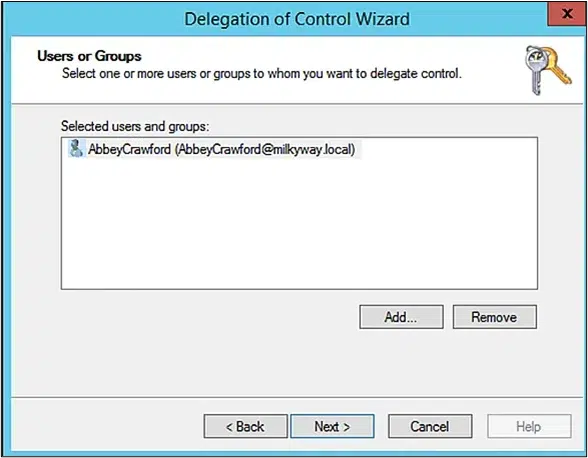
- Type the name of the user or group you want to delegate to, and click Check Names. From the list of matching objects, select the desired user and click OK.

- You will now see the object in the Selected users and groups field. Click Next.

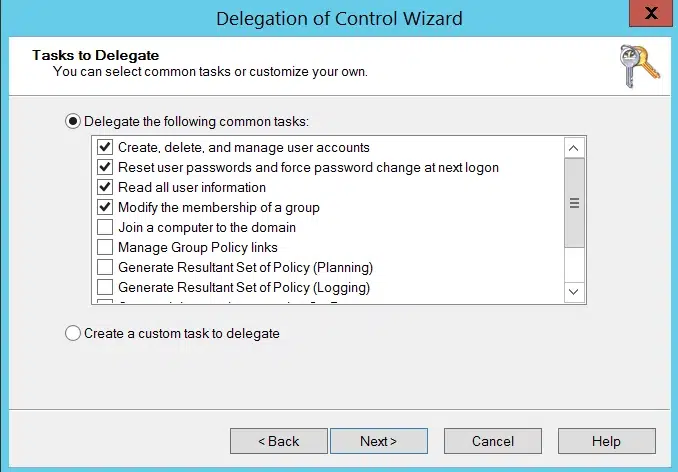
- On the next page, select the Delegate the following common tasks radio button and click one or more of the checkboxes underneath it. Click Next.

- Select the scope of the delegation:
- Choosing This folder, existing objects in this folder, and creation of new objects in this folder will grant all the permissions to the object on the selected folder or OU.
- Selecting Only the following objects in the folder enables you to delegate permissions to only the objects in the folder that you specify.
Click Next.
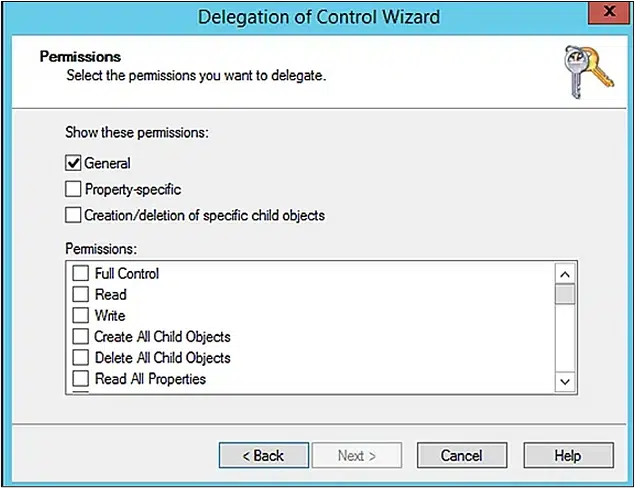
- Select the permissions you want to delegate and click Next.

- Review your changes and click Finish.


Create and save queries
You can build complex LDAP queries using the Saved Queries feature in the ADUC console. You can save these queries and use them to:
- Quickly find AD objects.
- Swiftly complete routine AD object management activities, like selecting all employees of a company with mailboxes on a specific Exchange server or displaying a list of all disabled accounts in a domain.
- Perform activities with objects from different Active Directory OUs.
- Perform bulk lock/unlock, enable/disable, move, remove and rename activities.
- Bypass Active Directory’s OU hierarchy and gather all the required objects in a flat table view.
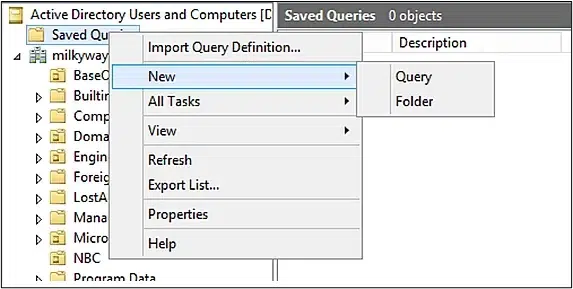
Take the following steps to create a query for an operation:
- Right-click the domain or OU where you want to perform the search operation and select New -> Query.

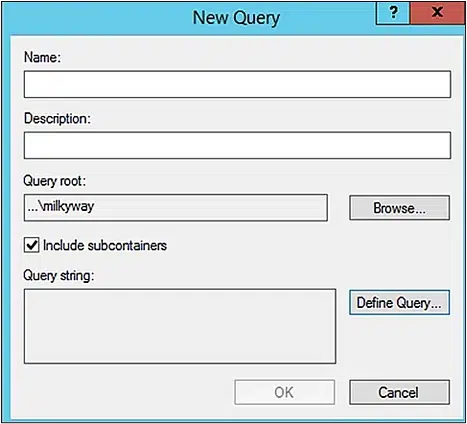
- Provide a name and description for the query. (If you want to select a different OU, click Browse.) Then open another dialog box for defining the query by clicking Define Query.

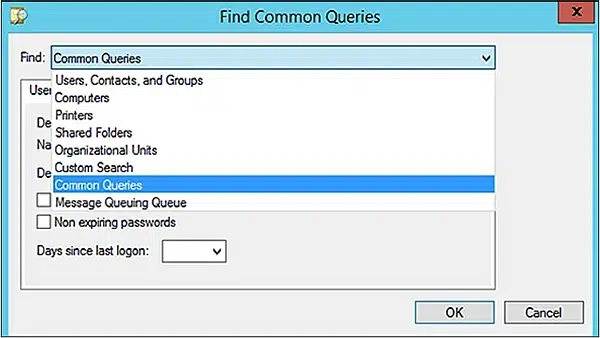
- Use the Find drop-down to select a common query, such as:
- Users, Contacts, and Groups
- Computers
- Printers
- Shared Folders
- Organizational Units
- Custom Search
- Common Queries

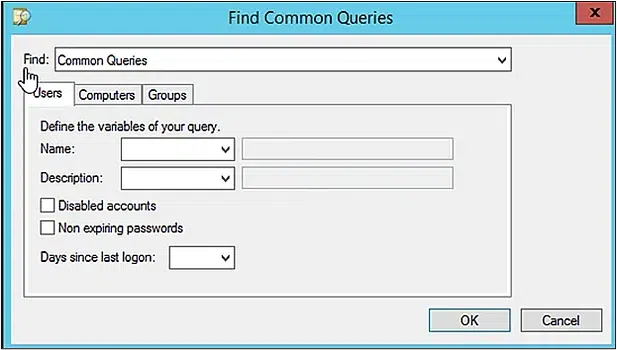
- Use the Users, Computers or Groups tab to define your query. Under the Users tab, for instance, you get options for limiting your query by:
- Disabled accounts
- Non-expiring passwords
- Days since the user last logged on to the domain
Click OK to create your query.
The context menu in ADUC appears when you click an object or click in the middle pane in an empty space. This menu displays common commands and options for the type of object you selected. Here are examples of the context menu for different types of objects:
Domain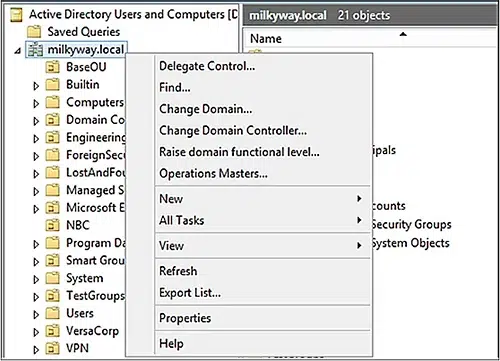
OU
User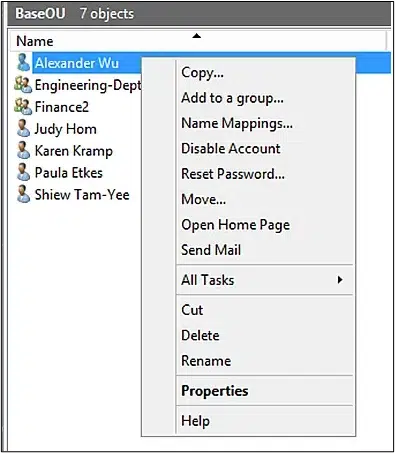
Group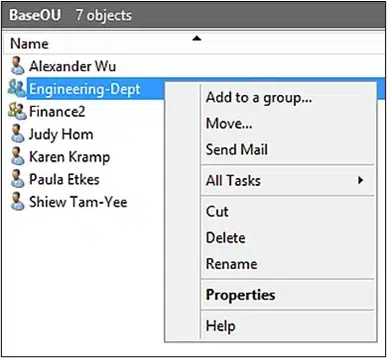
Computer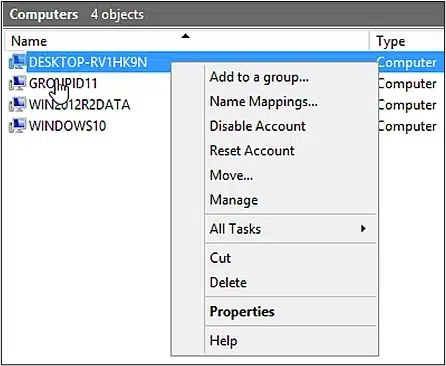
Contact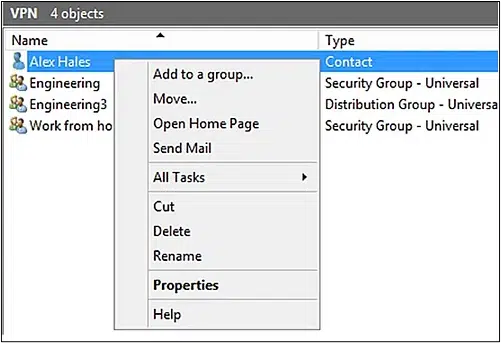
How Netwrix can help
While ADUC can be a valuable tool for admins, it can be difficult for helpdesk technicians and business users to access, let alone use. Netwrix Directory Manager enables you to easily create web-based portals that make it easy to perform tasks like creating and editing groups and users, without any assistance from an administrator.
You can control what each user can view and change based on their role. To ensure data integrity, you can define workflows to verify supplied information before changes are applied.
FAQs about ADUC
What is Active Directory Users and Computers (ADUC)?
ADUC is a Microsoft Management Console (MMC) snap-in that enables administrators to manage Active Directory objects and their attributes. For example, they can:
- Change passwords.
- Reset user accounts.
- Add users to security groups.
- Create and delete organizational units (OUs).
- Handle FSMO roles like RID master, PDC Emulator and infrastructure master.
- Create and manage computers, groups and users and their attributes.
- Delegate control of objects.
- Define advanced security and auditing in AD.
You can find more information about Active Directory basics in our AD tutorial for beginners.
How do I get Active Directory Users and Computers on Windows 10?
In Windows 10 version 1809 or higher, you can enable ADUC by going to Settings > Apps and Features > Optional features > Add a feature. In older versions of Windows, to get ADUC, you need to download and install the Remote Server Administration Tools (RSAT) package manually.
What is Remote Server Administration Tools?
The Remote Server Administration Tool enables you to remotely manage Windows Server services and features from a Windows computer. It has a busload of tools, including ADUC, Active Directory Module for Windows PowerShell and Active Directory Administrative Center (ADAC).
How do I install RSAT on Windows 10?
Starting with the October 2018 update to Windows 10, RSAT is included as a set of “Features on Demand,” so you don’t need to install it. You simply need to enable the specific RSAT tools you require by going to Settings > Apps and Features > Optional features > Add a feature.
If you’re using an earlier version of Windows, you need to manually download and install RSAT.
How to open Active Directory Users and Computers console?
To start the ADUC console, do one the following:
- Go to Start > Click Run > Type dsa. msc > Hit Enter.
- Click Start > Navigate to Administrative Tools > Click Active Directory Users and Computers.