Many organizations that use Office 365 have a hybrid deployment — that is, they also have an on-premises Active Directory, which is the primary storage for identity information.
Learn how to enable integration of local AD data with your Office 365 environment using native Microsoft tools in this guide to Active Directory sync to Office 365.
To enable you to synchronize identity data from your on-prem Active Directory to Microsoft Azure AD, Microsoft provides Azure Active Directory Connect, a fairly lightweight service that runs on a server in your office or datacenter. You can select which objects to sync and which objects to leave on your local Windows Server.
When you use Azure AD Connect to sync directories, you are creating what amounts to an irrevocable relationship between your Office 365 tenant and your local directory. While there are various hacks and unsupported ways of breaking a sync relationship between an on-premises directory and Office 365 directory, you won’t be able to call for help if things go wrong. Expect that your tenant will be forever bound to a local domain controller and that you will always have to have that domain controller unless you migrate to a brand new tenant. Once the sync is in place, you must create new users and make changes to your existing users in your on-premises directory; you won’t be able to use the Office 365 GUI or PowerShell to do it.
Installing and Configuring Azure AD Connect
To use Azure AD Connect, take the following steps:
- Download the Azure AD Connect installer from http://go.microsoft.com/fwlink/?LinkId=615771.
- Copy the installer to the server that you want to designate as the sync server and run the installer.
- Agree to the license terms and click Continue.
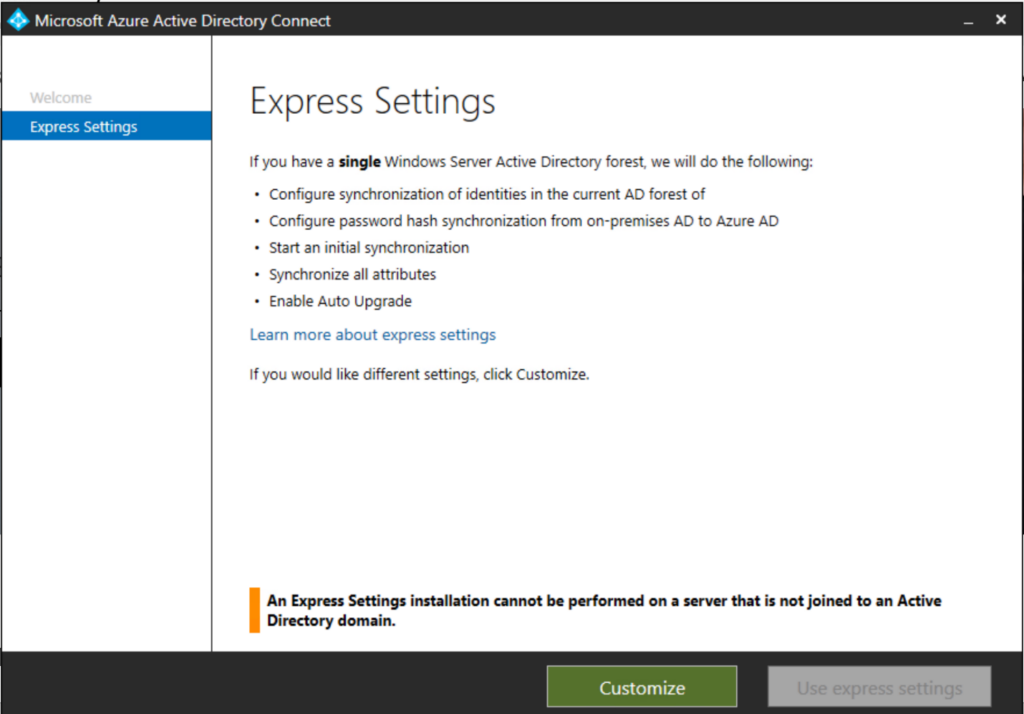
- The Express Settings screen appears. Read the details of what the wizard will do. For the purposes of our walkthrough, click Use express settings.

Figure 1. The Azure AD Connect Express Settings screen
- The Connect screen appears. Enter your Office 365 administrator’s username and password and then click Next.
- The wizard will do some computations and then show the Ready to Configure screen. On this screen:
- I recommend deselecting the “Start the synchronization process as soon as configuration completes” checkbox. You’ll want to do some filtering of the directory parts that get synchronized anyway, and when you uncheck this box, the wizard configures the sync service itself but disables the scheduler. Once you have completed your filtering, you’ll re-run the installation wizard in order to enable the schedule.
- If you are running Exchange locally, check the box to enable a hybrid Exchange deployment. This will enable a few more directory attributes to sync, which will serve you well when it’s time to run the Exchange Hybrid Configuration Wizard, as explained in the next section.
- Click Install.
- Once the installation completes, exit the wizard and reboot the machine.
Customizing What Gets Synchronized
It makes sense to sync only those directory objects that can be used in Office 365; you don’t want a bunch of service accounts and other objects littering your when there is literally nothing you can do with them in the cloud. To customize which organizational units (OUs) are synchronized, take the following steps:
- Launch the Synchronization Service Manager.
- Select Connectors.
- Open the properties of the Active Directory Domain Services connector.
- In Configure Directory Partitions, go to Containers. Enter your credentials to proceed.
- Select the OUs you want to sync and then click OK.
- Last, you just need to enable the scheduler, which is just a standard Windows scheduled task that has been disabled. To enable it, simply open Task Scheduler, find the “Sync Scheduler” task, and then in the right pane under Selected item, click Enable. Wait until it runs (or run it immediately from the Task Scheduler interface) and you’ll see a bunch of new user accounts populating in Azure AD. That’s how you know the sync is working. You can also try logging on with one of the accounts.


