Introduction to Group Policy Management
Group Policy is a feature of Microsoft Windows operating systems that helps administrators manage and secure users and computers in Active Directory environments. Group Policy settings are grouped into Group Policy objects (GPOs) and applied to computer and user objects within the scope of the GPO.
For example, Group Policy objects can be used to manage:
- Configurations, such as desktop settings, startup scripts and logon/logoff scripts
- Security, including Active Directory (AD) password policies, account lockout policies and firewall settings
- Access to network resources like shared folders, printers and applications
- Software deployment, including installation of software on selected machines and scheduling of patches and updates.
This guide explains the key elements of Group Policy management.
Group Policy Management Tool
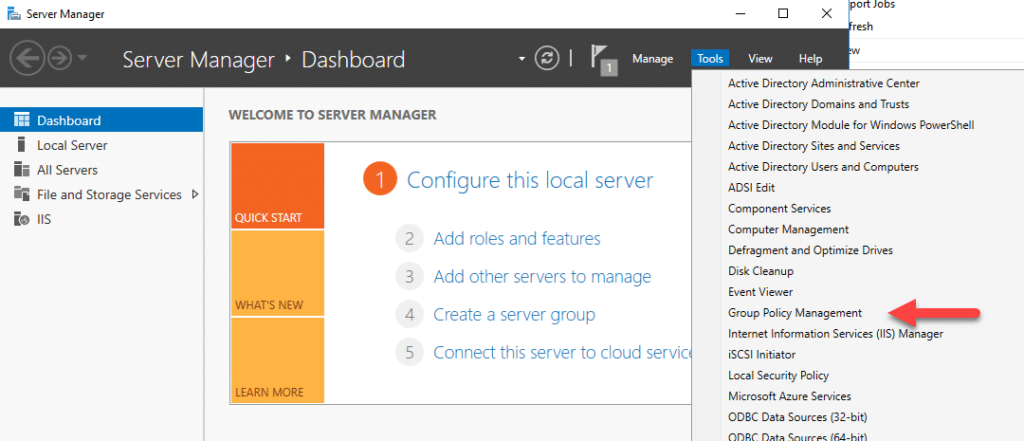
To manage GPOs, administrators use the Group Policy Management Console (GPMC). You can access this domain Group Policy editor from the Tools menu of Windows Server Manager.
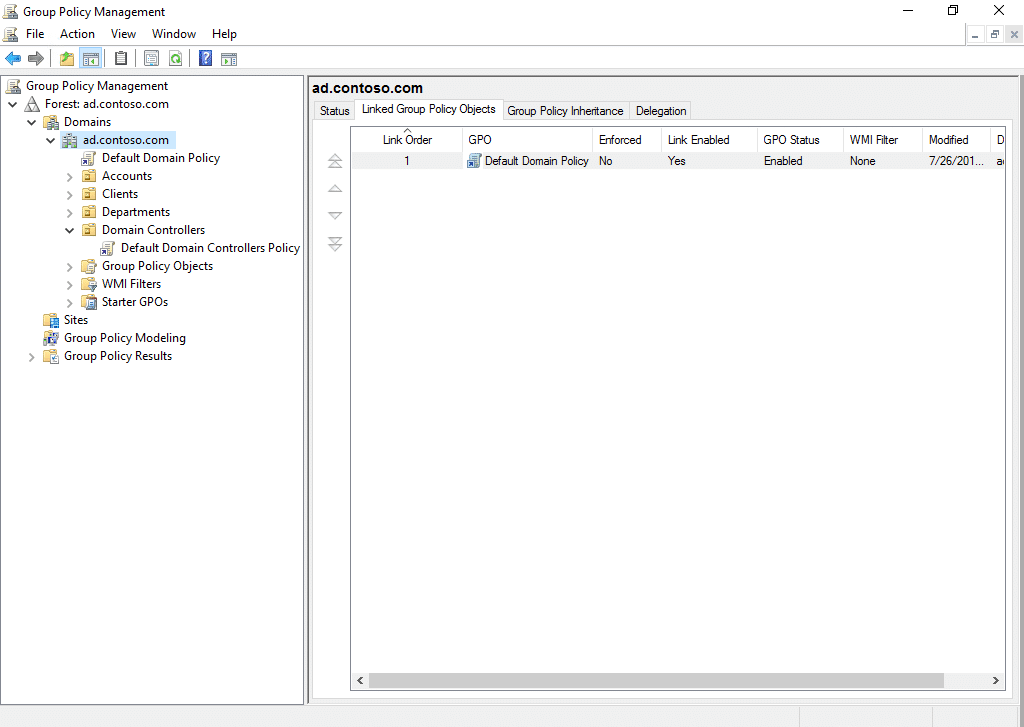
You can see all the GPOs in a domain by clicking the Group Policy Objects container in the left pane of the Group Policy Management Console. Below, you can see that the AD domain ad.contoso.com has just one GPO, Default Domain Policy:
The Group Policy Management Console includes a Group Policy Editor, as shown here:

Types of Group Policy Settings
The left panel of the screenshot below shows the types of settings in a GPO:
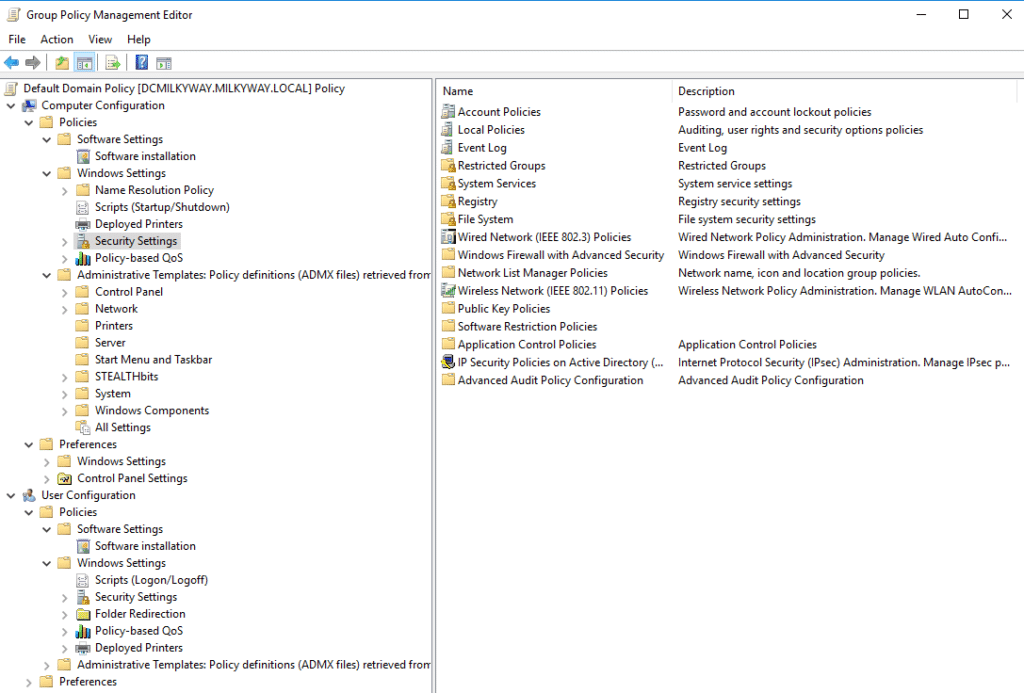
As you can see, there are two primary categories: Computer Configuration and User Configuration.
Each of these has Policies and Preferences, which you can expand to configure:
- Software Settings
- Windows Settings
- Administrative Templates
Policies vs Preferences
Policies and Preferences can both be used to manage settings for Active Directory computer and user objects. The primary difference is as follows:
- Policies cannot be changed by users. Accordingly, settings related to security and regulatory compliance should be made in policies. Examples include password policies, account lockout policies, firewall policies and software restriction policies.
- Preferences can be changed by users, so they should be used only for user experience and environment settings. For example, you might provide a standard set of mapped network drives, printers or desktop shortcuts, but establishing them via Preferences will allow users to adjust them to meet their own needs.
Installing the Group Policy Management Console on Windows Server
To install the Group Policy Management Console on Windows Server, take these steps:
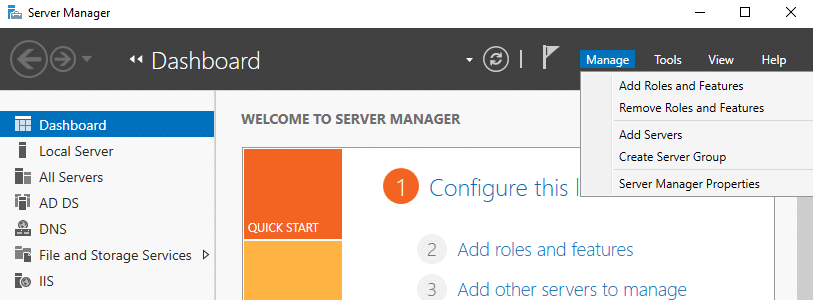
- Launch Server Manager by clicking on the Start menu and selecting Server Manager.
- In Server Manager, click Manage from the top menu, and then select Add Roles and Features.
- Choose Role-based or feature-based installation and click Next.

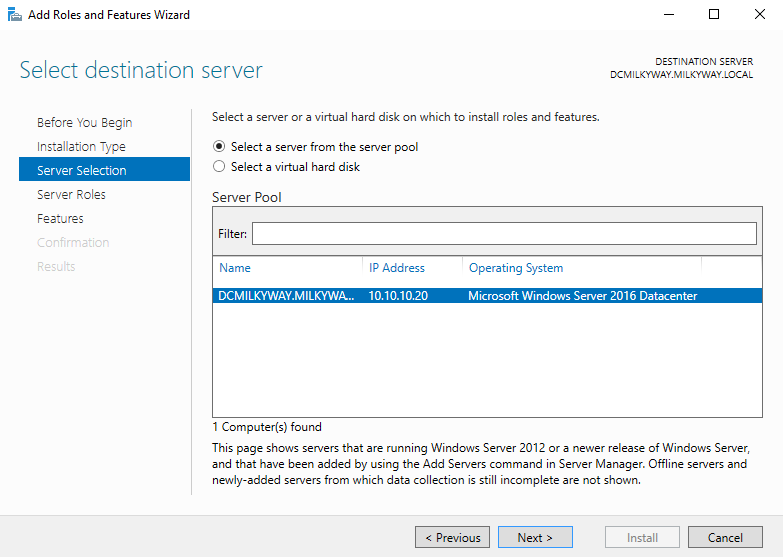
- Select the server where you want to install GPMC and click Next.
- On the “Select Server Roles” page click Next, since we are not adding a role.
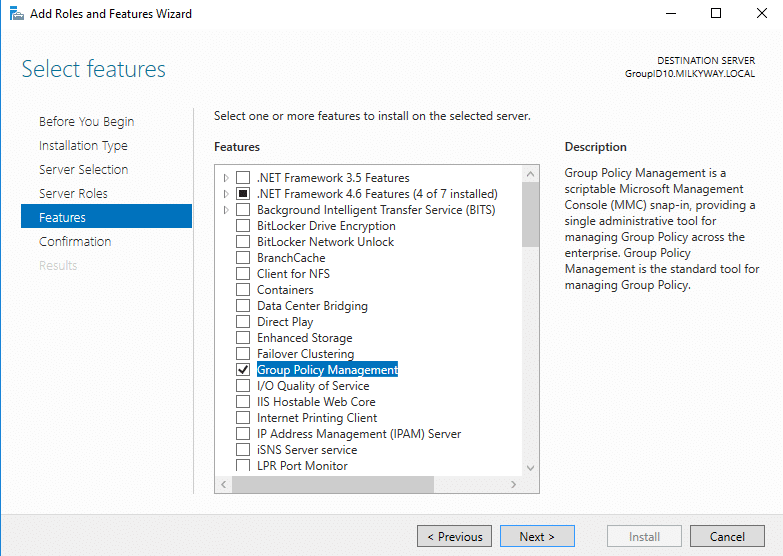
- Scroll down, find “Group Policy Management,” and check the box next to it.
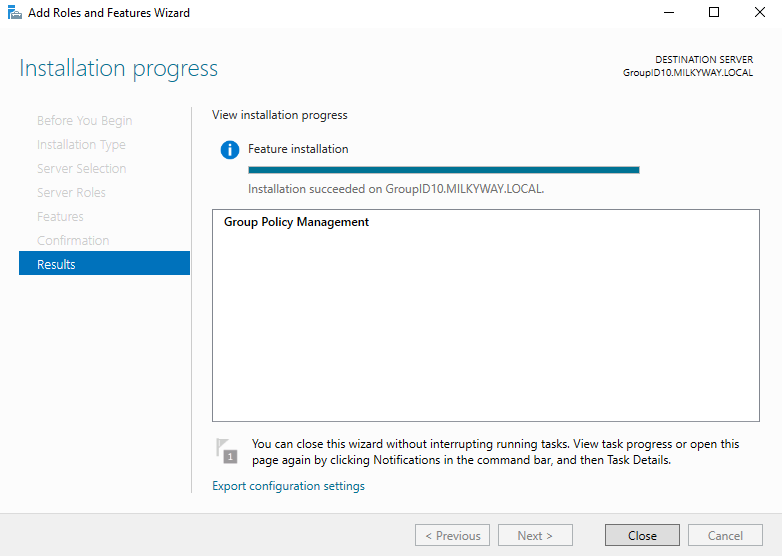
- Click “Next” any confirmation message once the installation is complete. Click “Close” to exit the wizard.
Installing the Group Policy Management Console on Windows
If you are using Windows 10 version 1809 or later, you can install GPMC using the Settings app:
- Open Settings by pressing WIN+I.
- Search for optional features.
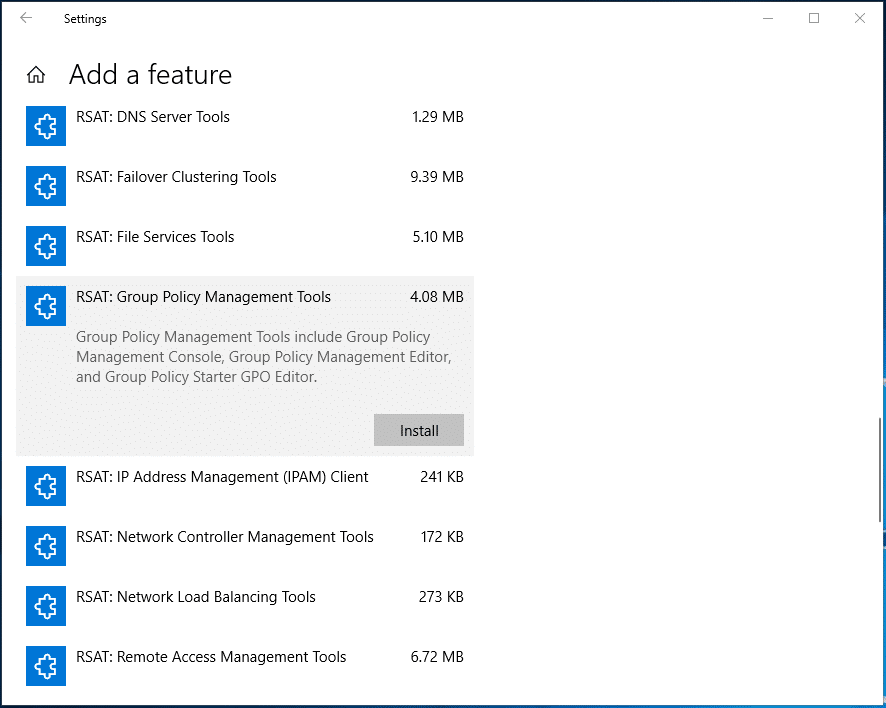
- Click + Add a feature.
- Click RSAT: Group Policy Management Tools and then click Install.
If you are using an older version of Windows, you’ll need to download the correct version of RSAT from Microsoft’s website.
How to Create a GPO
To create a new Group Policy object:
- Open Server Manager, click Tools in the top-right corner and select Group Policy Management from the dropdown menu.
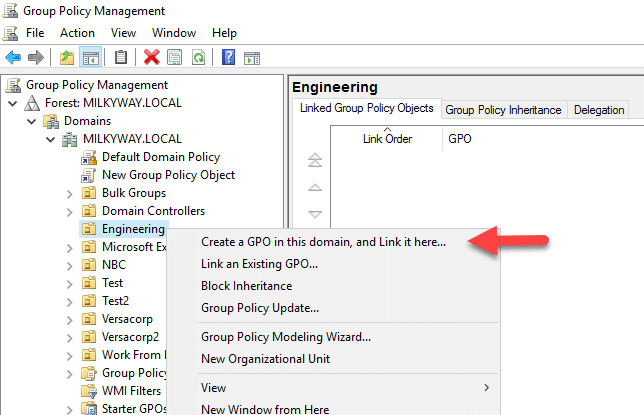
- In the Group Policy Management Console, expand the forest and domain where you want to link the GPO.
- Right-click on the OU, domain or site where you want to link the GPO and select the corresponding Create option, such as Create a GPO in this domain, and Link it here…
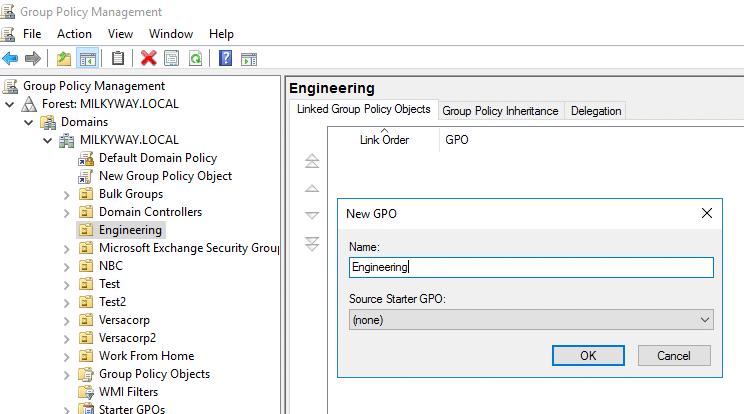
- Enter a descriptive name for the new GPO and click OK.
How to Edit a GPO
To edit Group Policy in the Group Policy Management Console, take the following steps:
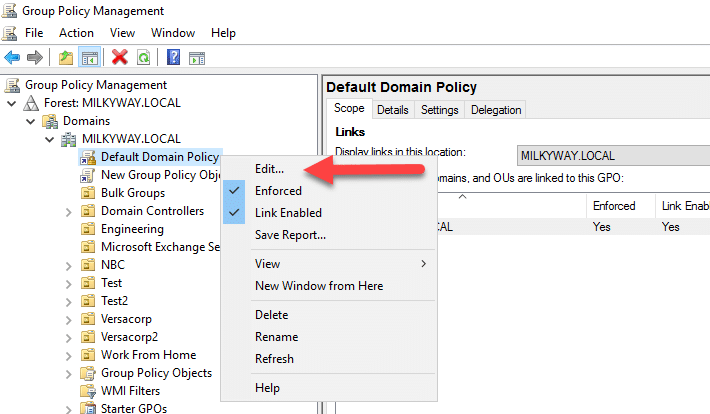
- Expand the forest and domain to which the GPO belongs.
- Navigate to the OU, domain or site where the GPO is linked.
- Right-click on the GPO you want to edit and select Edit.
- In the Group Policy Management Editor, double-click the desired policy setting and modify it according to your requirements.
Computer settings are applied when Windows starts, and user settings are used when a user logs in. Group Policy background processing applies settings periodically if a GPO has been changed.
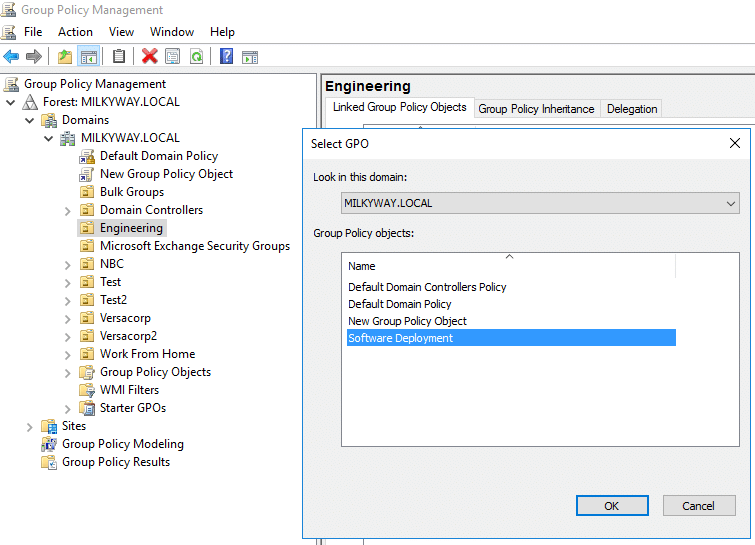
How to Link a GPO
To take effect, a GPO must be linked to at least one Active Directory container, such as an OU, domain or site. To link a GPO, take the following steps:
- In the Group Policy Management Console, expand the forest and domain where you want to link the GPO.
- Right-click the OU, domain or site where you want to link the GPO and select Link an Existing GPO.

- Choose the GPO you want to link from the list of available GPOs and click OK.
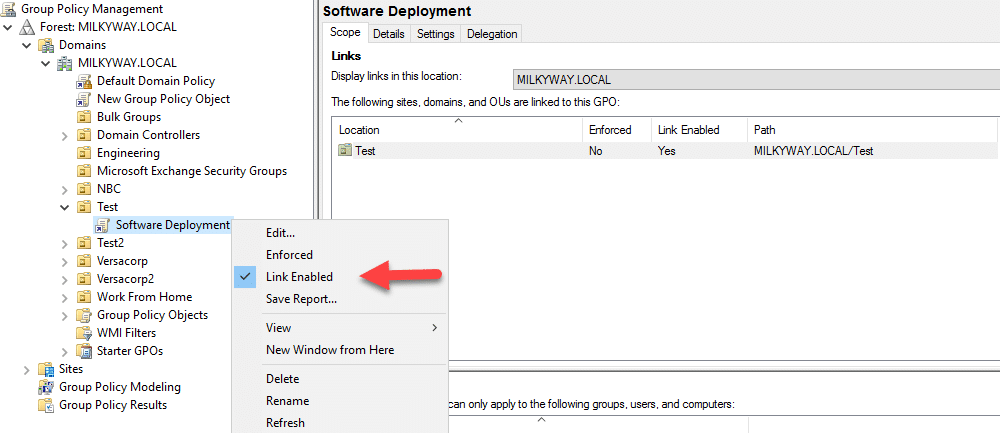
How to Enable or Disable a GPO Link
When a GPO link is disabled, its settings won’t apply to the objects in the linked container. Here’s how to enable or disable a GPO link:
- In the Group Policy Management Console, expand the Active Directory forest and domain to which the linked GPO belongs.
- Expand the container where the GPO is linked and right-click on the GPO.
- In the context menu, check Link Enabled to enable the link or uncheck it to disable the link.
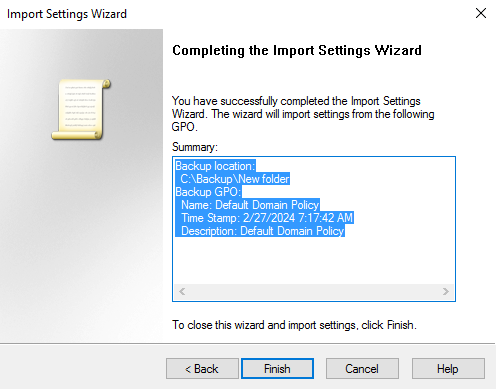
How to Import GPO Settings
You can configure a GPO by importing settings from a backup GPO or template file. Here’s how it’s done:
- In the Group Policy Management Console, navigate to the OU, domain or site with the GPO to which you want to import settings.
- Right-click on the destination GPO and select Import Settings…
- Choose the backup or template file (.admx or .adml) containing the desired GPO settings and click Open.
- Since backup locations can contain multiple GPOs, select the one from which you want to import settings.
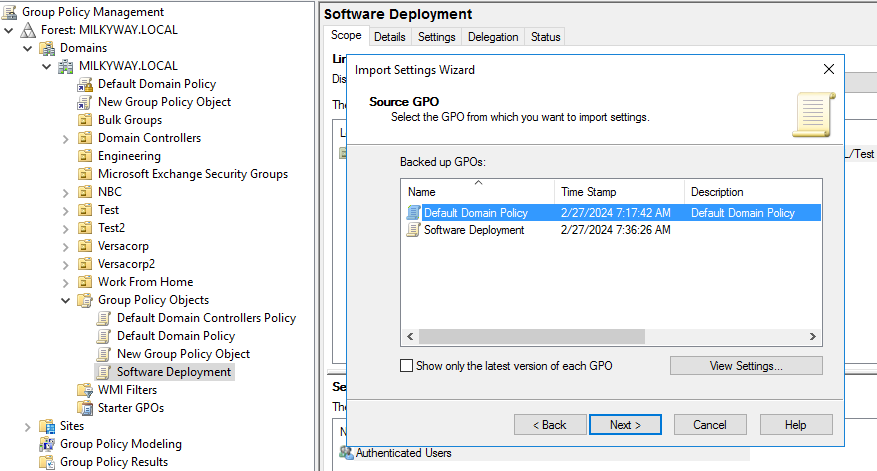
- Click Next twice, review the summary, and click Finish to complete the import process.
GPO Inheritance and Precedence
Group Policy inheritance and precedence determine how Group Policy objects are applied to objects.
Inheritance
Group Policy inheritance follows the hierarchical structure of AD domains and OUs. Domain-level policies apply to all objects (users, computers, groups) in the domain. OU-level policies apply to objects within a specific OU. Policies applied at a higher level in the hierarchy are inherited by child objects, so domain-level GPOs are inherited by all OUs in the domain, and a policy linked to an OU is inherited by all sub-OUs nested under that OU.
However, you can use the Block Inheritance setting on a site, domain or OU to stop GPOs linked to parent objects from being applied to child objects. Setting the Enforced flag on individual GPOs overrides the Block Inheritance setting.
To view the GPOs that an object inherits from parent objects, click on the object in GPMC and go to the Group Policy Inheritance tab.
Precedence
A given domain, site or OU can have multiple GPOs linked to it, and those policies could have conflicting settings. Group Policy precedence controls the order in which GPOs are applied and therefore which setting takes effect. The later a GPO is applied in the sequence, the higher its precedence.
The order in which policies are applied is as follows:
- Local Group Policy
- Site-level GPOs
- Domain-level GPOs
- OU-level GPOs
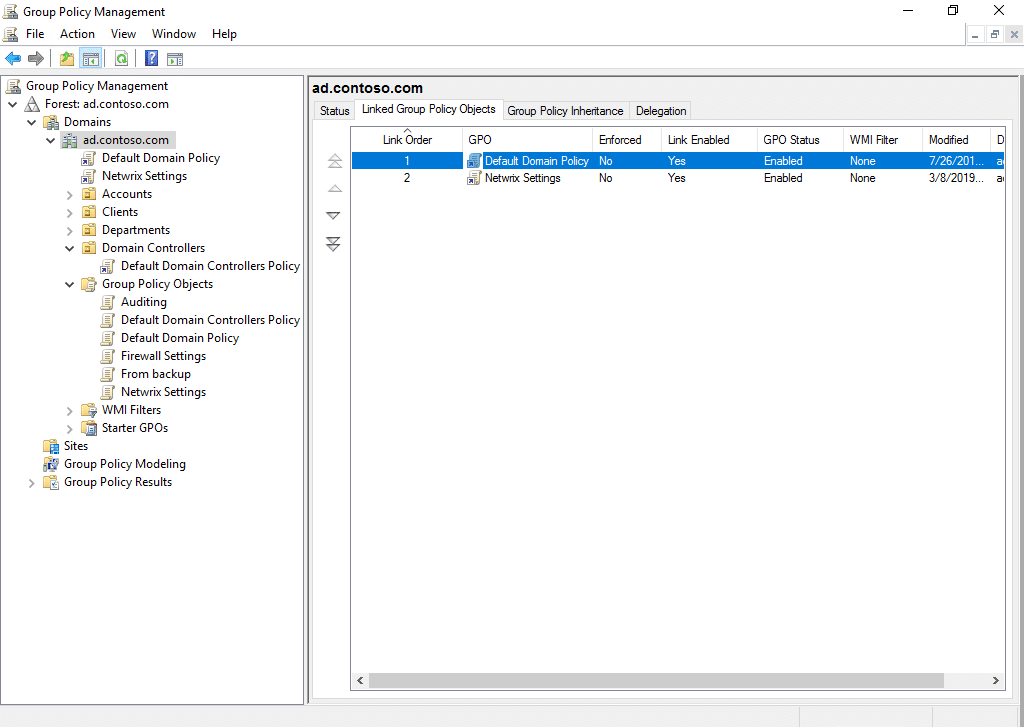
To view the GPOs linked to an object, click on the object in GPMC and go to the Linked Group Policy Objects tab. GPOs with a higher Link Order number take priority over those with a lower number. You can change the link order number by clicking on a GPO and using the arrows on the left to move it up or down.
Group Policy Extensibility
You can extend the functionality of Group Policy by integrating additional features, custom settings or third-party components. Here are several aspects of Group Policy extensibility:
- Administrative templates (.admx files) — Administrators can create custom templates to manage additional settings or configure custom policies.
- Custom Group Policy Preferences — You can create custom Preference items using XML files or scripts. These let you manage things like mapped drives, printers, registry settings, files and shortcuts on client computers.
- Group Policy client-side extensions (CSEs) — You can create custom CSEs to add extra settings, policies or management tasks.
- Group Policy filters and WMI filters — You can create filters to target Group Policy settings based on specific criteria, such as user or computer attributes.
- Third-party Group Policy tools — Third-party solutions provide additional management capabilities, reporting features, auditing tools and policy templates.
Backing Up GPOs
Create regular backups of your GPOs to ensure you have a recent copy in case of accidental or malicious deletion, corruption or misconfiguration. You should also back up GPOs after making significant changes or before performing maintenance tasks that could affect Group Policy settings.
Establish a centralized location for storing GPO backups to ensure easy access and management. Consider organizing backup files by domain, date or purpose to facilitate retrieval and recovery. Use descriptive naming conventions or metadata to identify backup versions and associated changes. Implement version control practices to track changes to GPOs over time, and maintain a history of backups.
Modeling Changes to Group Policy Settings
Group Policy Modeling is a GPMC feature that allows administrators to simulate how Group Policy settings would act for users and computers in an Active Directory environment. It provides a way to predict the outcome of applying specific Group Policy settings without implementing them.
Advanced Group Policy Management
Advanced Group Policy Management (AGPM) is a Microsoft Desktop Optimization Pack (MDOP) component that enhances the management, delegation, version control and auditing of Group Policy objects.
Unlike GPMC, AGPM is a client/server application. The server component stores GPOs and their histories offline. GPOs managed by AGPM are called controlled GPOs. Administrators can check them in and out, similar to how files or code are handled in GitHub or a document management system.
AGPM offers more control over GPOs than GPMC. Besides version control, you can assign roles like Reviewer, Editor and Approver to Group Policy administrators. This facilitates strict change control throughout the entire GPO lifecycle. AGPM auditing also provides deeper insight into changes in Group Policy.
How Netwrix Can Help
Netwrix Auditor extends traditional Group Policy management with enhanced visibility, auditing, change control and reporting functionalities that improve security, and compliance. For example, administrators get detailed insight into what was changed, who changed it and when the action occurred. From an intuitive interface, they can easily compare different versions of GPOs, identify specific changes and even roll back unwanted modifications.
This increased transparency empowers administrators to ensure that Group Policy settings align with organizational policies, security standards and regulatory requirements. By integrating Netwrix Auditor into their Group Policy management strategy, organizations can achieve a more secure, compliant and efficiently managed IT infrastructure.
Frequently Asked Questions
What is Active Directory Group Policy management?
Group Policy is a feature of Active Directory that enables administrators to control the configuration settings of users and computers. Group Policy management is the process of creating and maintaining Group Policy settings that enforce security, deploy software, manage desktop configurations and more.
How do you open the Group Policy Management Console?
To open the Active Directory Group Policy Management Console:
- Press Windows Key + R on your keyboard.
- In the Run dialog box that appears, type gpmc. msc and either press Enter or click OK.
How can I install the Group Policy Management Console?
To install GPMC on a Windows Server, take these steps:
- Launch Server Manager. You can usually find it in the taskbar, or you can locate it in the Start menu.
- In Server Manager, click Manage at the top-right corner and then select Add Roles and Features.
- On the “Before you begin” screen, click Next.
- On the “Select installation type” screen, choose Role-based or feature-based installation and then click Next.
- Select the server where you want to install the GPMC feature and click Next.
- On the “Select features” screen, check the box next to Group Policy Management. Click Next.
- Review your selections and click Install.
- Wait for the installation process to complete. Once you see a confirmation message, close Server Manager.
Which users are automatically granted permissions to perform Group Policy management tasks?
The Group Policy Creator Owners group is automatically created when an Active Directory forest is created. Members of the group can create, edit and manage Group Policy objects at the domain level. This group is typically used when administrators want to delegate control over Group Policy without granting full administrative privileges. By default, only the domain administrator is a member of this group.