
Organizations today store enormous amounts of data. To protect their business and comply with strict modern regulations, they need to manage and secure it properly. Ideally, every document would receive equal protection, but this approach is unrealistic both financially and operationally. Accordingly, organizations need to classify data so they can prioritize their critical and sensitive content.
Data classification is challenging enough across on-premises data stores. But today, most organizations make extensive use of Microsoft 365 cloud workloads like SharePoint Online, OneDrive and Teams, which adds additional complexity. Cloud data is highly dynamic and distributed across multiple services with different access controls, and the lack of physical control over infrastructure add to the difficulty.
This article shows how data classification works in Microsoft cloud environments and explains how you can overcome some of its important limitations.
Benefits of Data Classification
Before diving into data classification in Microsoft 365, let’s review the key benefits of data classification. Accurate classification and labeling of information can help your organization:
- Achieve and maintain compliance with regulations like HIPAA, CCPA and GDPR — and swiftly adapt to new regulations.
- Implement privacy, retention and confidentiality policies effectively.
- Cut data management, storage and backup costs by identifying and eliminating redundant data.
- Streamline business operations by facilitating quicker and more efficient searches.
- Optimize database architecture and enhance the functionality of security platforms.
Achieving these benefits requires accurate and reliable data classification. Manual processes fall short for multiple reasons. Individuals may interpret the classification criteria differently, leading to inconsistent labels. Busy employees may neglect the task altogether, or simply choose labels at random to get it done quickly. Moreover, manual labeling is so cumbersome and time-consuming that the huge volume of content already stored in your systems will likely never get classified. Accordingly, it’s vital to use an automated data classification solution.
Classifying Data with Microsoft Purview
The core tool for Microsoft data classification is Microsoft Purview (formerly known as Microsoft 365 Compliance and Azure Purview). This solution helps organizations discover, classify and protect data across Microsoft environments, including Microsoft 365 and on-premises servers.
Microsoft Purview can apply sensitivity labels to documents, emails and other data automatically based on rules created by administrators. For example, it can automatically identify personal identification numbers, financial details and confidential project information and apply the corresponding labels. This automation helps ensure that data is classified consistently and reliably. Sensitivity labels can also be applied manually by users in applications like Word, Excel, PowerPoint and Outlook.
Once labels are applied, Microsoft 365 services enforce the configured protection settings on content. Sensitivity labels are recognized across various Microsoft 365 workloads, including Word, Excel, PowerPoint, SharePoint Online, OneDrive for Business and Microsoft Teams. The labels can also be used by internal processes and third-party solutions to enhance data protection and compliance. For instance, a data loss prevention (DLP) tool might use sensitivity labels to control or prevent the sharing of sensitive information, while a data retention policy might leverage the labels to archive or delete data according to its given lifecycle.
How to Create and Publish Labels
You can create and publish labels using either the Microsoft Purview interface or PowerShell.
Prerequisites
To create and use sensitivity labels, you must have an active Microsoft 365 E5/A5/G5 license. In addition:
- Your account must be assigned to at least one of the following roles or role groups:
- Global Administrator
- Compliance Administrator
- Security Administrator
- Compliance Data Administrator
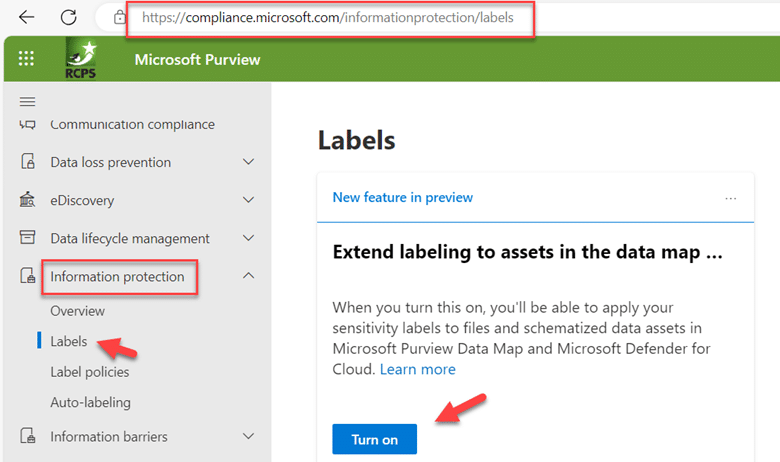
- You must consent to use sensitivity labels. To do this, access the Microsoft Purview compliance portal, navigate to the Information protection menu and go to the Labels page. In the “Extend labeling to assets in the data map…” section, click the Turn on button, as shown below. In the confirmation dialog that appears, click Yes.
- Enable sensitivity labels for Office files in SharePoint and OneDrive in the Microsoft 365 Admin Center.
Creating and Publishing Labels using the Purview Interface
Step 1. Create a Label
Step 1a. On the Labels page, click Create a label. Then specify the following information:
- Name
- Display name, which will be what users see in the apps where the label is published
- Priority
- Description for business users
- Description for admins who will manage the label
- Label color
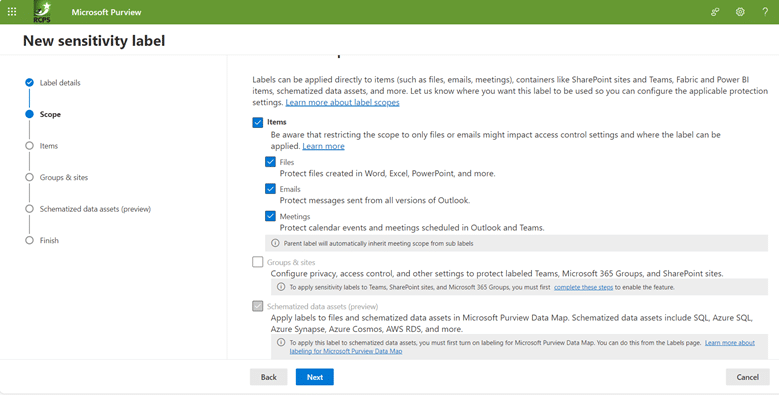
Step 1b. On the next screen, choose what types of items to classify, such as files, emails and meetings:
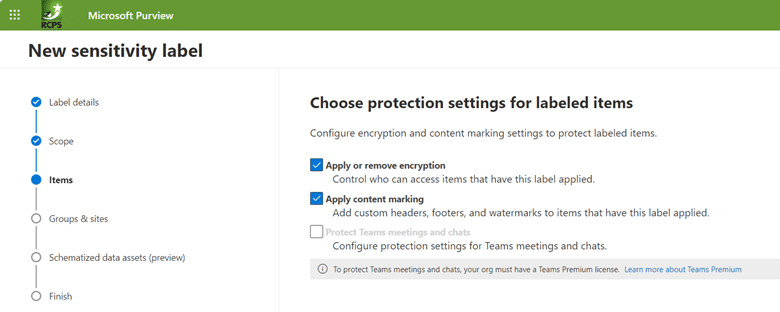
Step 1c. Specify whether to apply or remove encryption and whether to add customer headers, footers, or watermarks to documents, as shown below. If you choose either of these options, you will need to fill out additional information.
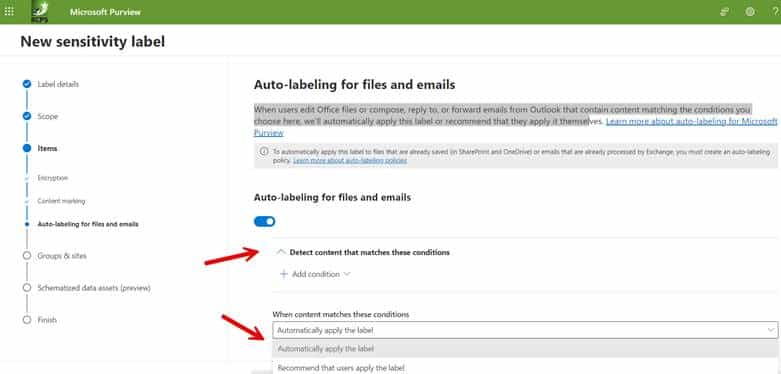
Step 1d. Specify whether Microsoft Purview should automatically assign the label to a file or email if it matches conditions that you specify:
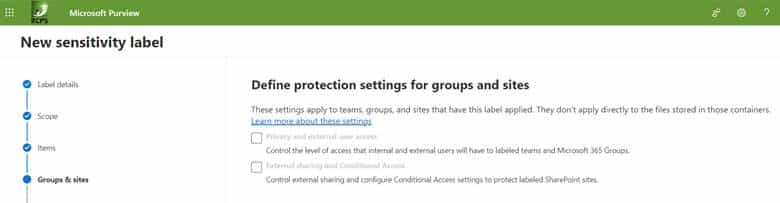
Step 1e. Sensitivity labels can also be applied to safeguard content across various containers, including Microsoft Teams sites, Microsoft 365 groups, and SharePoint sites. By assigning a sensitivity label to any of these supported containers, the designated sensitivity classification and pre-configured protection settings are automatically enforced on the respective site or group. As shown below, we are not choosing any additional containers in this example.
You have now created a label.
Step 2. Publish the Label
Now it is time to create a policy that will push the labels out for publishing.
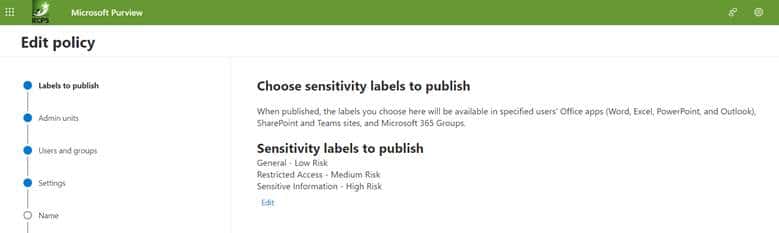
Step 2a. Navigate to Label policies > Publish labels and select the labels you want to publish:
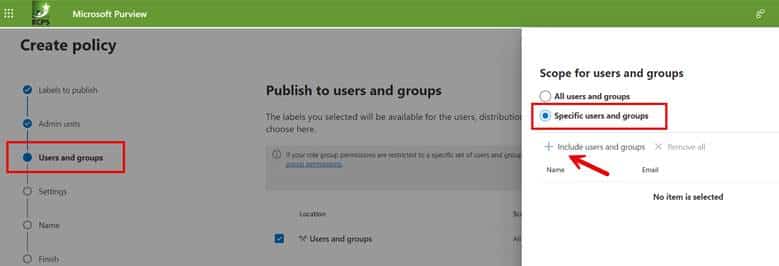
Step 2b. Select the users and groups who can use the label. You can either choose all users and groups or assign specific accounts as shown below.
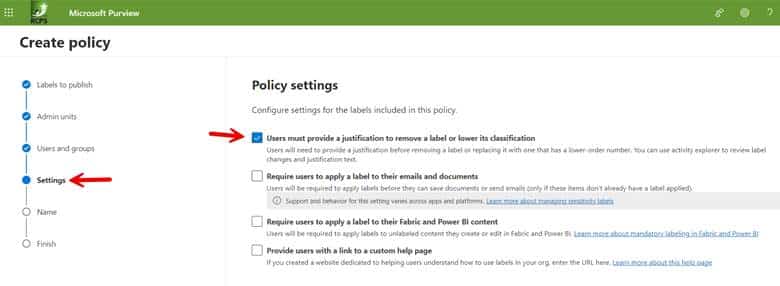
Step 2c. Configure the policy settings you want to enforce. In the example below we have chosen to require users to provide a justification before removing a label or replacing it with one that has a lower-order number as shown in the screenshot below.
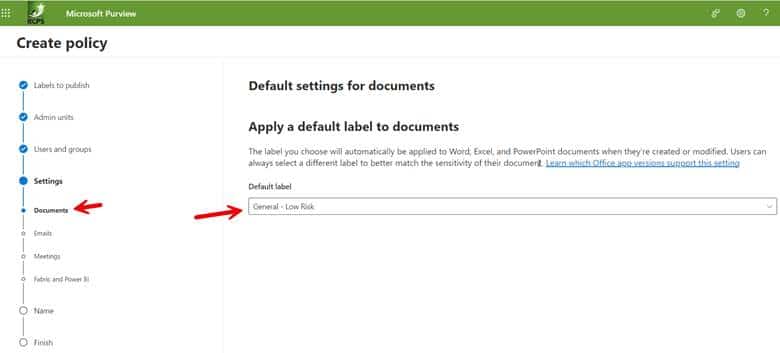
Step 2d. You then need to choose a default label for all the items you specified in the label creation process. This could be documents, emails, meetings, etc. In the screenshot below we have selected the policy called General – Low Risk as the default label for Word documents.
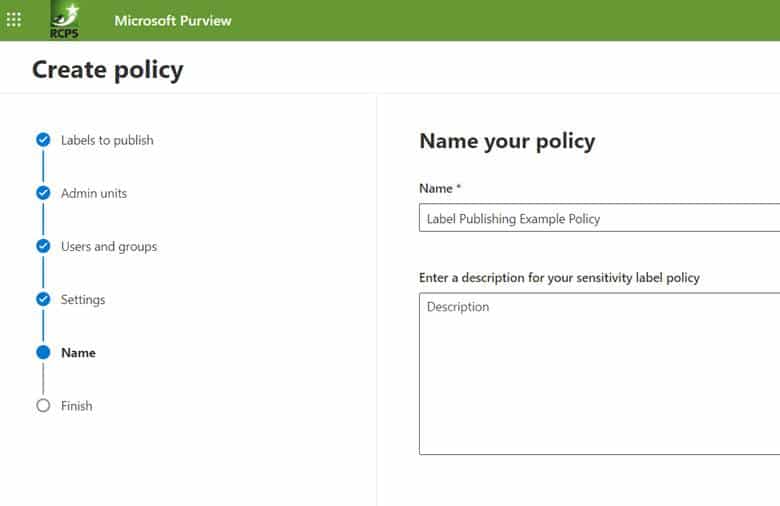
Step 2e. The final step is to name the created policy as shown below. Then review and finish to complete.
Creating and Publishing Labels using PowerShell
You can also use PowerShell to create and enable sensitivity labels in Microsoft 365. Here’s an overview of how to achieve Microsoft classification and labelling
1) Install the Security & Compliance Center PowerShell module if you haven’t already
2) Establish a session by using one of the following cmdlets:
Connect-ExchangeOnline or Connect-IpPsSession.
3) Create a sensitivity label. Use the New-Label cmdlet and specify parameters such as label name, description, tooltip and protection settings. Here is an example:
New-Label -Name "Confidential" -Description "This label applies strong protection to sensitive content." -Tooltip "Use for sensitive business documents."
4) Create a policy that publishes your sensitivity labels. Use the “New-LabelPolicy” cmdlet to specify which labels to include and to whom they should be published, as in this example:
New-LabelPolicy -Name "Default Label Policy" -Labels "Confidential" -Users "All"
Monitoring Label Use
Once labels are created and published, Microsoft Purview will automatically label sensitive content using the rules you have set up, and users can start applying these labels to documents and emails. Be sure to use the reporting tools in Microsoft Purview to monitor how labels are being used; this can help you understand your compliance status and identify areas that need attention.
Challenges with using Microsoft Purview for Data Classification
Implementing automatic labeling with Microsoft Purview enhances information protection and management. However, because it relies on predefined patterns, keywords or data types to identify sensitive information, it can lead to both of the following issues:
- False positives — Incorrectly labeling non-sensitive information as sensitive can result in users being blocked from accessing data they should be able to use, hindering productivity.
- False negatives — Failing to label data that is actually sensitive exposes the organization to data breaches and compliance risks.
In addition, automatic labeling is limited to Office files and may not be compatible with older versions of Microsoft products. And, as noted in the Prerequisites section above, it requires specific Microsoft 365 subscription plans.
An Alternative to Microsoft 365 Data Classification
For organizations seeking to enhance data management practices and maintain compliance, Netwrix solutions help ensure accuracy and security for classifying your most sensitive data.
Netwrix Access Analyzer offers robust auditing and reporting functionalities to help gain visibility into your data landscape and monitor user activity across various IT environments. Some notable features are as follows:
- Identify and categorize sensitive data across your IT infrastructure.
- Detect various types of data, including personally identifiable information (PII), financial records, intellectual property, and more.
- Create customizable classification rules and policies that can help define data handling criteria, ensuring compliance with regulatory requirements such as GDPR, HIPAA, or PCI DSS.
- Provide insights into data access patterns and user behavior.
Netwrix Data Classification is another comprehensive solution designed to identify and classify vast amounts of data with high accuracy and reliability. Its notable advantages include the following:
- More accurate classification results, thanks to advanced techniques like compound term search and stemming
- Support for a variety of file types, not just Office documents
- Support for both structured and unstructured data across a wide range of on-premises and cloud data repositories, including non-Microsoft options
- Predefined taxonomies aligned with specific regulations and data types
- Custom taxonomies to handle company-specific content, such as intellectual property
- Dedicated customer support and an active user community
- An intuitive interface and easy setup process
Plus, Netwrix Data Classification can be a more cost-effective choice for organizations than upgrading to a Microsoft 365 plan that provides Microsoft Purview.
Data classification is a core capability for every organization today. By choosing the right automated solution, your organization can significantly reduce the risk of data breaches and compliance penalties by ensuring that sensitive and regulated information is accurately identified and adequately protected. Moreover, you can enhance operational efficiency and user productivity. Microsoft Purview offers valuable functionality, but be sure to also consider third-party solutions, which can be more robust and cost-effective.
FAQs
What is data classification in Microsoft?
Microsoft data classification refers to the process of categorizing and organizing data based on its sensitivity, importance, or other attributes. This classification helps in managing and securing data effectively, ensuring that appropriate measures are taken to protect sensitive information. The core tool for Microsoft data classification is Microsoft Purview.
What are the 4 types of data classification?
There are generally four common types of data classification:
- Confidential: Confidential data is highly sensitive and should be accessed only by authorized individuals. This type of data often includes trade secrets, financial information, personally identifiable information (PII), and other critical business data. Access to confidential data is usually restricted, and additional security measures are applied to prevent unauthorized access or disclosure.
- Internal: Internal data is essential for the organization but may not be as sensitive as confidential data. It includes information that is crucial for day-to-day operations but doesn’t pose as significant a risk if accessed by internal employees. However, access controls are still in place to ensure that only authorized personnel can view or modify internal data.
- Public: Public data is non-sensitive and can be freely shared with the public or within the organization. This category typically includes information that is meant for public consumption, such as marketing materials, product catalogs, or general company information. Security measures are minimal for public data, as its disclosure does not pose a risk to the organization.
- Restricted: Restricted data falls between confidential and internal classifications. It is more sensitive than internal data but not as critical as confidential data. Access to restricted data is limited to specific individuals or teams within the organization, and additional security measures may be applied to protect it from unauthorized access or disclosure.
What is Azure data classification?
Data classification in Azure refers to the process of categorizing and organizing data within Microsoft Azure based on its sensitivity, importance, or other attributes. Azure provides various tools and services to help organizations classify and protect their data in the cloud. Key components and features related to Azure Data Classification include:
- Azure Information Protection (AIP): AIP is a cloud-based solution that allows organizations to classify, label, and protect their data based on policies. It integrates with other Azure services and provides a unified approach to data protection across the organization’s cloud environment.
- Azure Purview: Azure Purview is a data governance service that helps organizations discover, classify, and manage their data assets across on-premises, multi-cloud, and SaaS (Software as a Service) environments. It provides a holistic view of an organization’s data landscape, helping in data discovery and classification.
- Azure Security Center: Azure Security Center helps organizations protect their cloud workloads. It includes features related to threat detection, security policy management, and compliance. Data classification is part of its capabilities to help organizations identify and protect sensitive information.
- Azure Policy: Azure Policy is a service that enables organizations to create, assign, and manage policies for resources in their Azure environment. This can include policies related to data classification, ensuring that specific data handling practices are followed across the organization.
- Azure Data Factory: Azure Data Factory is a cloud-based data integration service that allows organizations to create, schedule, and manage data pipelines. While it focuses on data movement and transformation, organizations can implement data classification as part of their data processing workflows.
- Azure Sentinel: Azure Sentinel is a cloud-native SIEM (Security Information and Event Management) service that provides intelligent security analytics. It includes features for threat detection and investigation. Data classification plays a role in identifying and securing sensitive information within the security context.


