Understanding Active Directory (AD) permissions is vital for cybersecurity, compliance and business continuity. In this blog, we’ll be going over, at a high level, how Active Directory permission are applied in a domain and how to view them natively.
The most common way to apply Active Directory permissions is through the tool Active Directory Users and Computers (ADUC). There are two ways in ADUC to apply permissions
Active Directory Delegation Wizard
The Active Directory Delegation wizard is an easy-to-use UI for granting permissions to a user or group to perform a certain task. Let’s walk through the steps we would take as an administrator who needs to enables the ‘Help Desk’ group to service password resets for all users in a specific OU.
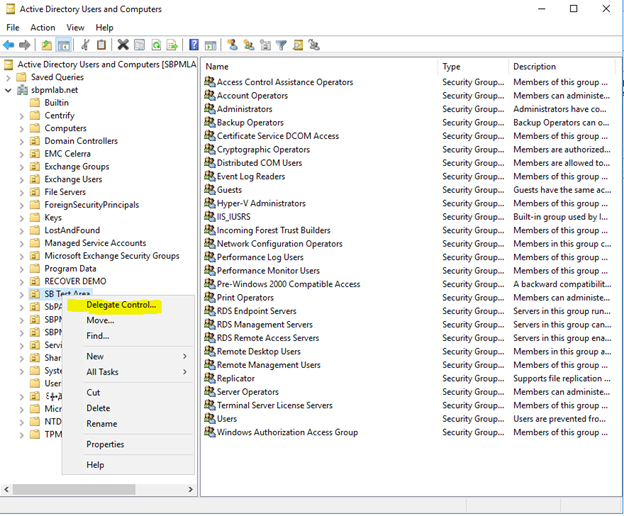
1. Launch the wizard by right-clicking an OU or container and selecting ‘Delegate Control…’.
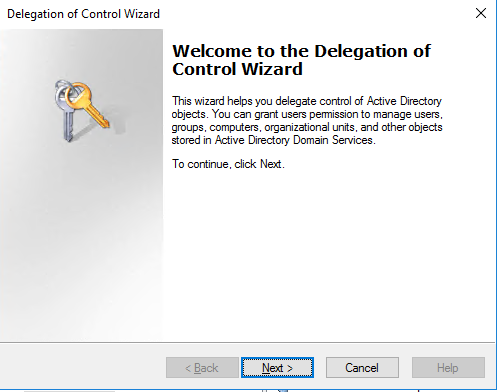
The Active Directory Delegation of Control wizard will open:
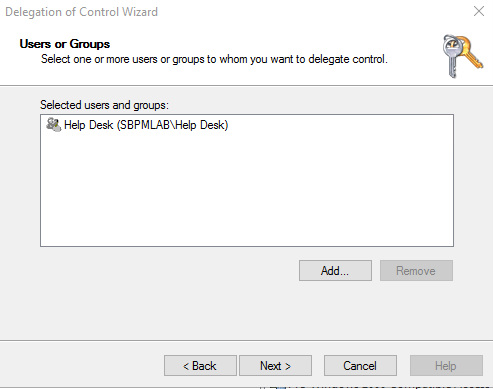
2. The first step in the wizard is to choose the users or groups we want to grant permissions to:
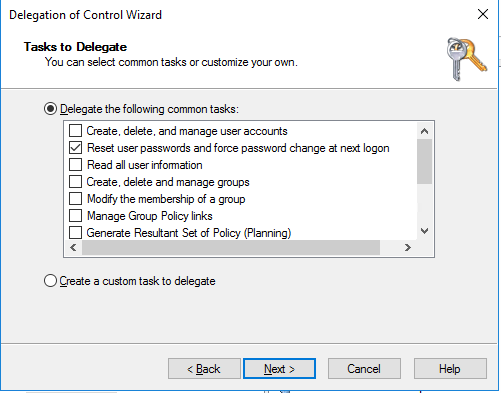
3. Next, we specify which tasks these objects should be able to perform. We can pick from a list of common tasks or create a custom task to delegate them access to perform. For this example, we’ll stick with the scenario we mentioned, resetting users’ passwords.
4. Finally, you need to confirm your selection by clicking Finish:
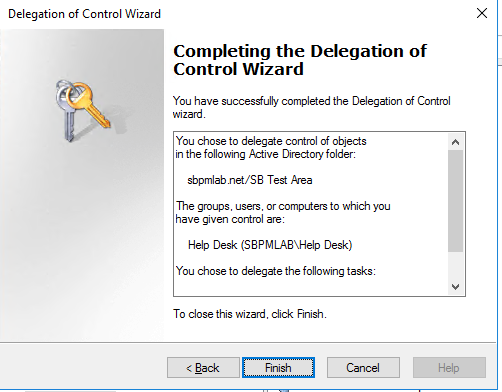
As you can see, we’ve granted the ‘Help Desk’ group the right to ‘Reset user passwords and force password change at next logon’ to all descendant users of the ‘SB Test Area’ OU.
Security Tab
Reviewing Permissions
To confirm the permissions we specified in the delegation wizard were applied correctly , we will check the Security tab the ‘SB Test Area’ OU.
1. To view the Security tab on an object, you need to enable Advanced Features in ADUC by choosing ‘Advanced Features’ from the View dropdown menu:

2. Next, right-click the SB Test Area OU and select ‘Properties’; then go to the Security tab:
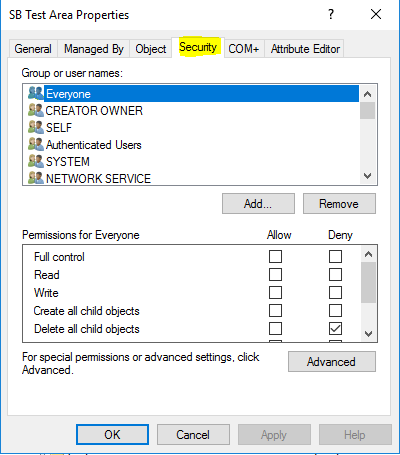
3. This tab shows us the Access Control List (ACL) for the SB Test Area object, which comprises Access Control Entries (ACEs). If we look through the groups and user accounts that have been applied to the SB Test Area OU ACL, we can find the Help Desk group we added:
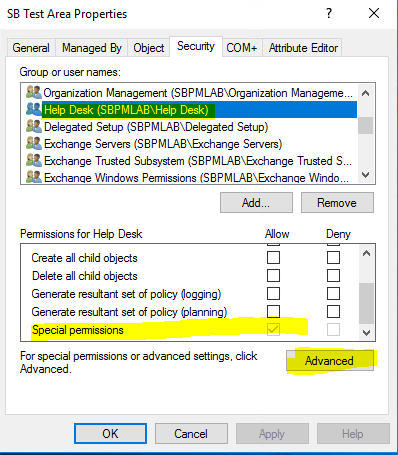
4. We can see that this account was granted ‘Special Permissions’, so to view the security permissions we applied, we’ll have to click Advanced. We can see in the screenshot below that the ACE for the ‘Help Desk’ principal is granting ‘Reset Password’ permissions on ‘Descendant User objects’ of the SB Test Area OU.
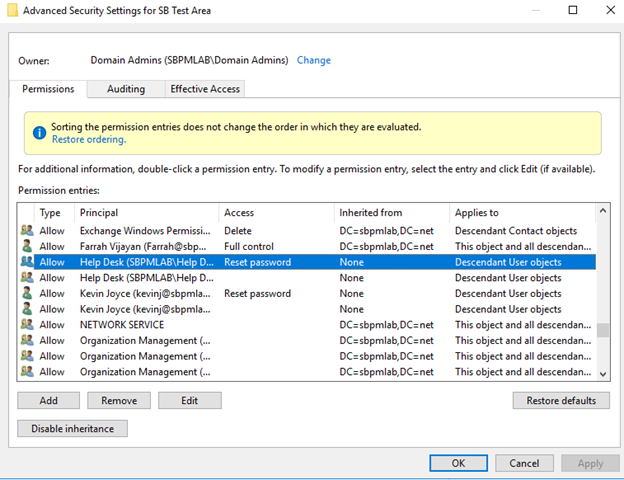
5. Clicking Edit here lets us review the ACE for the Help Desk principal on the SB Test Area OU.
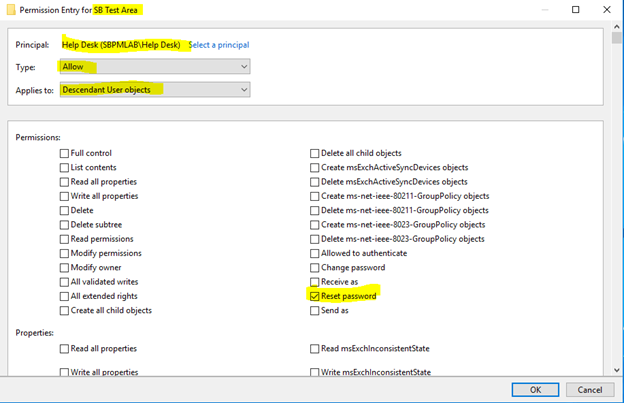
We can see above that the permission we granted to the Help Desk account on the SB Test Area OU was just ‘Reset password’.
Applying Permissions Directly
Now that we’ve seen how to apply permissions using the delegation wizard, let’s cover how we can apply permissions directly from the Security tab.
Let’s say we want to grant my account the right to modify members of groups in a certain OU.
1. We right-click the desired OU (KevinJSandbox), go to Properties and then open the Security tab:
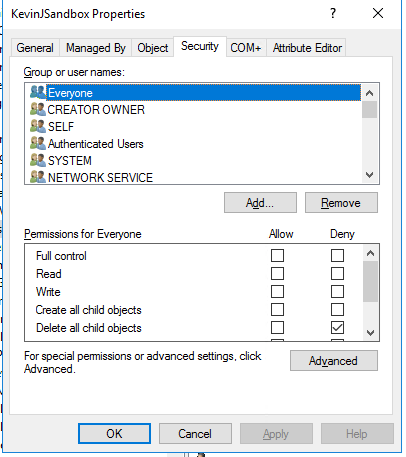
2. We scroll down and select our account name, Kevin Joyce:
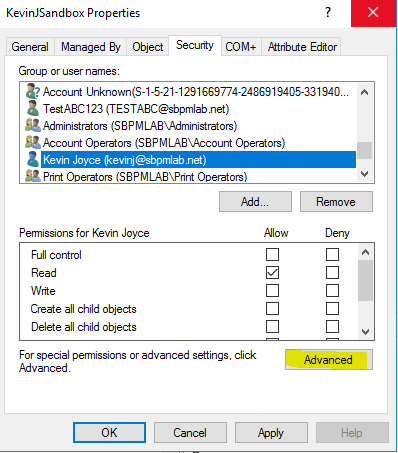
3. Then we click ‘Add…’ As you can see, this granted my account ‘Read’ access rights to the KevinJSandbox OU, but we don’t have a way from this interface to granularly allow group modifications. To do this, we’ll have to click ‘Advanced’. Then we click ‘Edit’ on the ACE for the object we just granted access to:
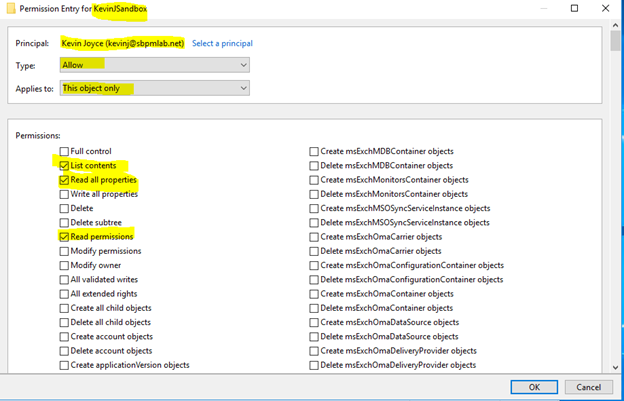
4. We can see the default ACE that was created when we added my user account; it allows the listing of contents, reading of all properties, and reading of permissions on the KevinJSandbox object only. We’re going to modify this to allow us to also modify the membership of descendant groups in the KevinJSandbox OU. To do this, first, we’ll want to select ‘descendant group objects’ from the ‘Applies to’ dropdown:
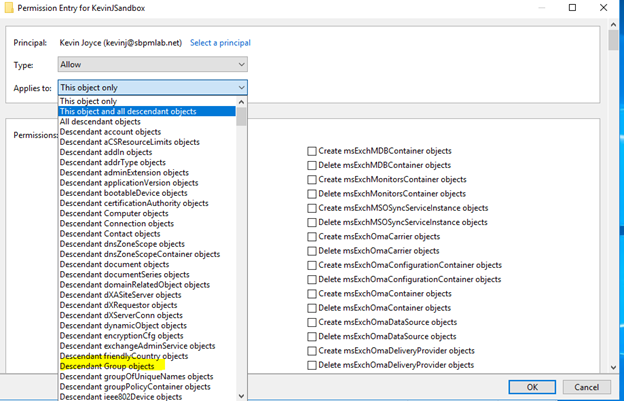
The list of permissions allowed to be applied changes based on the object(s) selected in the Applies to field:
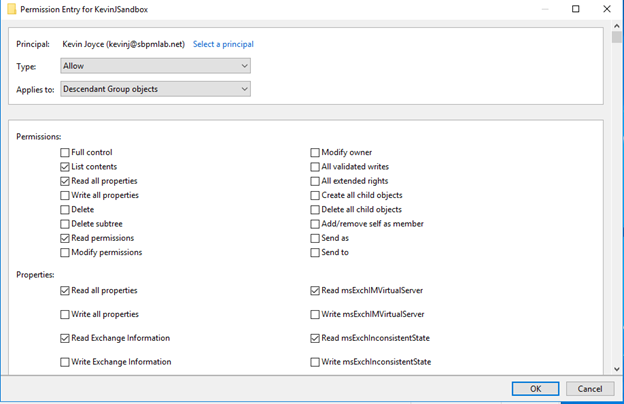
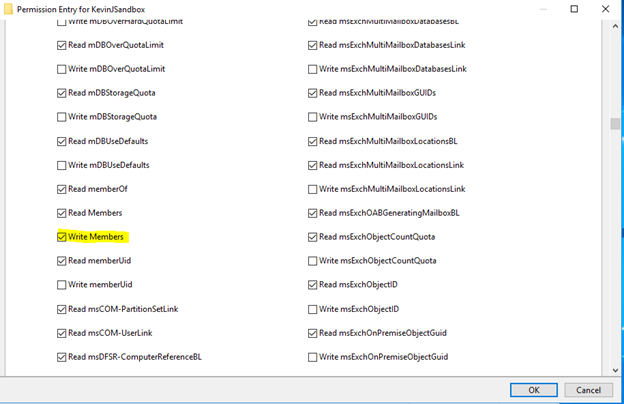
5. As you can see from the list above, there is no ‘Modify group membership’ permission under the Permissions entries. To grant the principal the capability to only modify group members of a group, we need to scroll down and select the ‘Write Members’ property as shown in the following screenshot:
Conclusion
As you can see, understanding, applying, analyzing and deleting Active Directory permissions can be very complex. However, there are tools that can help you with permissions management and auditing. In particular, be sure to check out the Netwrix Active Directory Security Solution.
FAQ
What is Active Directory delegation?
Delegating administrative rights enables you to grant users the permissions to perform tasks that require elevated permissions — without assigning them to highly privileged groups like Domain Admins and Account Operators.
How to delegate administrator privileges in Active Directory?
To delegate Active Directory permissions, open the Active Directory Users and Computers console and launch the AD Delegation wizard by right-clicking an organizational unit (OU) or container and selecting ‘Delegate Control…’
How do I check delegation in Active Directory?
In the Users and Computers console, go to the View menu and make sure ‘Advanced Features’ is ticked. Then right-click an OU, choose Properties and go to the Security tab to view the delegated permissions.


