Managing email services efficiently is essential for any organization’s productivity and security in the modern digital workspace. This blog will discuss Exchange Online administrative tasks and how to streamline their management process. Before we discuss how to manage Exchange Online, we’ll explore its history.
Exchange Online is the cloud version of Microsoft Exchange Server, offering email, calendar, contacts, and collaboration services. As a part of Microsoft 365, it enables businesses to leverage the power of cloud computing to enhance communication and collaboration while ensuring the security and reliability expected from Microsoft’s services. With features like Microsoft Defender for Office 365 and compliance solutions, Exchange Online is designed to meet the needs of organizations of all sizes, facilitating a secure and productive email environment.
Exchange Online History
Exchange Online has evolved significantly, with new features and improvements regularly added. Let’s look at how the platform developed over the years; that may help you get insights and context to manage the platform more effectively, make informed decisions, and overcome challenges more easily.
- In the mid-2000s, Microsoft began exploring cloud-based services. This transition led to the development of Exchange Online, part of the broader Microsoft Online Services suite.
- In 2008, Microsoft launched the Business Productivity Online Suite, which included Exchange Online as one of its services. This marked Microsoft’s entry into providing cloud-based email services.
- In June 2011, Microsoft rebranded and expanded its cloud offerings, including Exchange Online, under the name Office 365. Office 365 became a comprehensive suite of cloud-based productivity services, including Exchange Online for email, SharePoint Online for collaboration, and more.
- In April 2020, Microsoft rebranded Office 365 to Microsoft 365 to reflect a broader focus on productivity and collaboration beyond traditional office applications.
- Microsoft regularly releases updates and new features for Exchange Online as part of the overall Microsoft 365 service. This includes improvements in security, compliance, collaboration, and user experience.
- Exchange Online has seen continuous updates to its interface and the integration of modern collaboration tools. This includes features like Microsoft Teams integration, advanced security options, and AI-driven enhancements.
- Microsoft has been transitioning from individual service-specific admin centers, like the Exchange Admin portal, to a unified Microsoft 365 admin center for centralized administration.
- Given the importance of email security, Microsoft has implemented various security features in Exchange Online, including advanced threat protection, anti-phishing measures, and encryption capabilities.
What Administering Exchange Online Includes
If you are an administrator responsible for managing Exchange Online, below are some everyday administrative tasks and steps you might need to perform.
- Create and manage user and shared mailboxes: This task involves setting up individual email accounts for users within your organization.
- Create and manage distribution groups for email communication within the organization: Distribution groups or distribution lists allow you to send email communications to groups within your organization, such as a department or project team, without entering each recipient’s email address individually.
- Configure mail flow rules (transport rules) for message handling: Mail flow rules help you manage the path an email takes from the Internet to reach the destination mailbox and vice versa. For example, you can create a rule to redirect emails containing specific keywords to a designated mailbox for review.
- Create and manage resource mailboxes for meeting rooms and equipment: Resource mailboxes are special accounts in Exchange Online for booking company resources, such as meeting rooms or equipment. Users can book these resources through their Outlook calendar.
- Specifying SMTP Addresses for a Recipient: This task involves assigning email addresses to users. SMTP addresses are the addresses that external parties use to send emails to users within your organization.
- Granting Send on Behalf and Full Access Permissions for a Mailbox: You might grant a user permission to send emails on behalf of another user or give them full access to another user’s mailbox for management purposes, such as an assistant managing a manager’s email.
- Blocking Senders: This refers to preventing emails from specific senders or domains from reaching your organization’s inboxes, a crucial step in managing spam and malicious emails.
- Enabling Archive Mailboxes: Archive mailboxes provide users with additional email storage space. They allow for archiving old emails that are no longer actively needed but may need to be accessed in the future for compliance or reference.
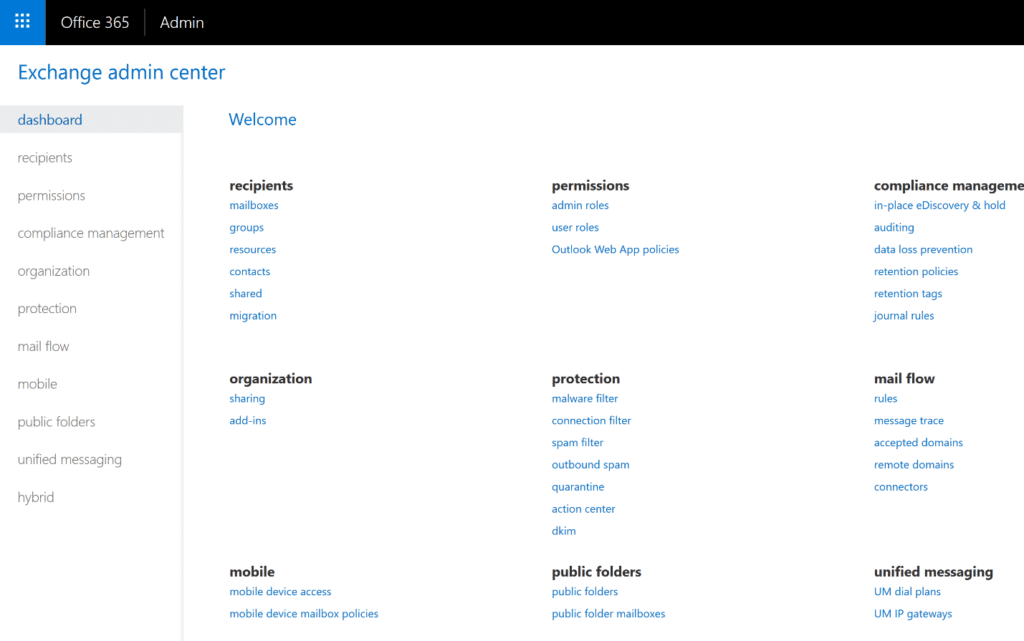
The web interface for the Office 365 Exchange admin center is nearly identical to that of Exchange 2013 when it was first added to Exchange on-premises. Since then, Microsoft has been integrating many services into its Office 365 suite (Later called Microsoft 365), as described in the Exchange Online history section above. Below is the initially released Exchange Online admin center web interface.
But later, in 2021, Microsoft officially separated the Exchange Online Admin Center from the Microsoft 365 Admin Center; in fact, Microsoft has provided many admin center web consoles for different services, e.g., Exchange Online, SharePoint Online, and Teams, yet it keeps the users and group management, along with other features, within the Microsoft 365 Admin Center.
Difference Between Microsoft 365 and Exchange Online Admin Centers
While the Microsoft 365 admin center is intended to offer a unified experience for managing various services, including Exchange Online, some email-specific tasks may still be accessed through the Exchange Online admin center. The exact interface and features may have evolved, so referring to the latest Microsoft documentation or the admin centers for the most current information is recommended.
Let’s explore the difference between the Microsoft 365 admin center and the Exchange Online admin center (EAC):
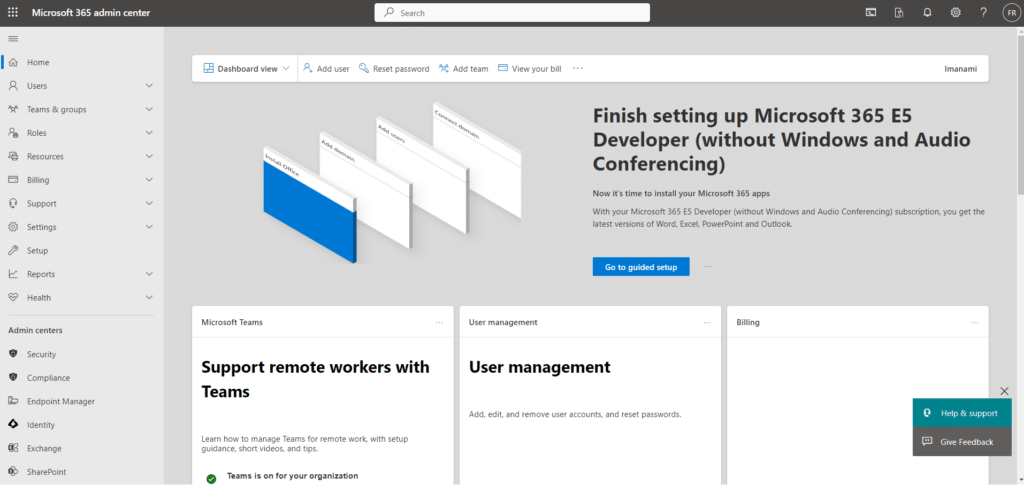
Microsoft 365 Admin Center
- The Microsoft 365 admin center is a centralized portal for managing all Microsoft 365 services, including Exchange Online, SharePoint Online, OneDrive for Business, Microsoft Teams, and more.
- It provides a unified experience for administrators to configure settings, manage users, review reports, and administer various aspects of their Microsoft 365 subscription.
The left navigation pane in the Microsoft 365 admin center categorizes different services, and administrators can navigate to specific admin centers for each service from here.
- You can access the Microsoft 365 Admin Center using the following URL https://admin.microsoft.com/
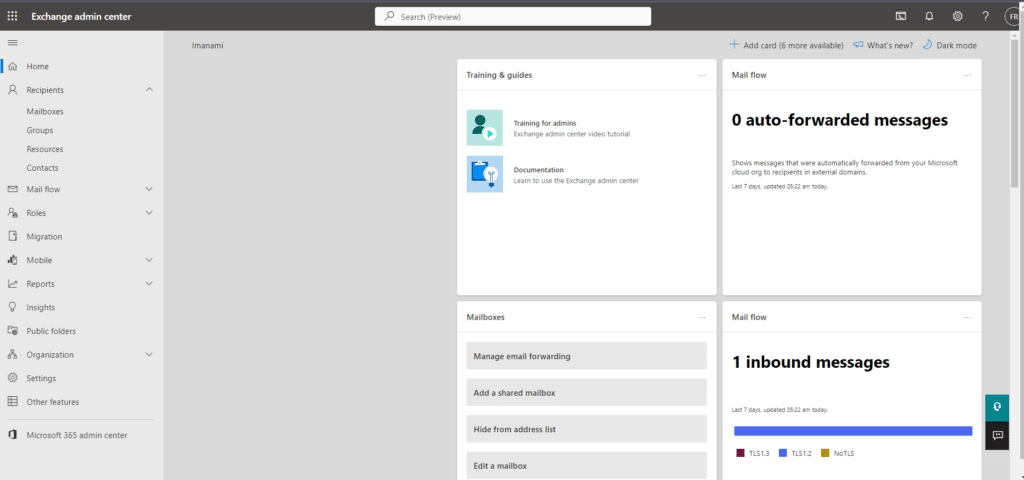
Exchange Online Admin Center (EAC)
- The Exchange Online admin center is specifically designed to manage Exchange Online.
- Administrators can perform email-related tasks, such as managing mailboxes, configuring mail flow rules, setting up anti-spam policies, and handling other email-related settings.
- There was a shift from the classic Exchange Admin Center to the new Exchange Admin Center (EAC) to incorporate Exchange features directly into the Microsoft 365 admin center. The specific interface might vary based on updates and changes implemented by Microsoft.
- You can access the new EAC using this link: https://admin.exchange.microsoft.com.
Step by Step Guides for Administering Exchange Online
Creating a user mailbox using the Microsoft 365 Admin Center
Creating a user mailbox in Microsoft 365 involves using the Microsoft 365 admin center.
Follow the steps below to create a user and assign a mailbox and other services.
- Go to https://admin.microsoft.com/ and log in with your administrator account.
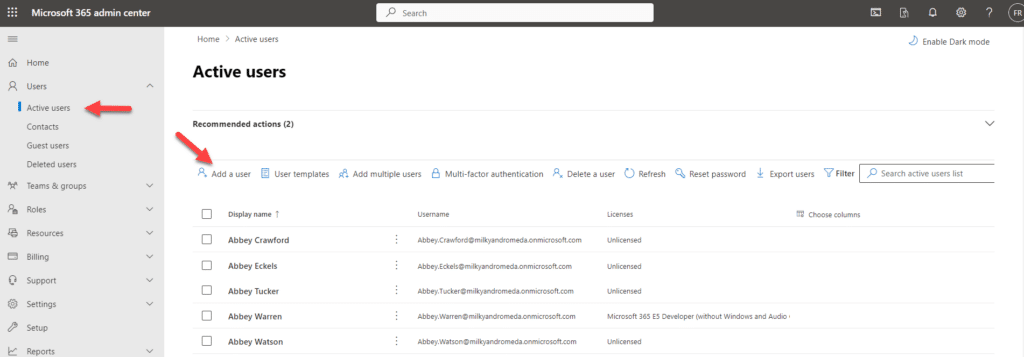
- In the left navigation pane, click “Users” and select “Active users.”
- Click on the “Add a user” button.
- Fill in the required information for the new user, including:
- First name: Enter the user’s first name.
- Last name: Enter the user’s last name.
- Display name: The display name for the user.
- Username: This will be the user’s email address (e.g., user@example.com).
- Password: Set a strong password for the user.
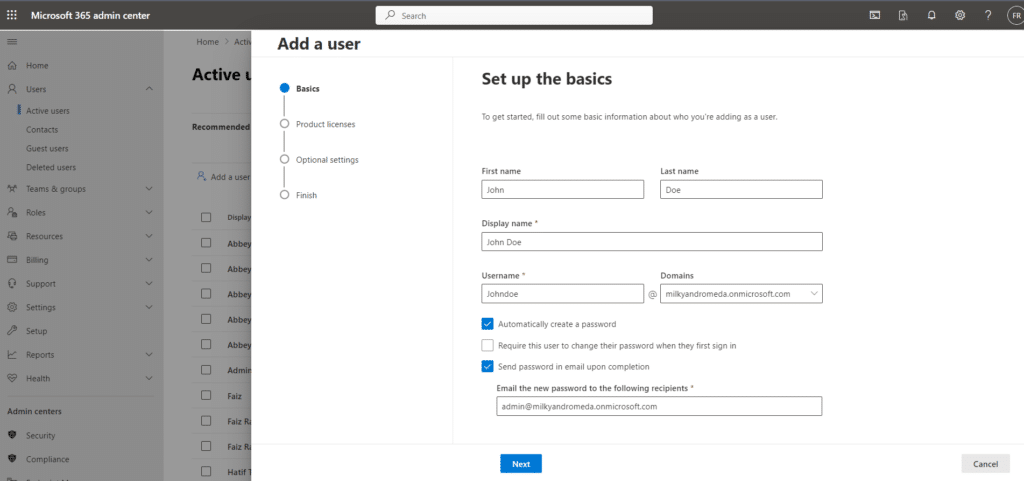
- Click “Next”.
- Under “Product licenses,” select the appropriate license for Exchange Online.
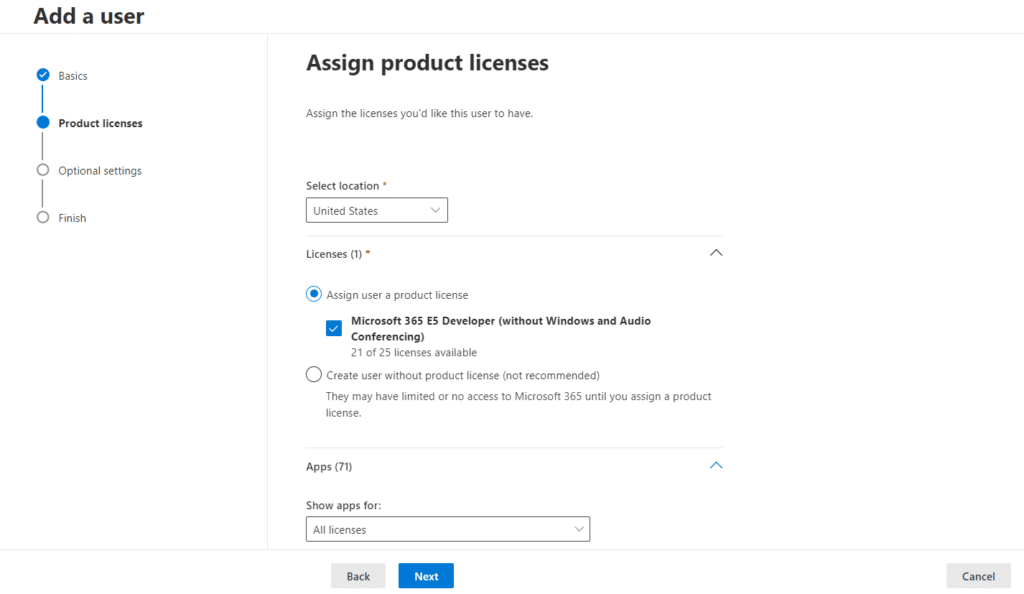
- You can configure additional options such as mailbox settings, group memberships, and roles.
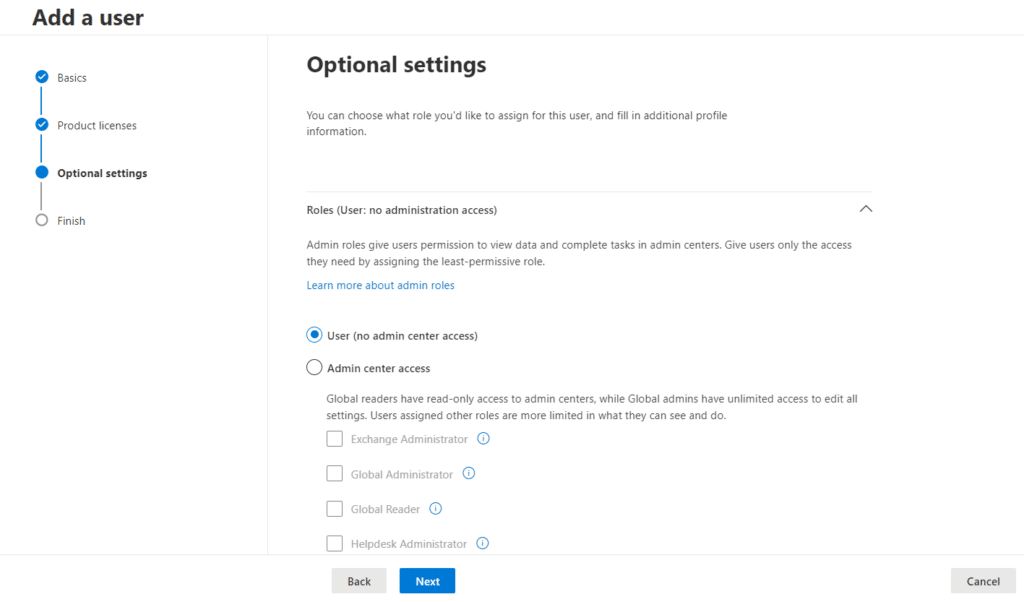
- Scroll down to see the user profile section, add the information accordingly, and click Next.

- Review the user details and click the “Finish Adding” button to create the user.
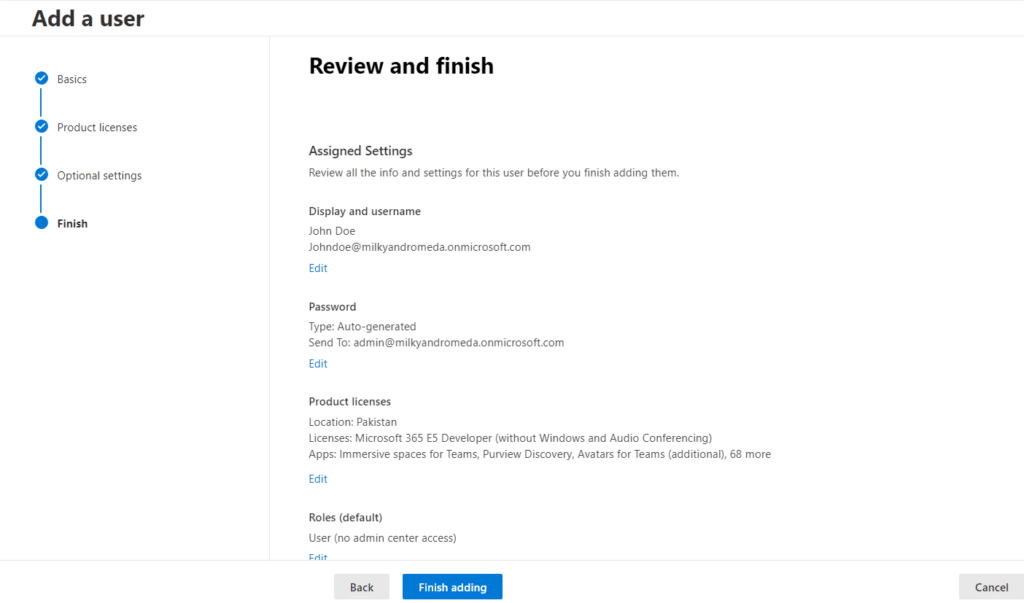
A confirmation window will show that a newly created user has been added to the active users list. Click “Close” to return to the Microsoft 365 Admin Center.
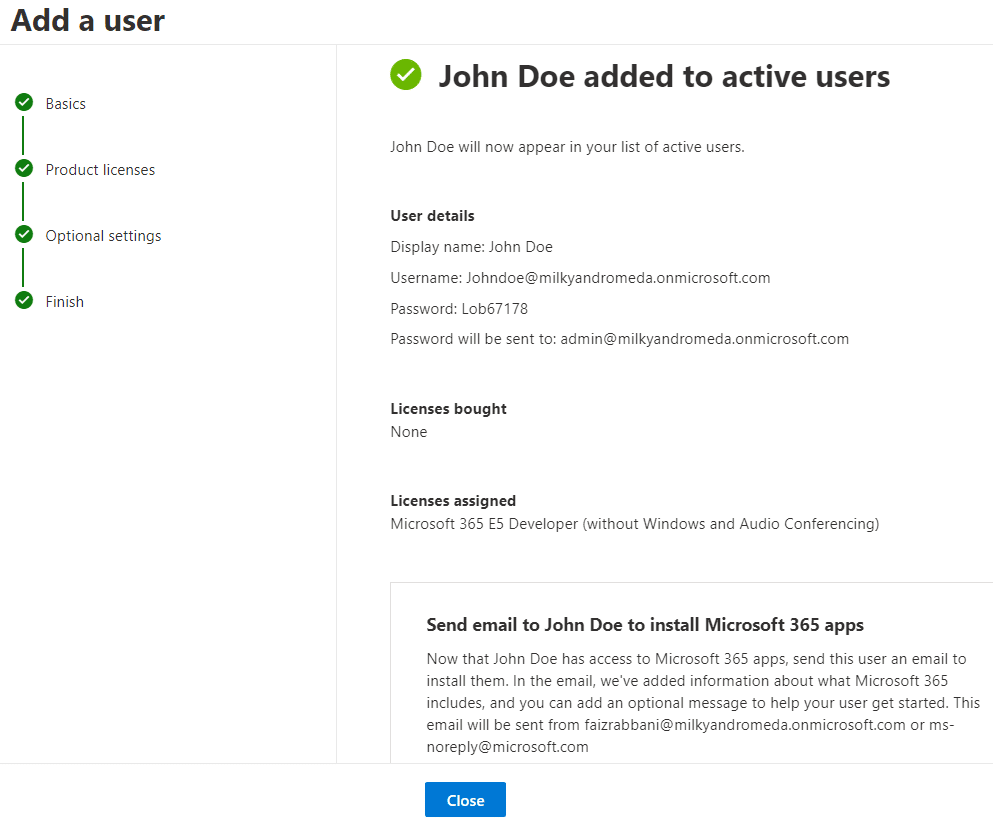
Remember that creating a user mailbox also assigns users an Exchange Online license, allowing them to access their mailbox and other associated services.
Shared mailboxes enable multiple users to access mail, contacts, calendar items, and related data stored in a single mailbox. For instance, you might have a Customer Support mailbox associated with the support@yourcompany.com address, which three employees are responsible for monitoring.
To create a shared mailbox in Exchange Online, you can use either the Microsoft 365 Admin Center to navigate to the Microsoft Exchange Admin Center or the link below to log into the Admin Center EAC. Follow the steps below to create a shared mailbox:
- Log in to https://admin.exchange.microsoft.com.
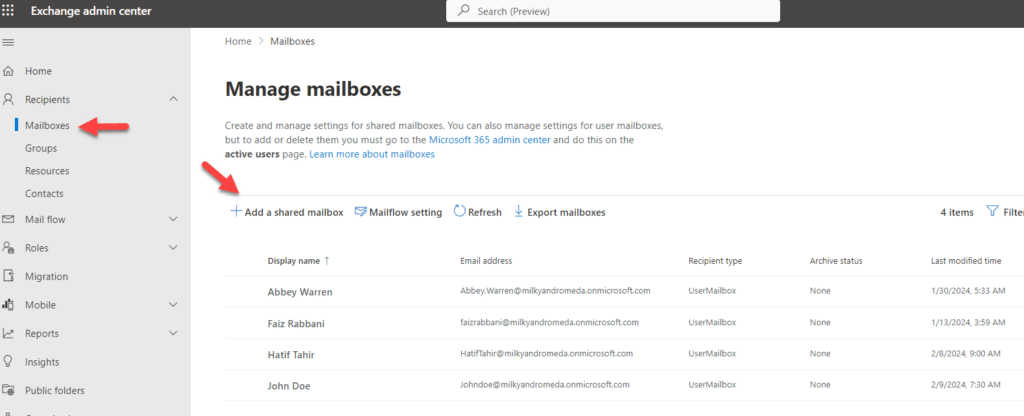
- In the Exchange Admin Center, go to “Recipients” > “Mailboxes.”
- Click the “Add a shared mailbox” button to create a new one.
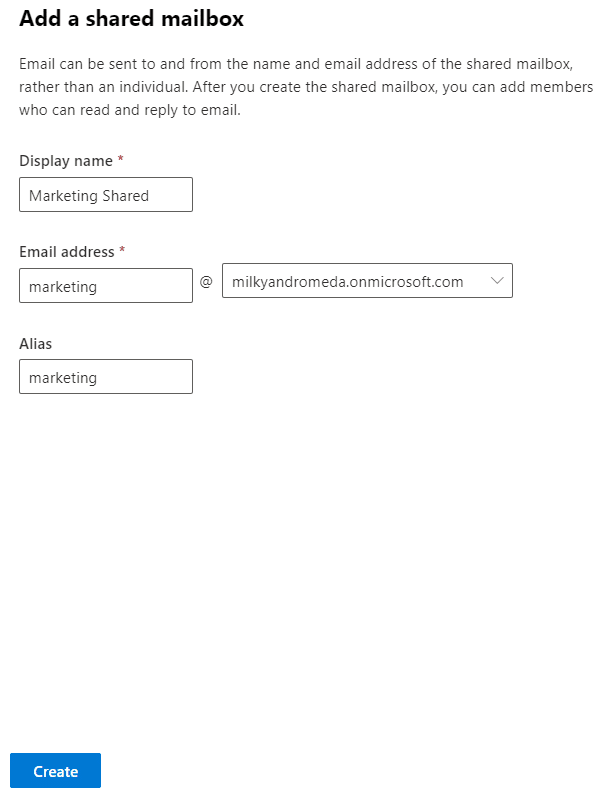
- Fill in the required details for the shared mailbox, including:
- Enter a name for the shared mailbox.
- Specify the email address and alias for the shared mailbox.
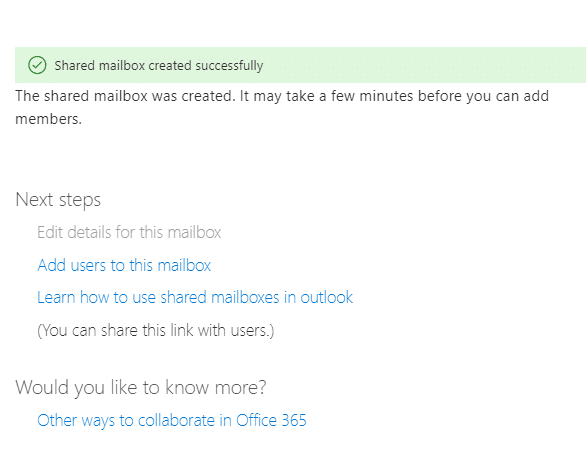
- A “Share mailbox created successfully” confirmation window will show; you can add members to this shared mailbox by clicking on the “Add users to this mailbox” link.
Creating Resource Mailboxes (Room or Equipment)
You can use the Admin Exchange Center to create a resource mailbox in Exchange Online, typically for scheduling resources such as meeting rooms or equipment.
Follow the steps below.
- Log in to https://admin.exchange.microsoft.com.
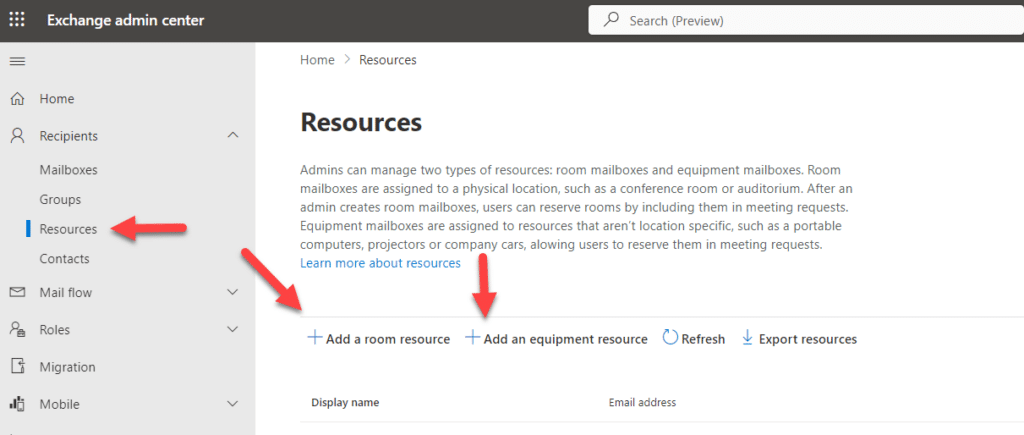
- In the Exchange Admin Center, go to “Recipients” > “Resources.”
- Click the “Add a room resource” or “Add equipment” buttons to create a new resource mailbox.
- Fill in the required details for the resource mailbox, including:
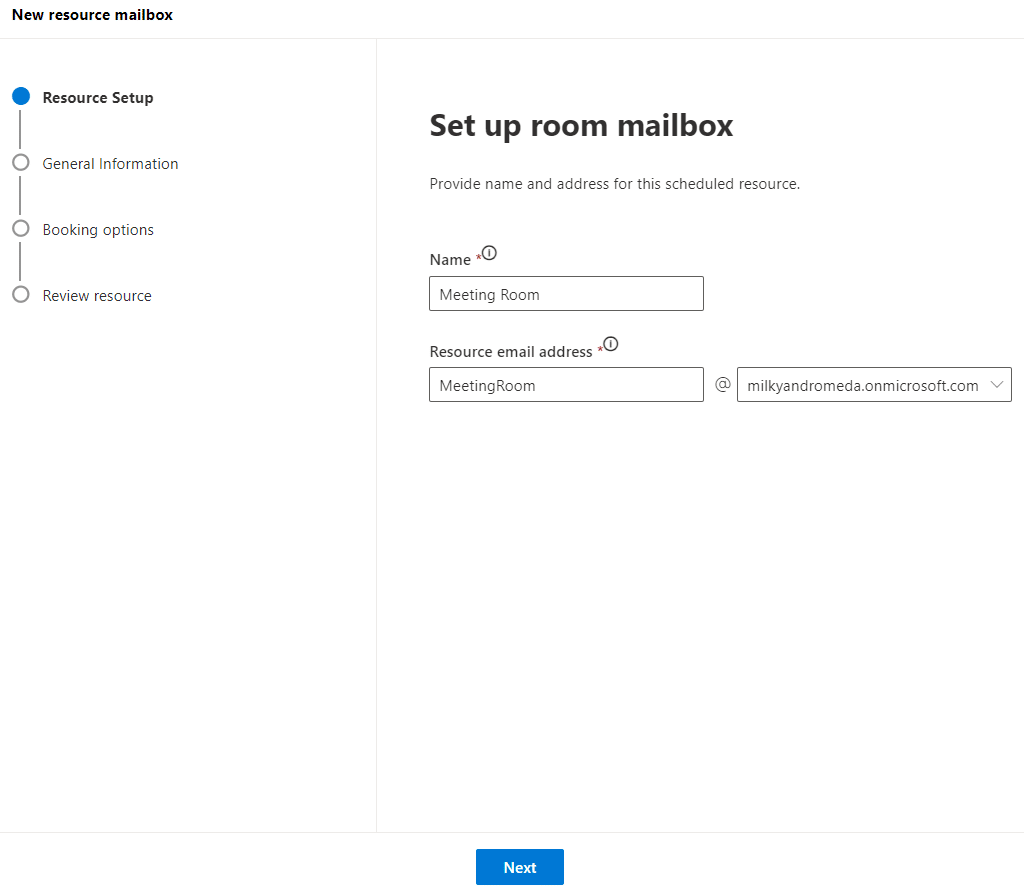
- Enter a name for the resource mailbox.
- Specify the email address and domain for the resource mailbox, and click Next.
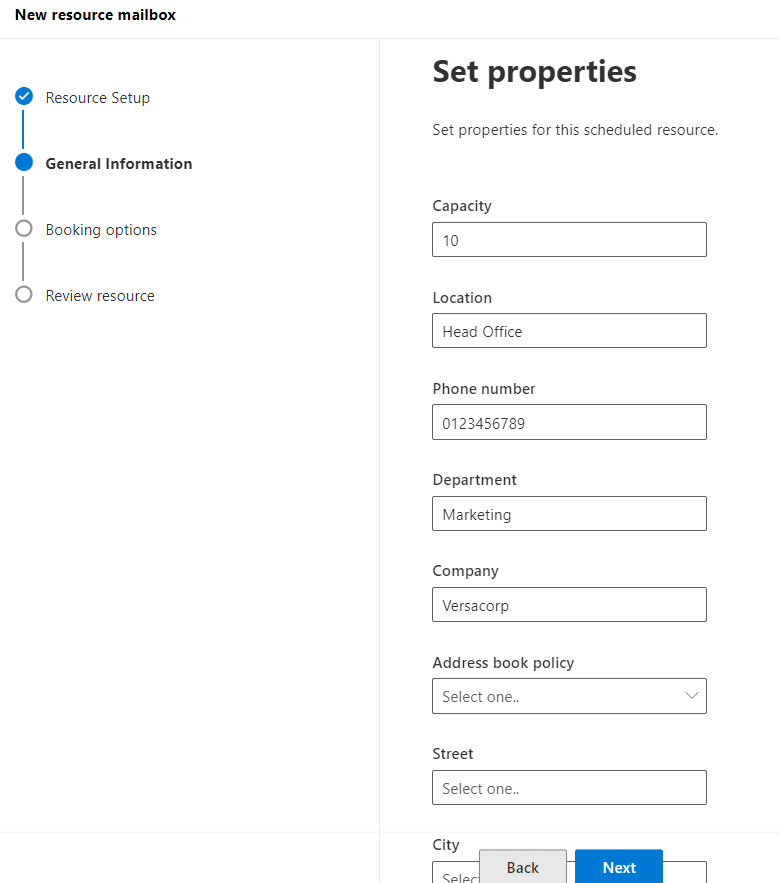
- On the General Information page, you can provide additional information, e.g., Capacity, Location, Phone number, Department, etc. Click Next.
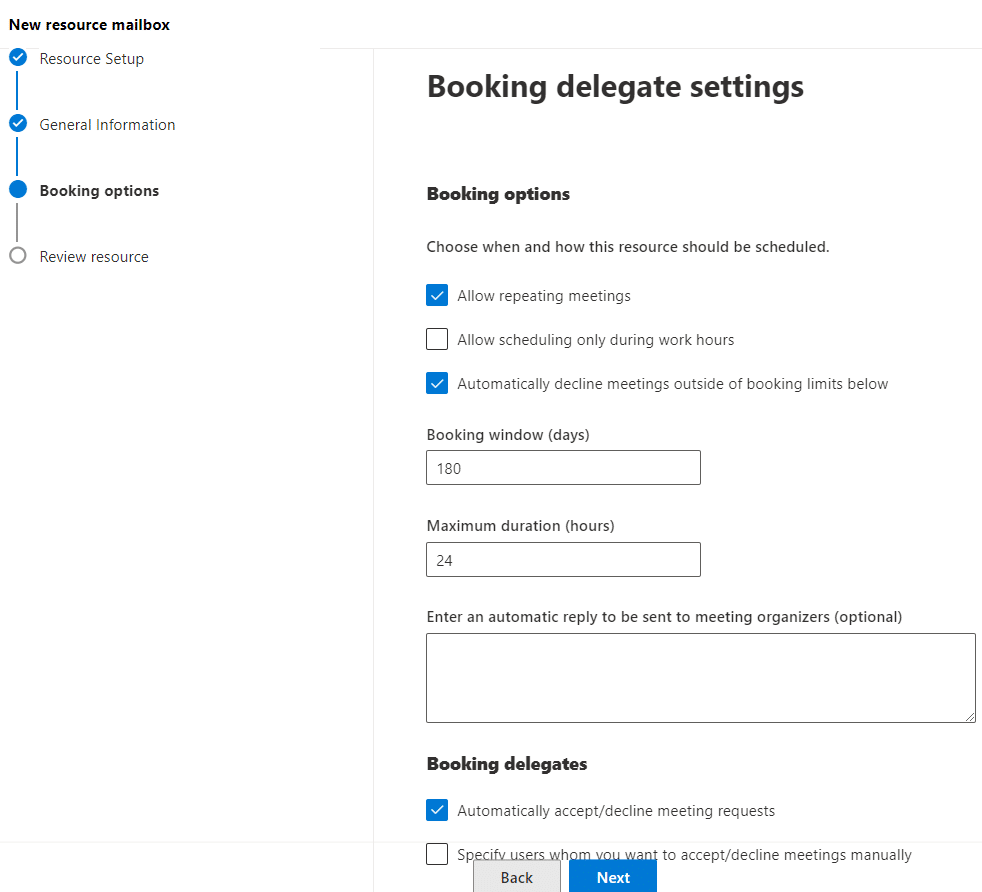
- On the Booking Options page, you can set the Booking Delegate settings, e.g., Booking Window, Maximum Duration, and other options. Click Next.
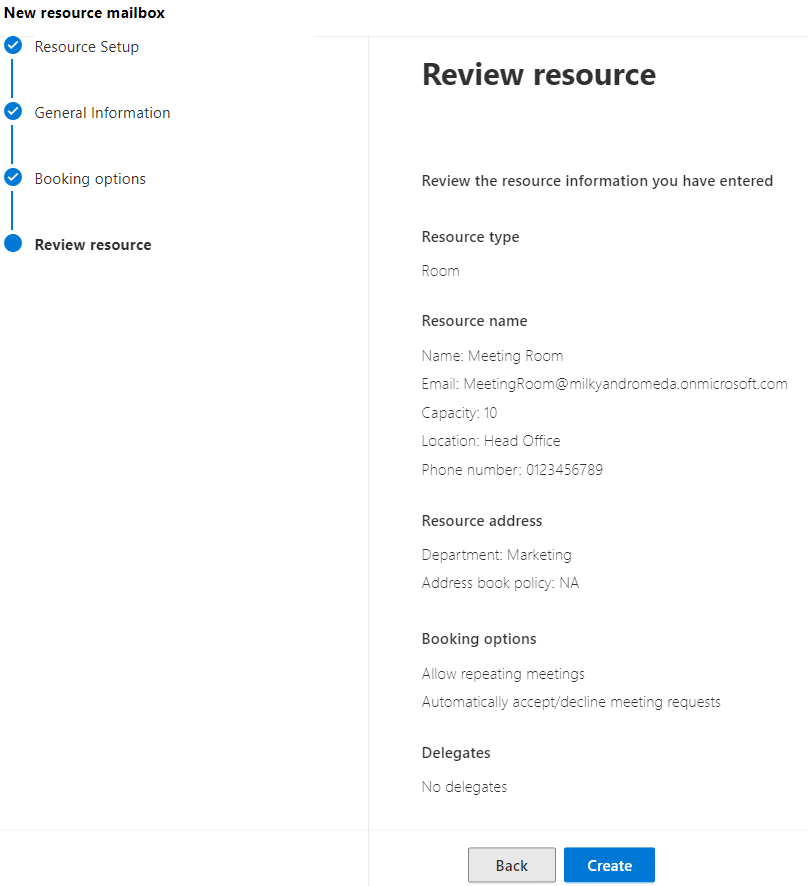
- Review the information you provided for this Room Mailbox and click “Create” to create a room mailbox. You can also click the “Back” button to return to the wizard.
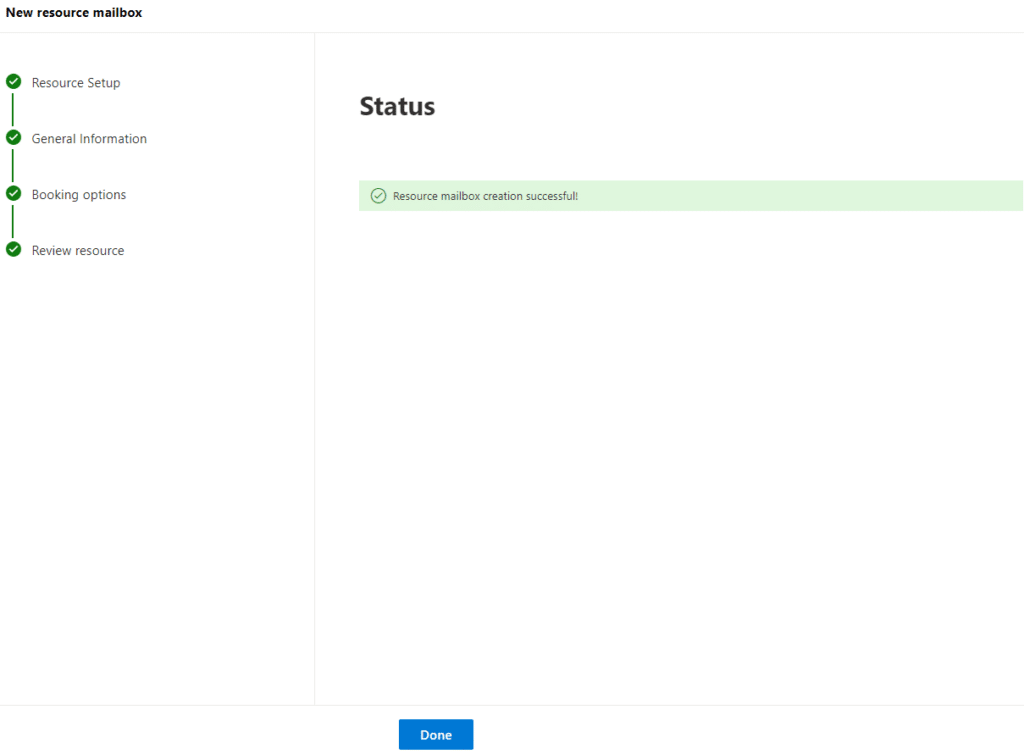
- A status window will appear confirming the creation of the Resource mailbox; click on the “Done” button to return to the Exchange Admin Center.
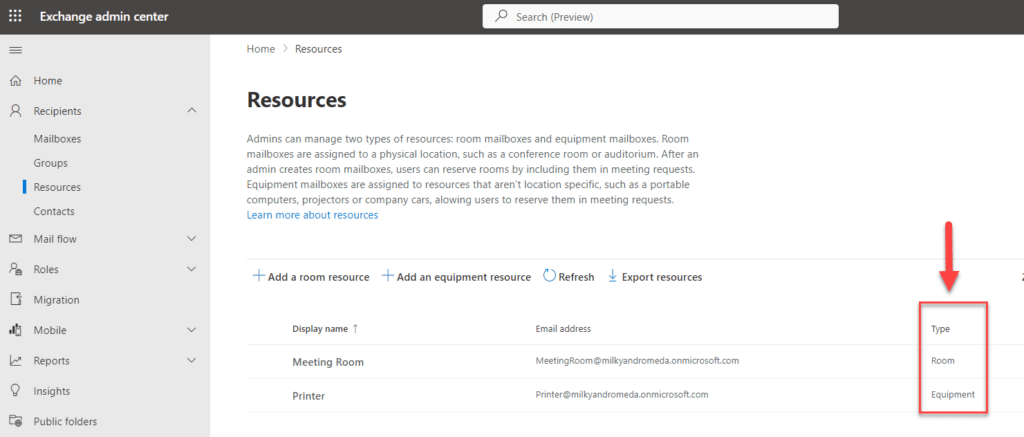
- The process for creating equipment mailboxes is the same; you will see your resource mailboxes under the Resources section. The screenshot below shows a room and Equipment mailbox.
Specifying SMTP Addresses for a Recipient
Most organizations have multiple DNS domains for which they accept the inbound email. For example, you might have yourorganization.com, yourorganization.net, and so on. To get all your domains working with Microsoft 365, you must set them up in the service. A comprehensive wizard walks you through identifying your domains, verifying your ownership of those domains, and then setting up the proper DNS records to get traffic from other internet users to your Microsoft 365 tenant. To access that wizard, go to https://admin.microsoft.com/AdminPortal/Home#/Domains and click the Add Domain button.
Once your domains are correctly set up on your tenant, you can add additional SMTP addresses for a recipient, such as a user mailbox, group, or contact. Follow the steps below in the Exchange Admin Center (EAC).
- In the Exchange Admin Center, go to “Recipients” >” Mailboxes.”
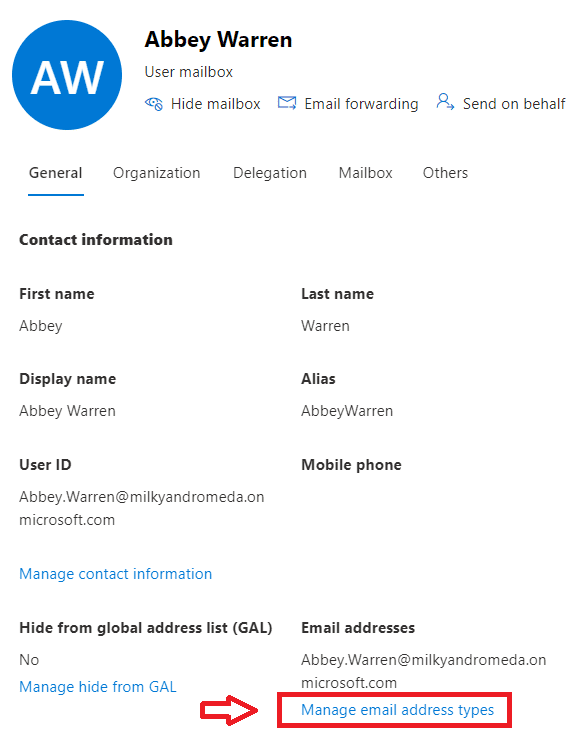
- Click on the recipient to view its properties. Properties will be shown on the right side in a popup window.
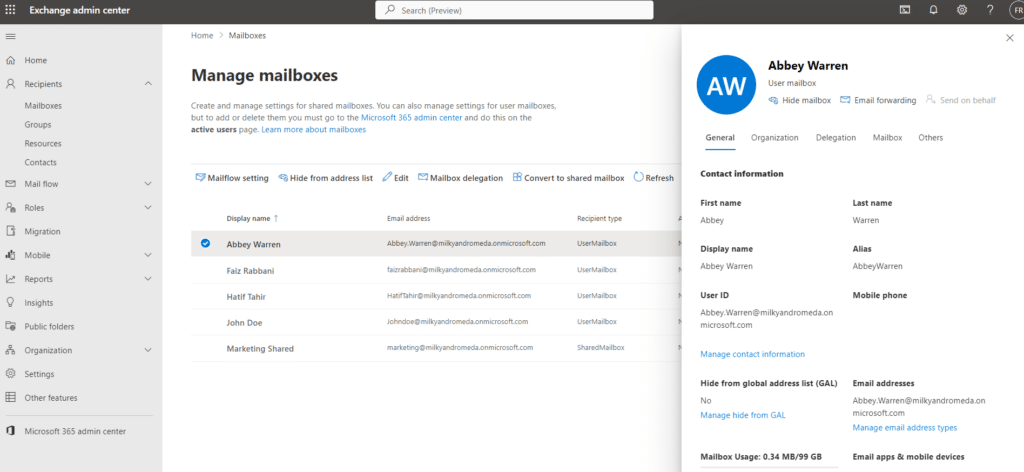
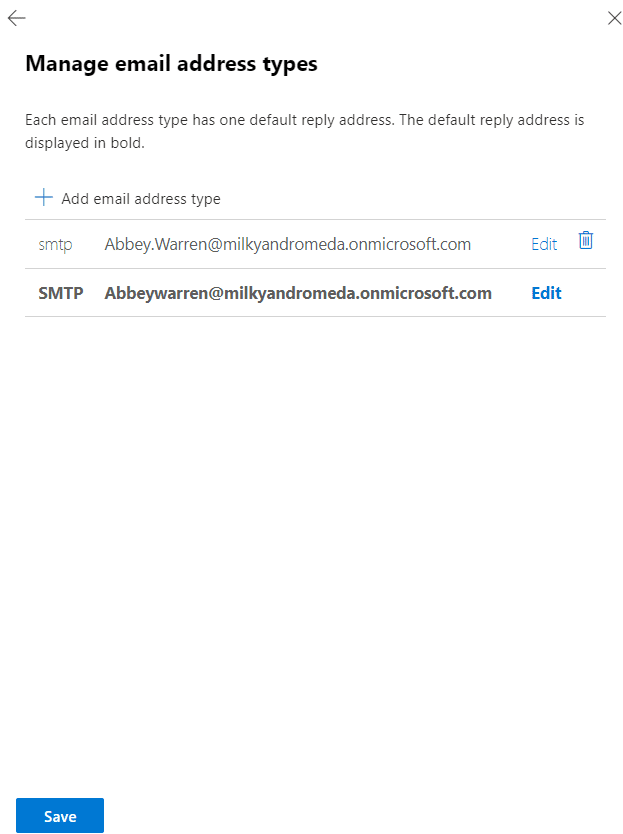
- On the “General” tab, click “Manage email address types” in the recipient properties” at the bottom right corner.
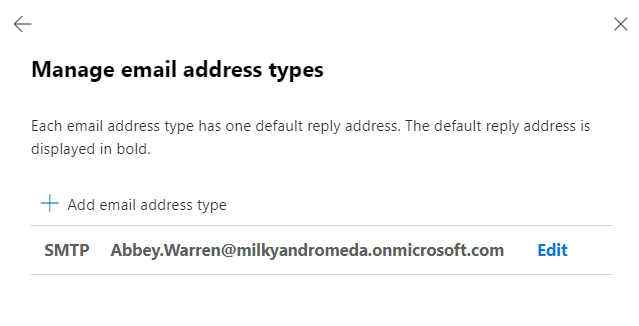
- Click on “Add email address type”.
- Enter the new SMTP address and select the domain from the drop-down list view. Click “OK” to add a new SMTP address.
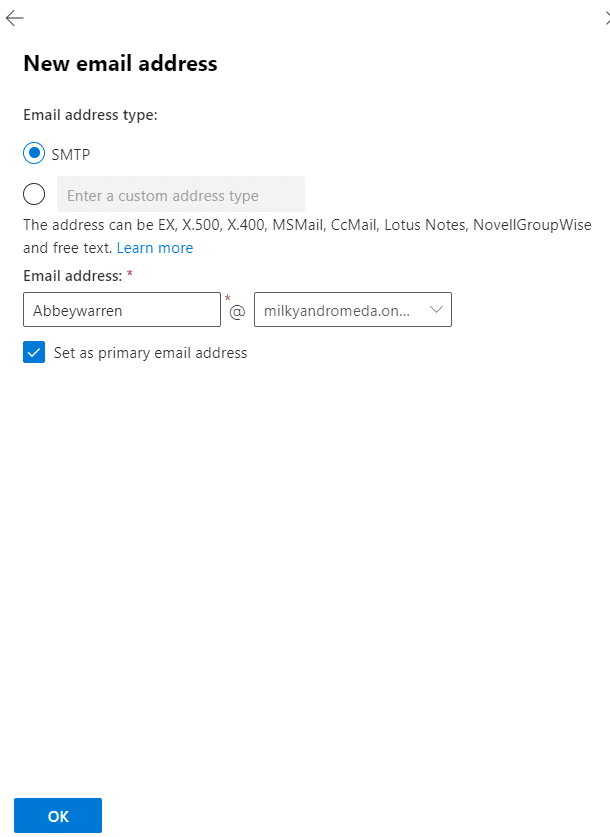
- Click “Save” to save the changes on user properties.
Granting Send on Behalf and Full Access Permissions for a Mailbox
In many organizations, senior managers have assistants or other staff to help manage their Mailboxes. In these cases, you need to assign user permissions to access the mailbox and/or send and receive mail on behalf of the user.
Permissions in Exchange Online are managed through the Exchange Admin Center (EAC), where administrators can specify which users have “Send on Behalf” or “Full Access” rights to other mailboxes. This system provides flexibility in delegation, allowing for efficient workflow and communication management while ensuring that sensitive information remains protected.
Send on Behalf Permissions
The Send on Behalf permission allows a designated user or group to send an email that appears to come from another user, albeit with an indication that it was sent on behalf of the original mailbox owner. This is particularly useful for assistants or deputies who manage communication for senior staff.
Implications: When an email is sent using “Send on Behalf” permissions, the recipient sees that it was sent by one person on behalf of another, maintaining transparency. However, this does not grant the delegate access to read or manage the mailbox’s content.
Full Access Permissions
Full Access permission grants a user complete control over another’s mailbox, allowing them to read, delete, and manage emails, calendars, and contact information. Unlike “Send on Behalf,” there’s no indication to recipients that emails are being sent by someone other than the mailbox owner.
Implications: This level of access is significant, as it allows the delegate to manage nearly all aspects of the mailbox, potentially including sensitive information. Therefore, cautiously assigning “Full Access” permissions is critical, ensuring that only trusted individuals receive them.
Here’s how you can set “Send on Behalf” or “Full Access” permissions using the Exchange Admin Center (EAC):
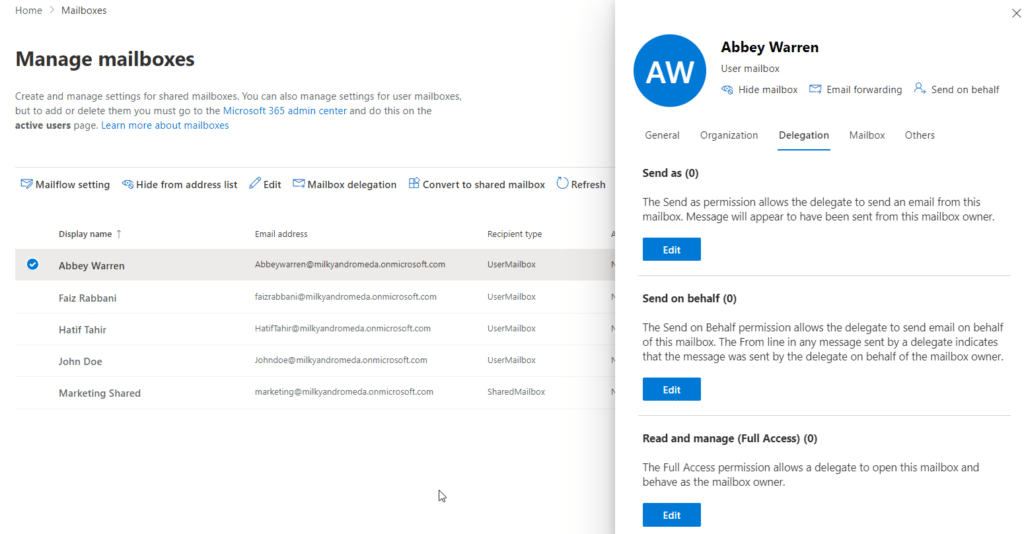
- Navigate to “Recipients” > “Mailboxes” in the EAC.
- Select the mailbox to set “Send on Behalf” permissions.
- Click on “Delegation” in the mailbox properties and then click on “Edit” under the “Send on behalf” section.
- Click on the “Add members” button to add a user or group with “Send on Behalf” permissions for the selected mailbox.
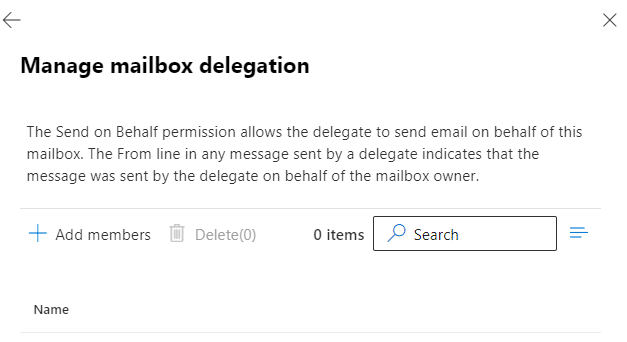
- Search for and select the user or group and click “Save.”

- Click on “Confirm”.
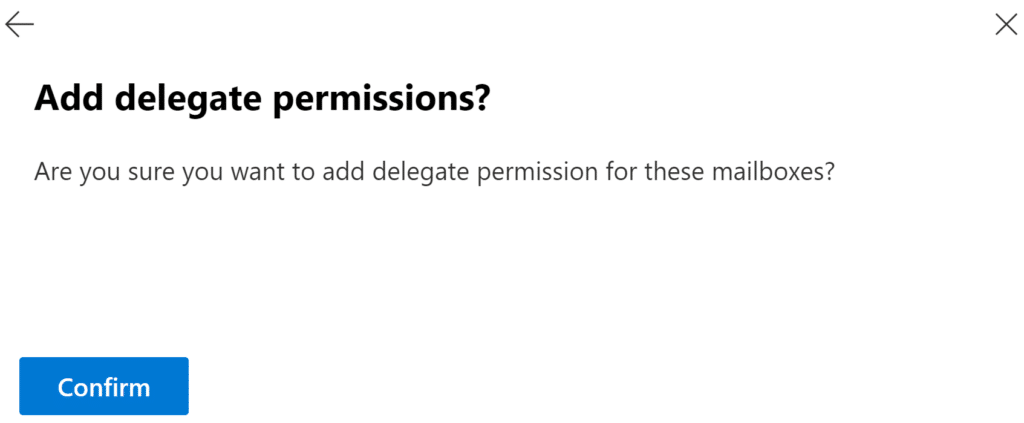
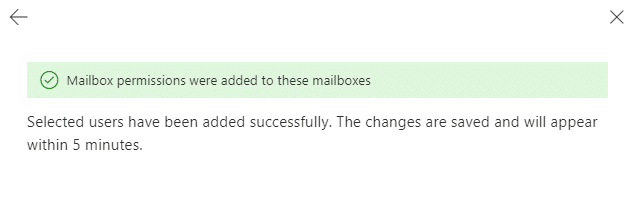
- A confirmation window will show the message that the selected member has been added and will appear within 5 minutes. Click the arrow on the top left to return to the “Delegation” tab on user properties.
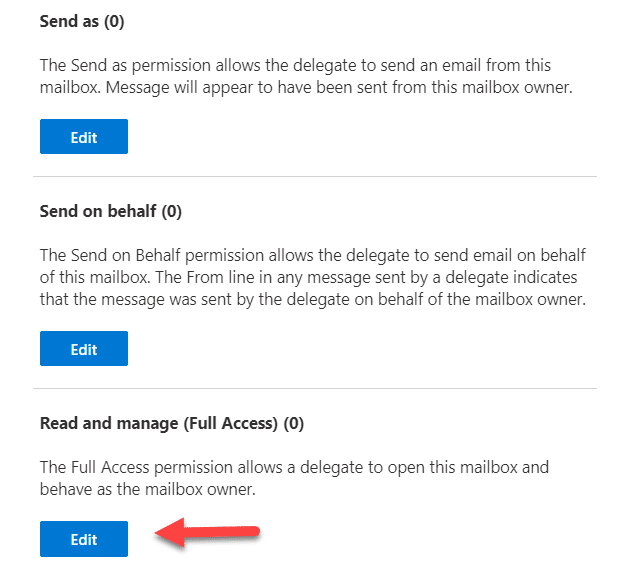
- You can click on the “Edit” button under the “Read and Manage (Full Access)” section and then follow steps 3 to 7 to add users or groups in that section.
Creating a Distribution list
A distribution list, sometimes called a distribution group, is a single point of contact for a group of users. You might have a list that includes all the manager’s direct reports, another that consists of all company employees, and yet another with all users involved in a particular business project. Anyone can email the whole group by simply emailing the distribution list.
Distribution lists are different than Office 365 groups because they function only within the context of email. Groups include a distribution list but enable other functionality in applications like SharePoint, Microsoft Teams, etc.
You can use Exchange Admin Center to create a distribution list in Exchange Online.
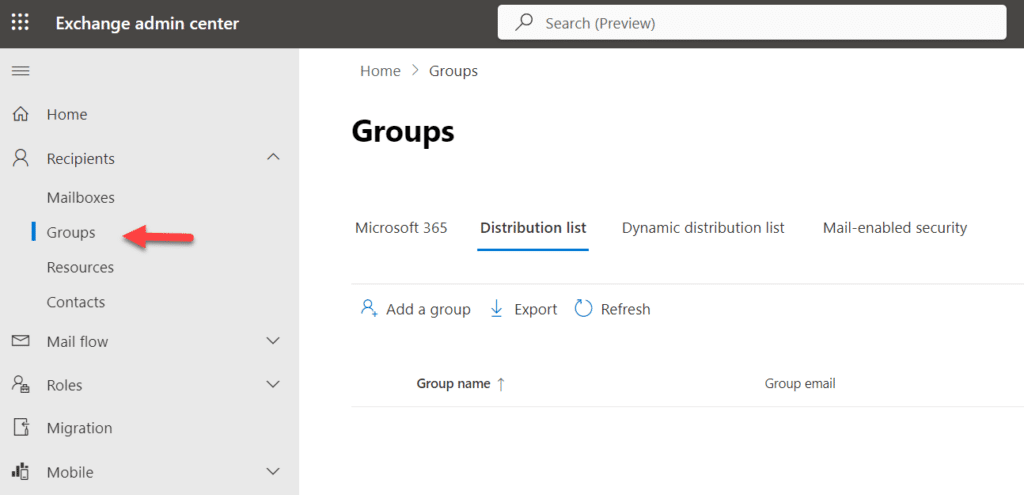
- In the Exchange Admin Center, go to “Recipients” > “Groups.”
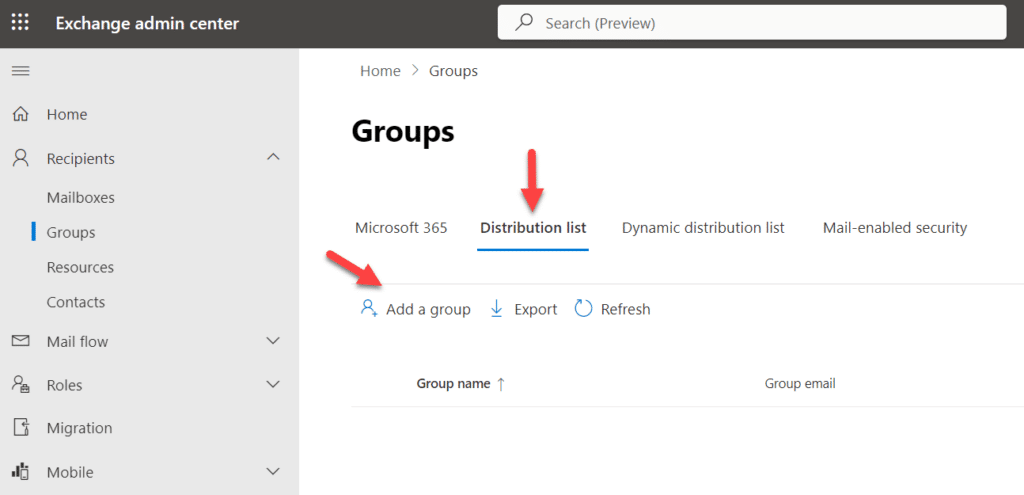
- Click on the “Distribution List” tab, then click on the “Add a group” icon to create a new distribution list.
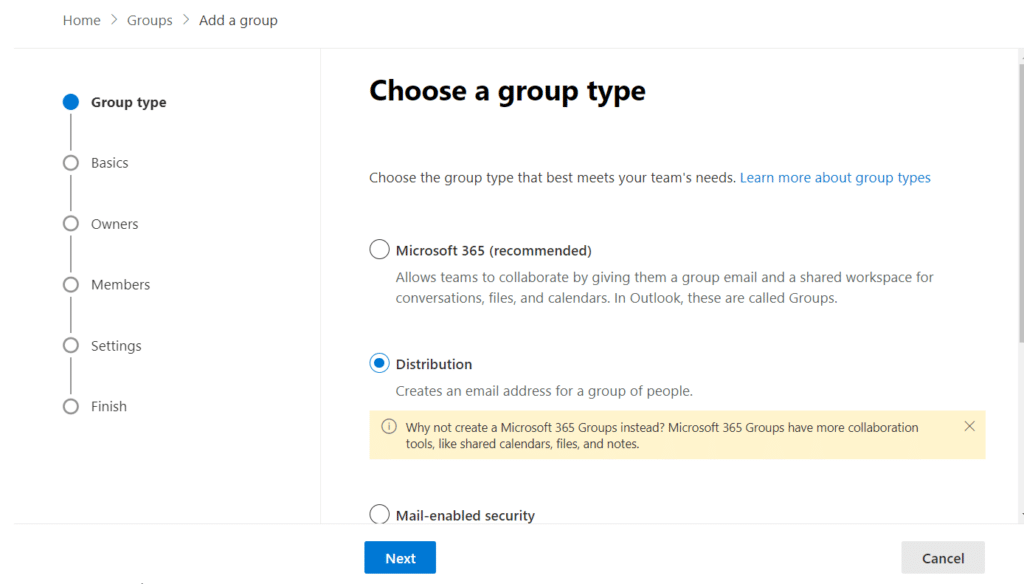
- On the “Choose Group Type” page, select “Distribution” and click “Next.”
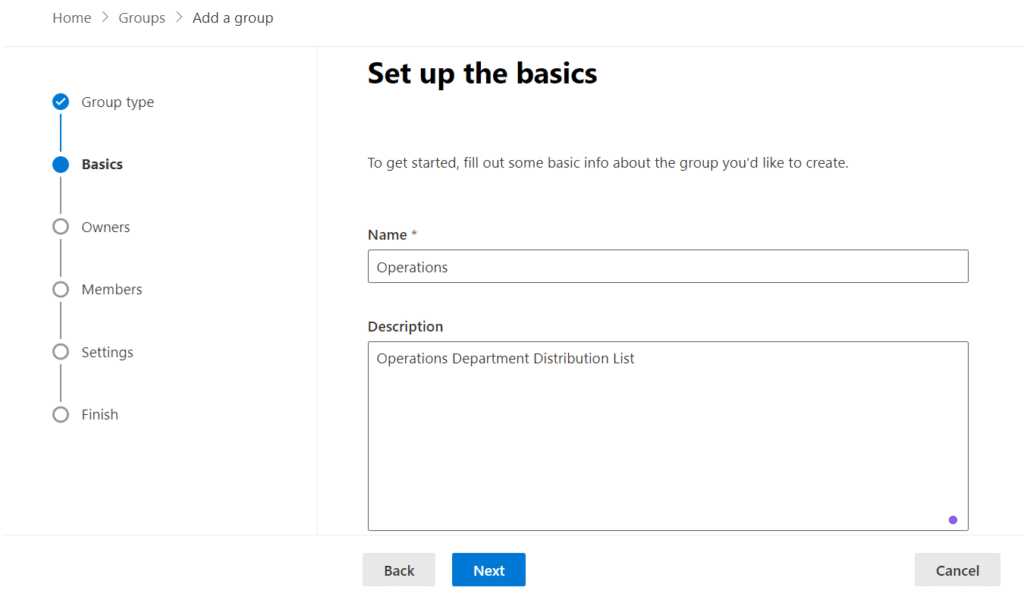
- Fill in the name and description for the distribution list and click “Next.”
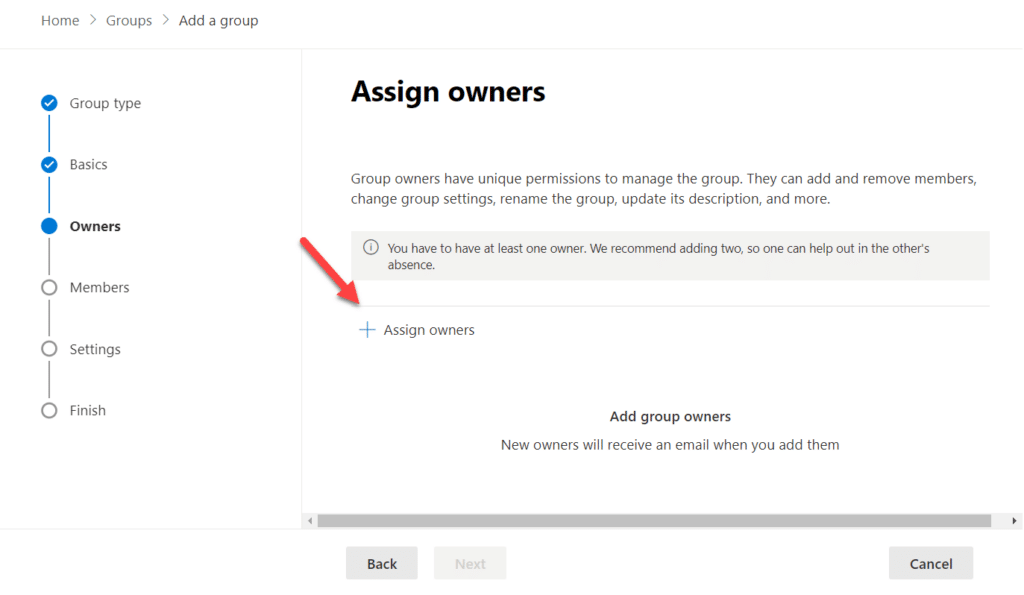
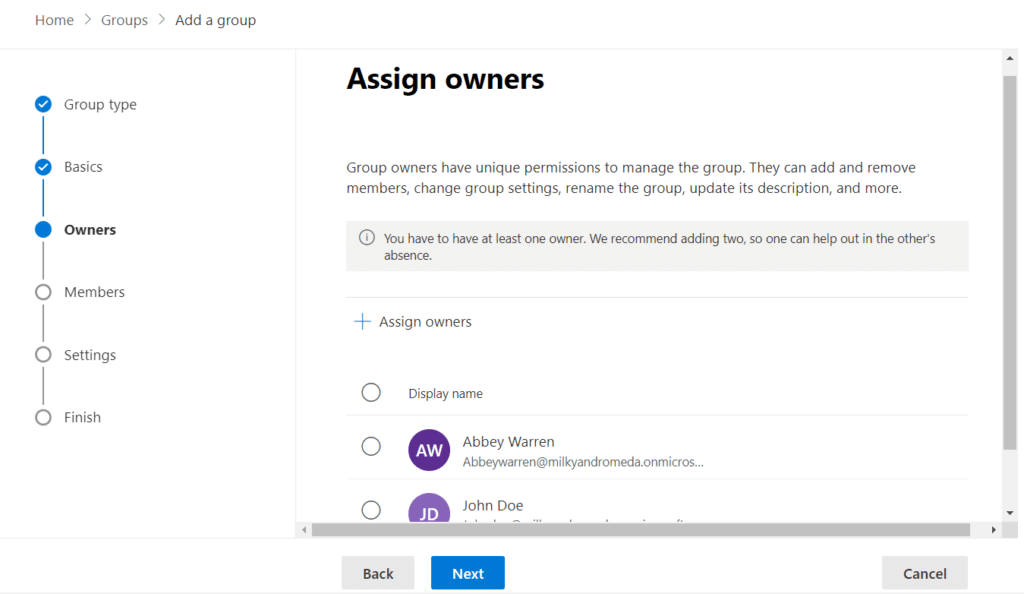
- Click on the “Assign Owners” button.
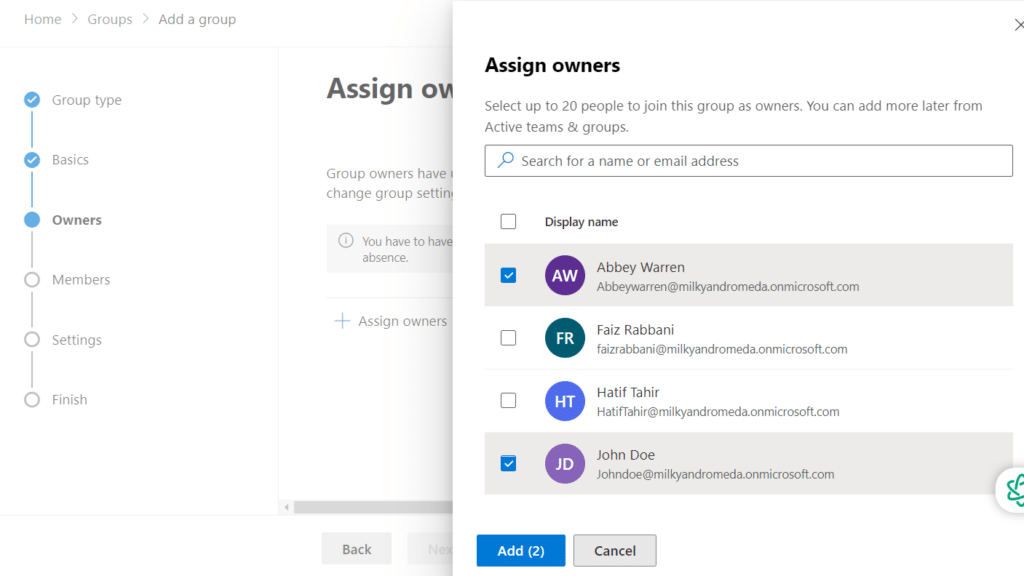
- Search and select owners; click on the “Add” button to add owners.
- Click “Next” on the Assign Owner page to move forward in the wizard.
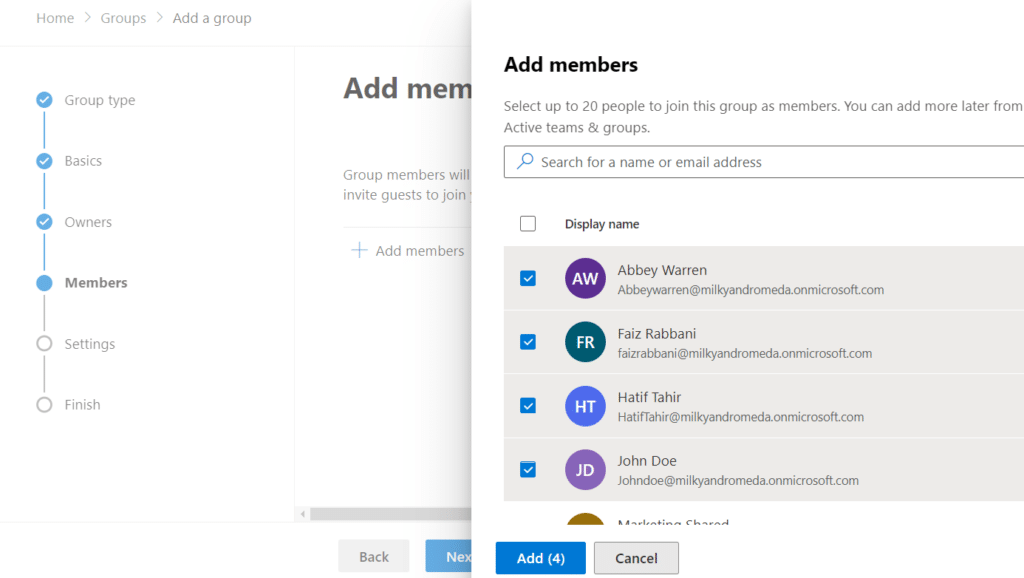
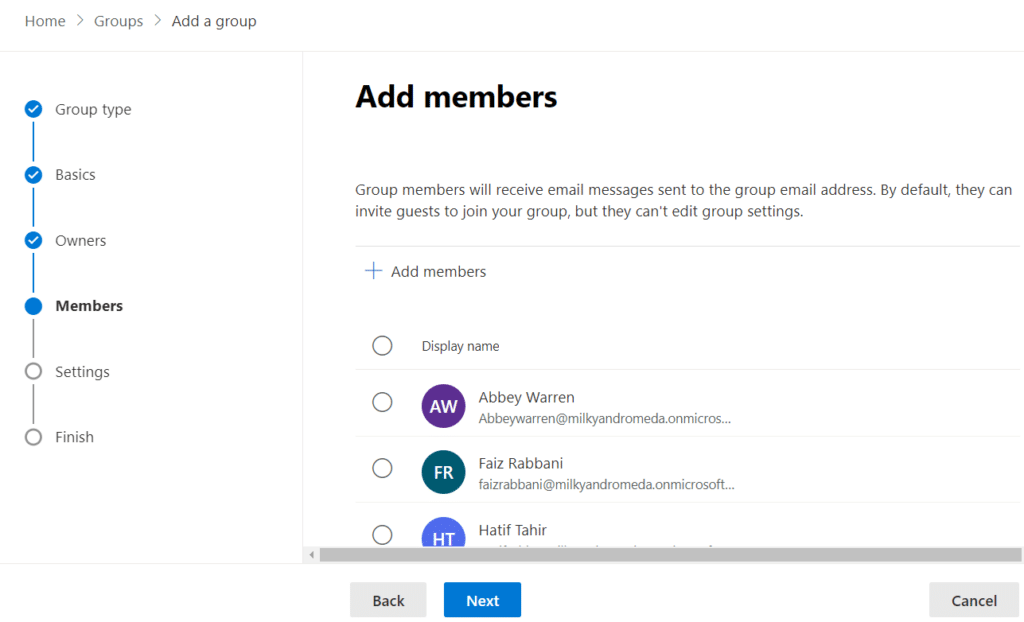
- Add members to the distribution list by clicking the “Add members” button and selecting users, then clicking “Next.”
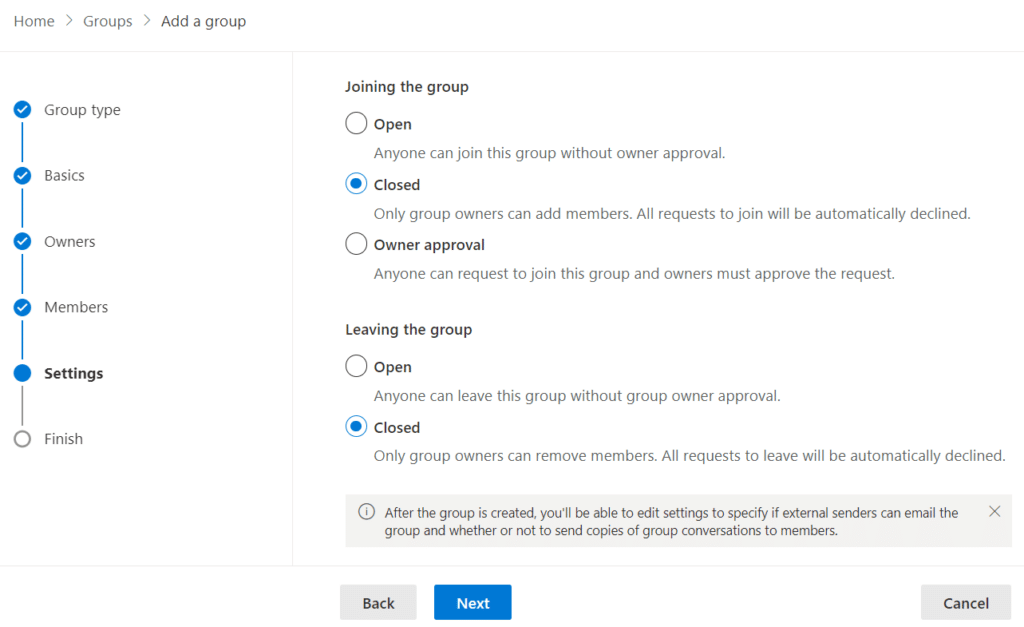
- Provide the email address for the distribution list; you can also select the communication option for outside your organization.
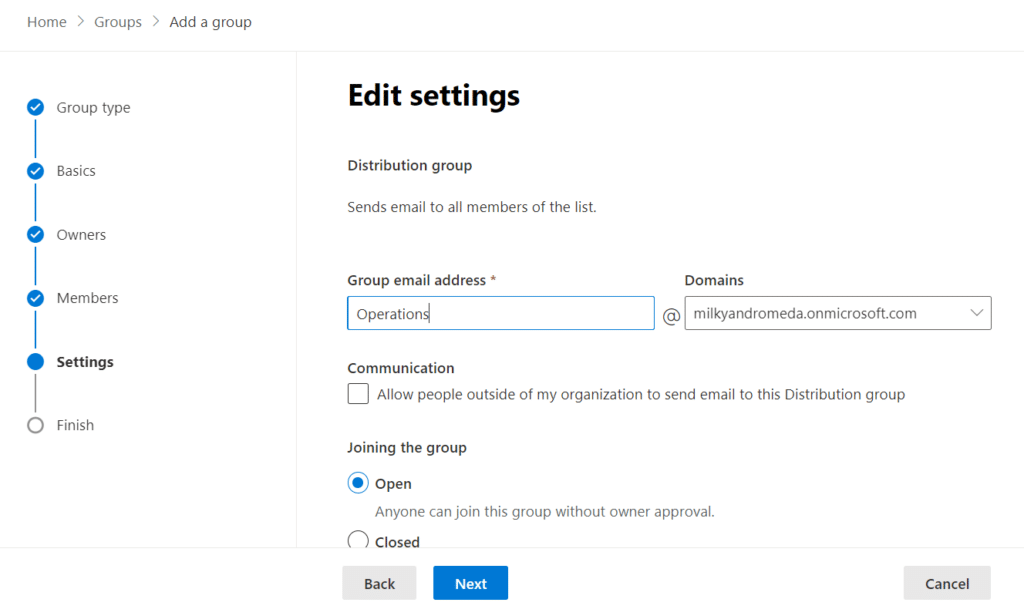
- You can also control the group membership by selecting options (Open, Closed, or Owner Approval). Select accordingly and click “Next”.
- An Open group allows anyone within the organization to join without needing approval from the group owner. This setting facilitates easy participation and is ideal for groups where shared information is not sensitive and broad membership is encouraged.-
- A Closed group restricts membership to only those the group owner or administrator adds. Individuals cannot request to join; they must be directly invited. This setting suits groups dealing with sensitive information or where membership needs to be tightly controlled.
- For groups set to Owner Approval, individuals can request to join the group, but the group owner must approve their membership. This approach balances open and closed, allowing the owner to vet potential members while permitting individuals to express interest in joining.
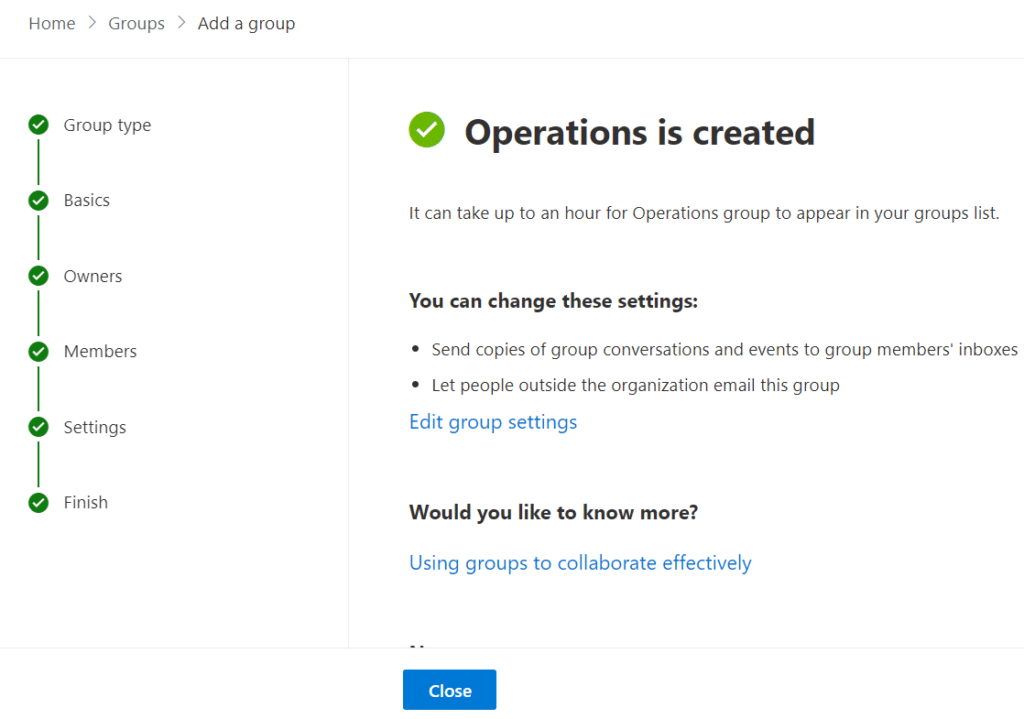
- Review the information and change if required; on the Review and finish adding page, click the “Create Group” button.

- Click “Close” on the confirmation page to return to the groups section.
Create a Dynamic Distribution List in the Exchange Online Admin Center
Dynamic distribution lists (DDLs) automatically update their membership based on the defined recipient filter criteria, so you don’t need to add or remove members manually. They help manage distribution lists based on dynamic criteria such as department, location, or job title.
Follow the steps below to create dynamic distribution lists in Exchange Online.
- In the Exchange Admin Center, click “Recipients” and select “Groups.”
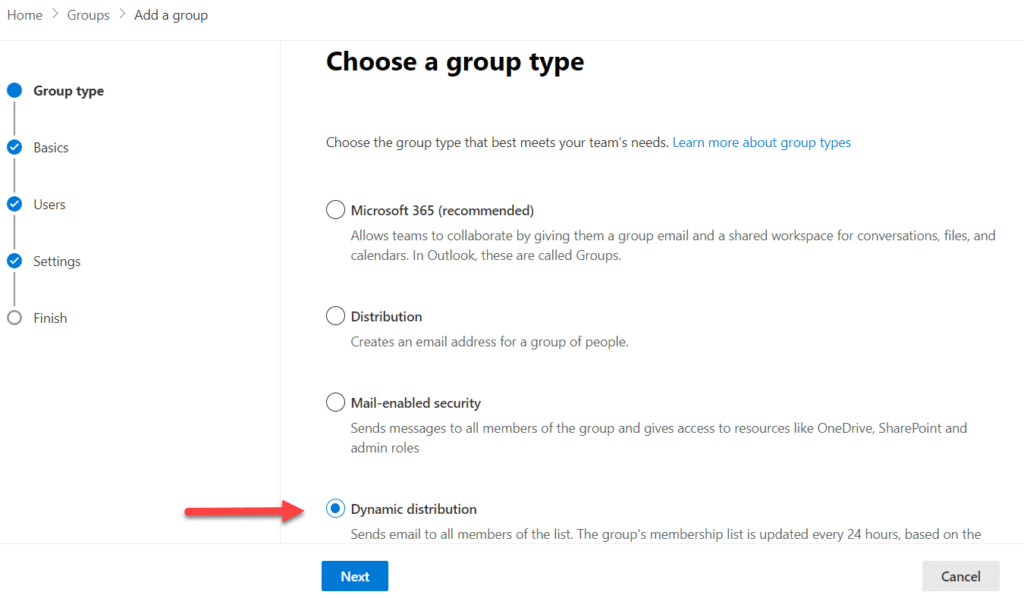
- Click on the “Add a group” icon to create a new group, and then select “Dynamic distribution group” and click “Next.”
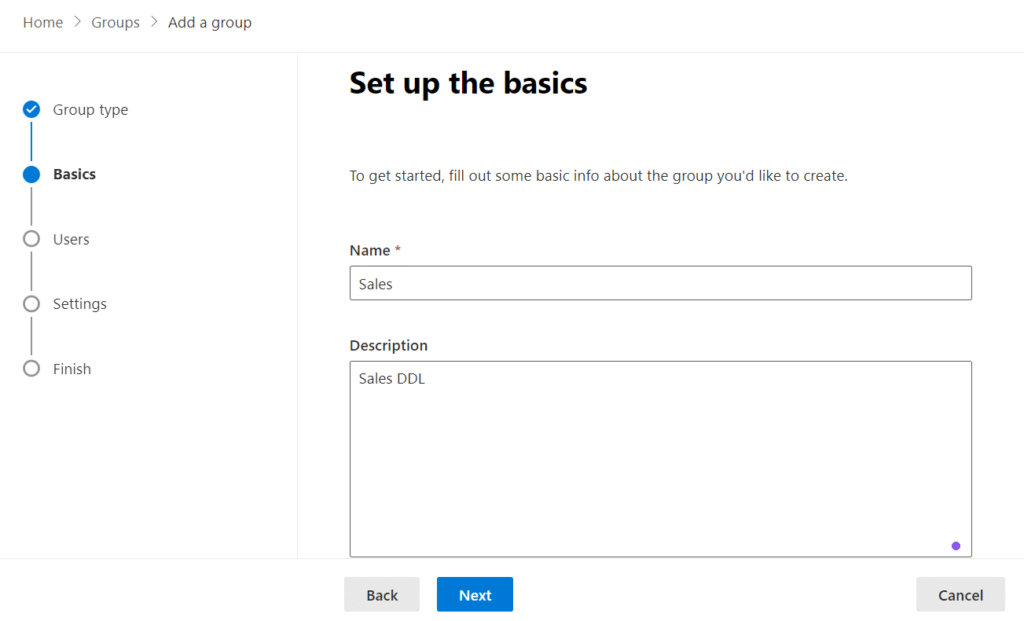
- Fill in the required information for the dynamic distribution group, such as the name and description, and click “Next.”
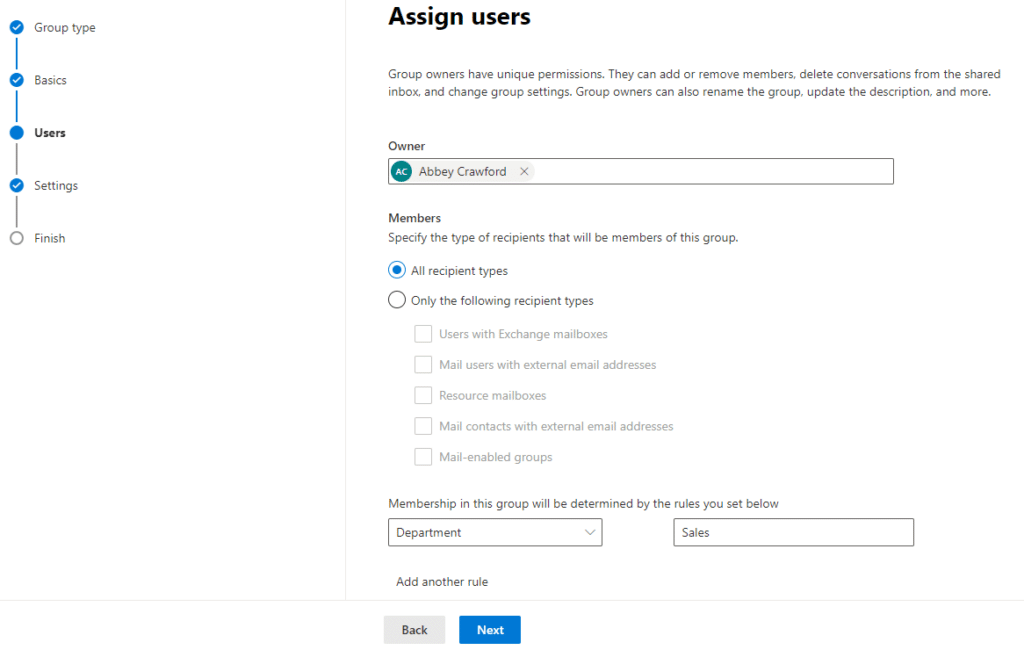
- Find and assign the owner, set the object types for membership, and add rules to define the criteria for the dynamic distribution list. For example, you can set filters based on attributes like department, location, or job title and click “Next.”
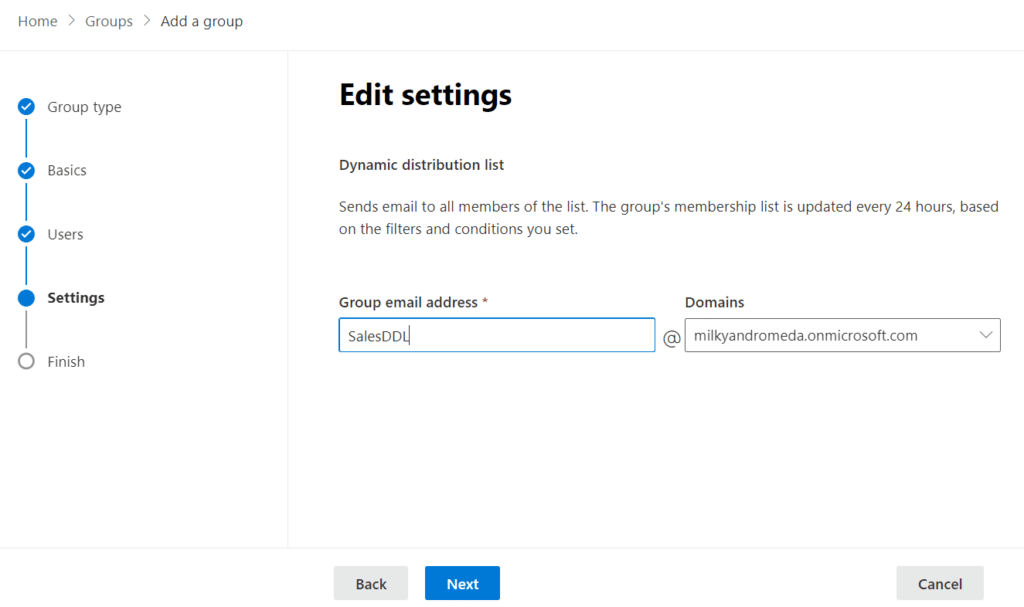
- Provide the email address for the dynamic distribution group and click “Next.”
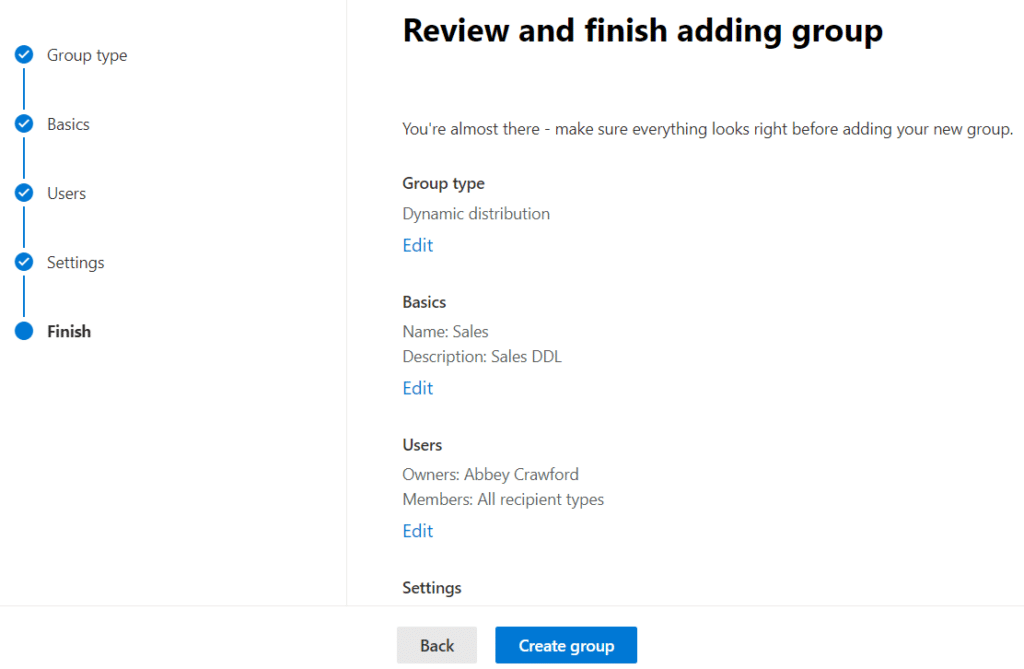
- Review the dynamic distribution group changes and click “Create group.”
Create a Mail Flow Rule
Mail flow (transport) rules are similar to the Inbox rules in Outlook; you can use them to identify and take action on messages flowing through your Microsoft 365 organization. For example, mail claiming to be from executives and managers is often spoofed, so it can be helpful to identify mail that originated outside of your organization. That way, you can train your users to double-check that messages asking them to perform sensitive actions (like making a wire transfer or paying an invoice) come from the user, not some poser outside the company. Exchange administrators can enforce each rule, test it, or test and notify the sender.
Follow the steps below to create a mail flow rule in Exchange Online.
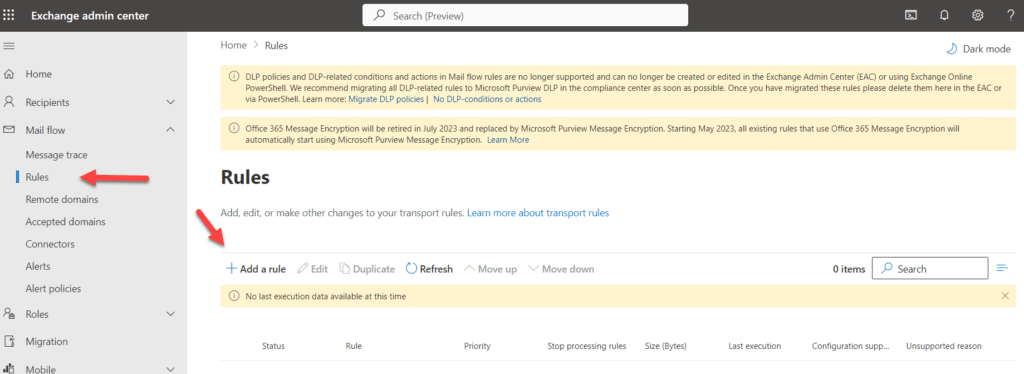
- In the Exchange admin center, navigate to “Mail flow” > “Rules.”
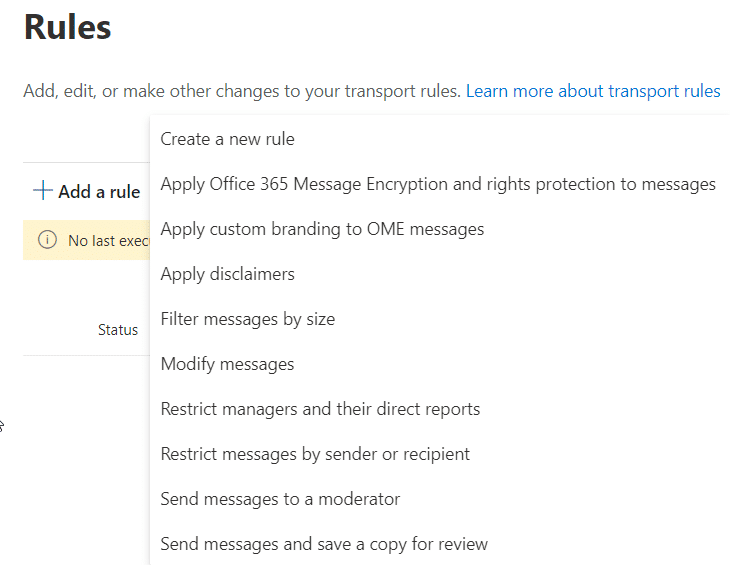
- Click the “Add a rule” button to create a new one.
- By default, you will see predefined rules to be selected, as shown below in the screenshot. To create a new custom rule, click “Create a new rule.”
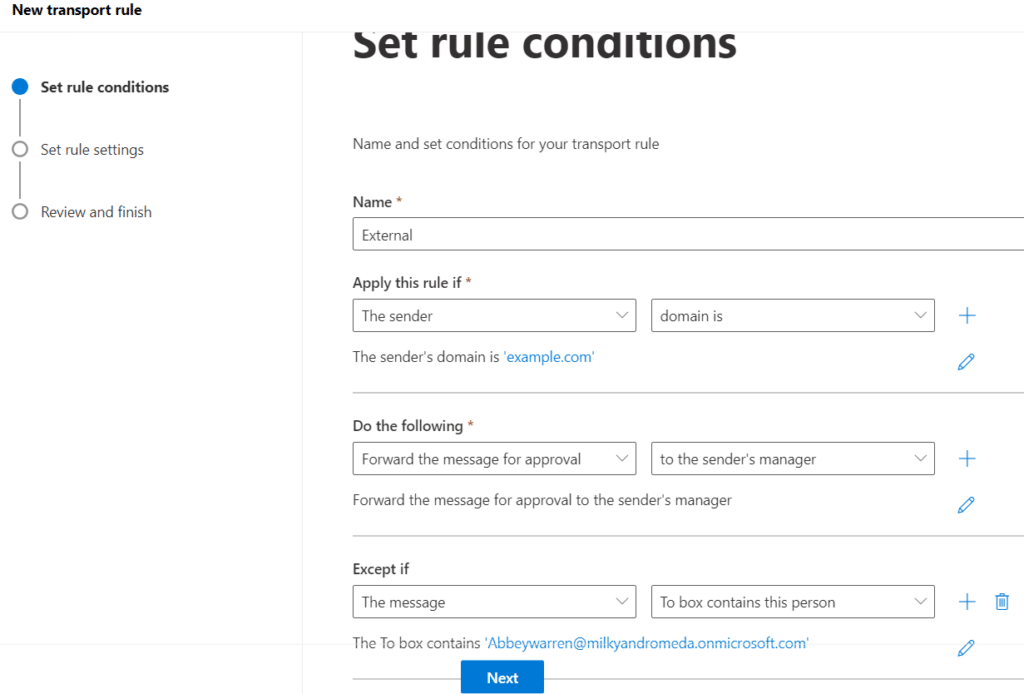
- Provide a name for the rule in the “Name” field.
- Under “Apply this rule if,” specify the conditions messages must meet for the rule to apply. For example, you can select conditions based on sender, recipient, subject, or message properties.
- Under “Do the following,” specify the actions to be taken when the conditions are met. For example, you can modify the message, redirect it, add a disclaimer, or forward it to another address.
- You can add exceptions under “Except if.” Messages that meet the specified exceptions will not have the rule applied to them. Click “Next”.
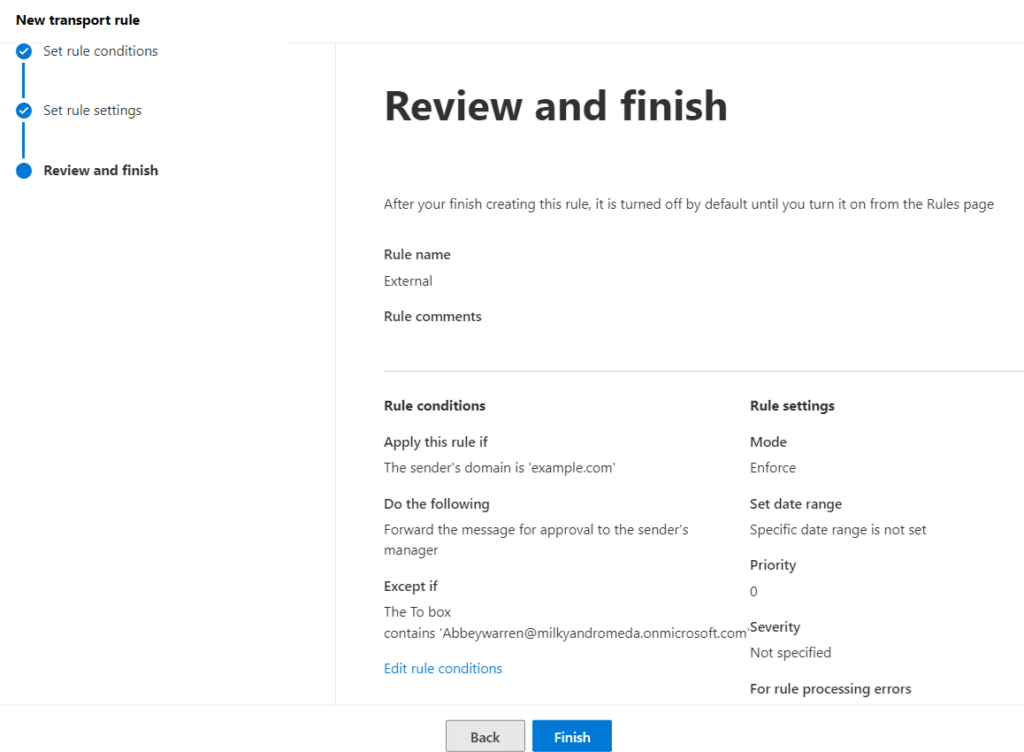
- On the “Set rule settings” page, you can set the Rule mode, Severity, activation or deactivation dates, headers matching, and comments. Set the desired settings and click “Next”.

- Review the changes and click “Finish” to create the rule.
Blocking Senders
Users may request to block specific external senders from sending emails to your organization for various reasons, such as spam and harassment.
To block senders using the Exchange Admin Center, follow the steps below.
- In the Exchange admin center, navigate to “Mail flow” > “Rules.”
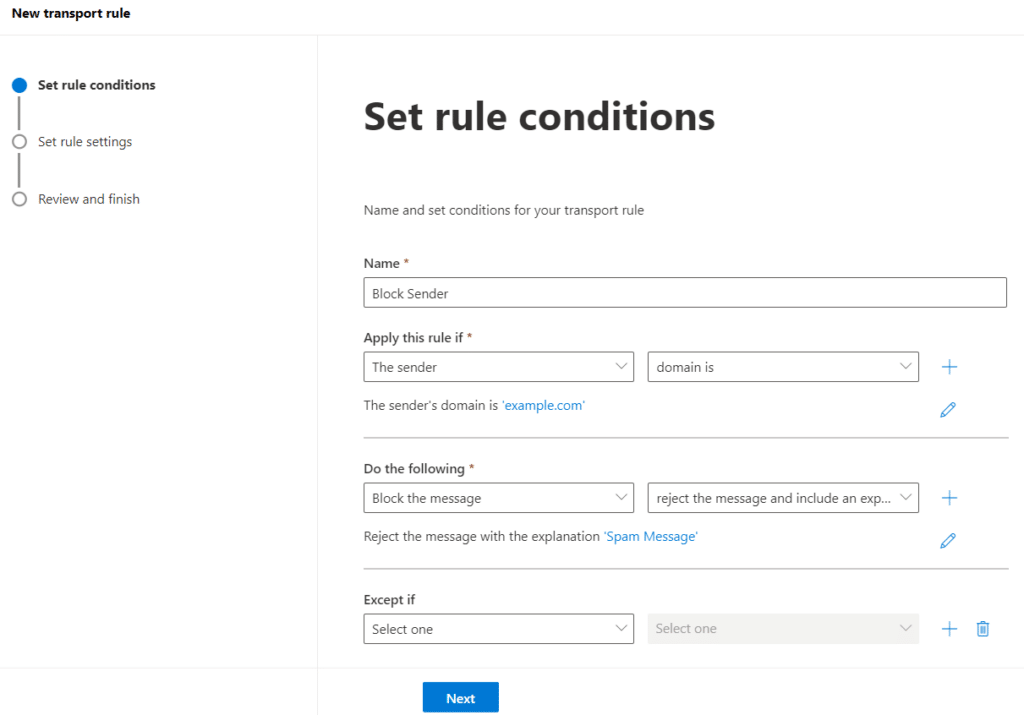
- Create a new “Blocked Sender” rule and apply the conditions below.
- Apply this rule if “The sender domain is ‘example.com.’”
- Do the following: “Block the message” and “Reject the message and include an explanation.”
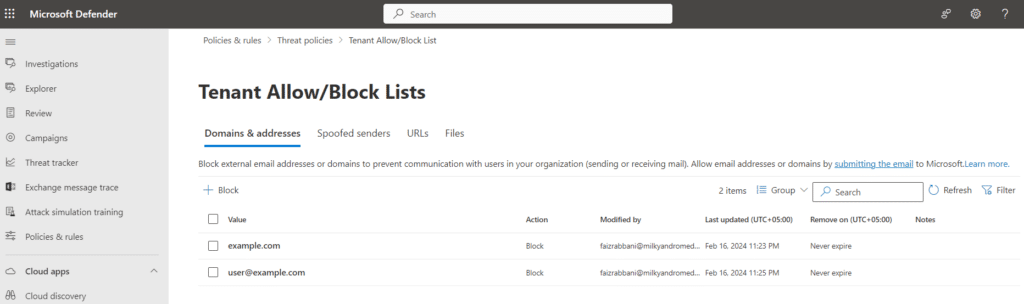
Alternatively, you can block senders using the Tenant Allow/Block list in Microsoft Defender for Office 365 (formerly known as Office 365 Advanced Threat Protection); follow the below steps:
- Click on Security to open “Microsoft 365 Defender portal” in “Microsoft 365 Admin Center”.
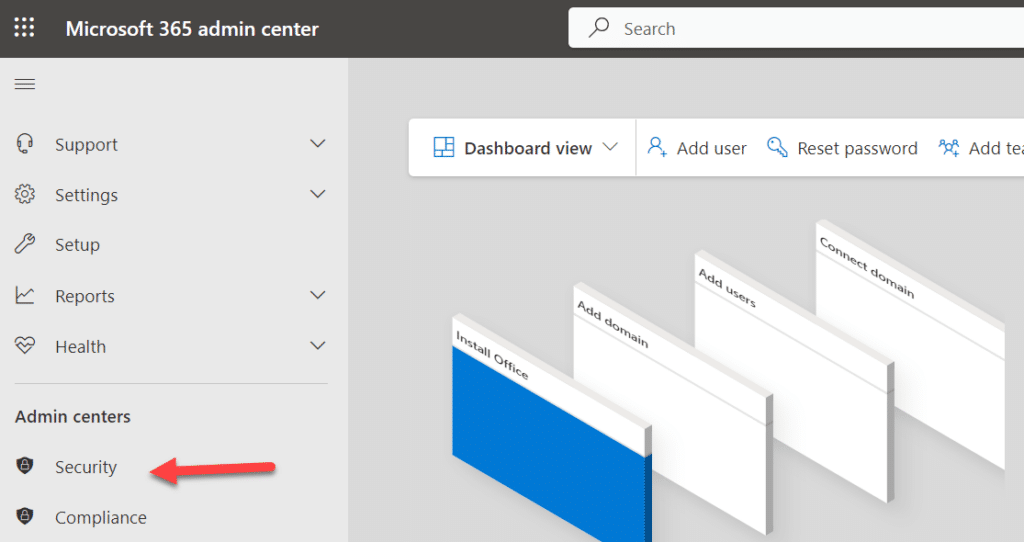
- You can also sign in Microsoft 365 Defender portal directly using https://security.microsoft.com/.
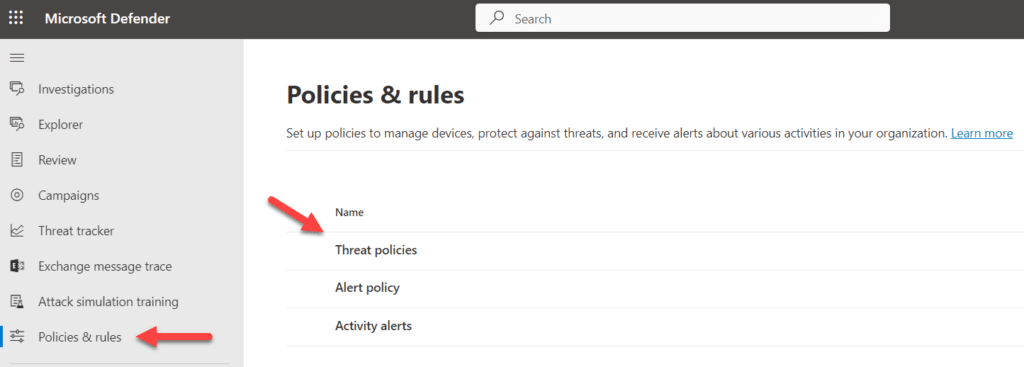
- Navigate to the “Policies and Rules” section in the Microsoft 365 Defender portal; click “Threat Policies”.
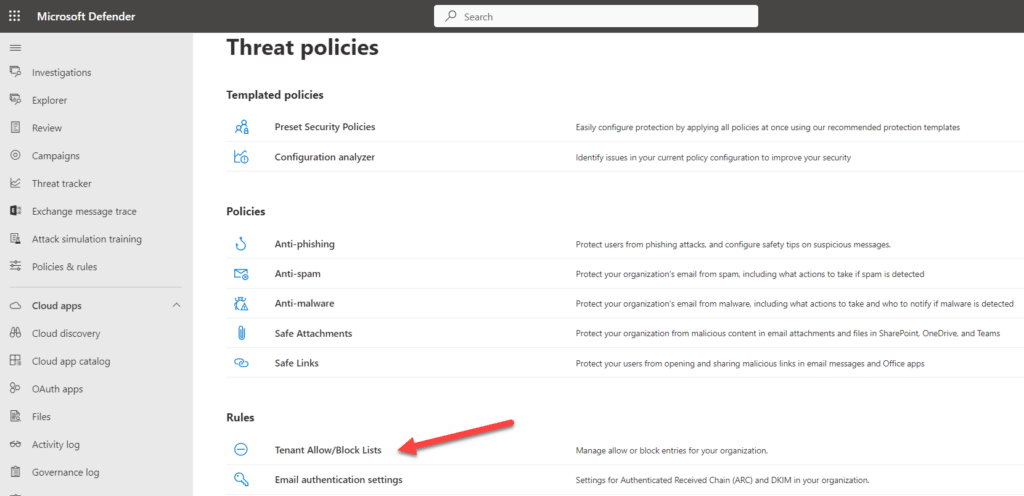
- In the “Threat policies,” click on “Tenant Allow/Block list” under the “Rules” section.
- Click on “Domains & Addresses” and click on “Block” to add the domain or email address to the list; click Add.
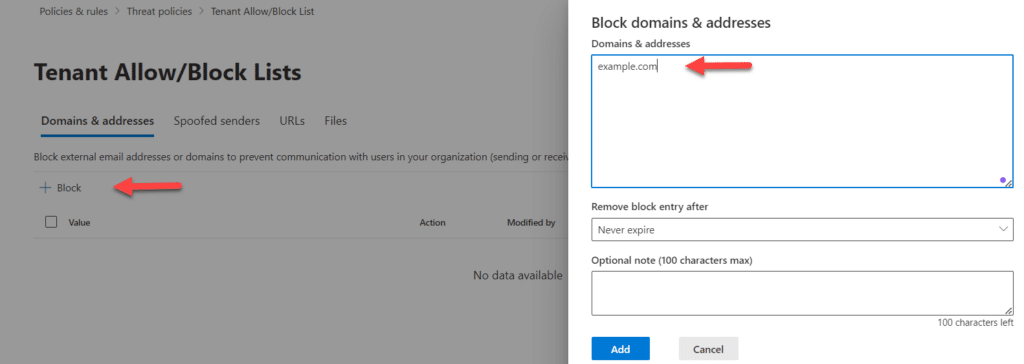
- You can maintain the list by adding more domains or senders by repeating the process.
Enabling Archive Mailboxes
Archive user mailboxes were introduced in earlier versions of Exchange to address issues such as excessive PST files containing old emails scattered throughout your network. Each mailbox includes an archive mailbox, where older mail can be retained in more affordable storage. That way, older emails are available for eDiscovery purposes while also helping to manage the primary mailbox size for improved performance.
Once the archive mailbox is enabled, users can access it in Outlook and Outlook on the web, where they can move older emails from their primary mailbox to the archive for long-term storage.
To enable archive mailboxes in Exchange Online, follow the steps below in the Exchange admin center.
- In the Exchange admin center, navigate to “Recipients” > “Mailboxes.”
- Select the mailbox for which you want to enable the archive mailbox.
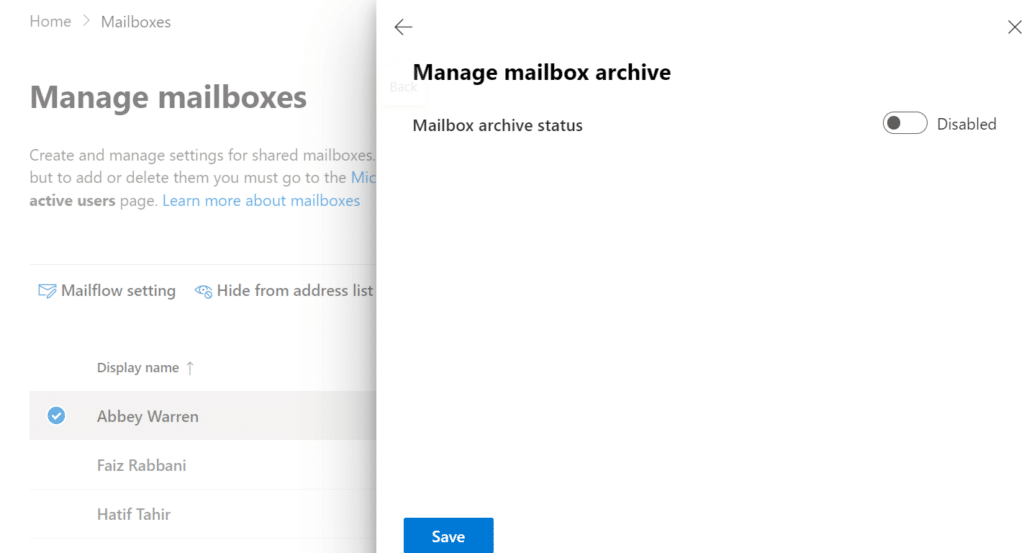
- In the mailbox properties pane, click on “Others” and click on “Manage mailbox archive” under the “Archive mailbox” section.
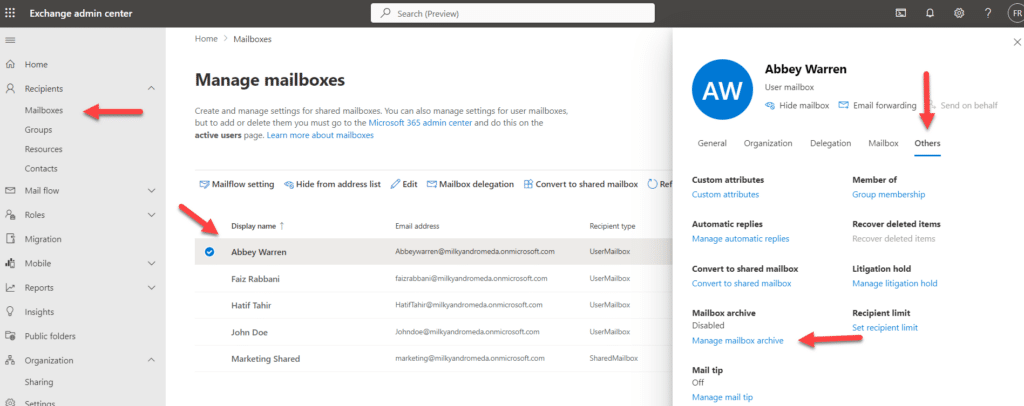
- Click on the toggle button to enable the archive mailbox, and click on “Save” to save the setting.
Conclusion
How Netwrix Can Help
In Exchange Online’s complex and dynamic environment, keeping track of changes, configurations, and permissions is essential for maintaining a secure and efficient communication system. This is where Netwrix Auditor for Exchange comes into play, providing administrators with a powerful tool to enhance visibility, improve security, and ensure compliance within their Exchange Online environments.
Netwrix Auditor for Exchange offers detailed auditing capabilities, enabling admins to track every configuration change and mailbox access within Exchange Online. Whether it’s monitoring permission changes, mailbox logins, or non-owner mailbox access, Netwrix Auditor ensures that every action is recorded and easily accessible for review. In addition, its real-time alerting mechanism immediately informs administrators of suspicious activities or potential security breaches, allowing swift action to mitigate threats. This includes unauthorized mailbox access, unexpected changes to mail flow rules, or any other activity that deviates from the norm. As Exchange Online continues to evolve, having a reliable tool like Netwrix Auditor ensures that administrators can adapt to changes confidently and maintain control over their environments.