Windows Server security has improved markedly over the last decade, putting it up there with Unix-based operating systems, which traditionally are considered more secure than Windows. Much of this work is due to the infamous Vista reset, which saw Microsoft plough resources into Windows XP Service Pack 3, and delay the release of what was to become Windows Vista. During this period, Microsoft also adopted its Secure Development Lifecycle (SDL), a process for building secure software and meeting regulatory compliance standards.
But that’s not to say Windows cannot be further secured out-of-the-box, and if you’re an IT professional with lots of experience, that’s not necessarily a problem. But small businesses with limited resources sometimes need a helping hand, and that’s where the Security Configuration Wizard (SCW) steps in. The tool analyzes the local server, including applications, services, and used ports etc., and then guides users through the process of generating a security policy for the server, which can be applied locally, or exported for use on other servers.
Security Configuration Wizard
Before using SCW on your server, you should always test any security policy you intend applying in a lab environment, as security configuration changes can prevent applications from working as intended, or prevent users from logging in. Additionally, before changing security settings, make sure you have a server backup and that you’ve tested the restore process.
Log in to Windows Server 2012 R2 using a local administrator account, and open Server Manager. You can launch Server Manager from the icon on the Start screen, or using the icon on the desktop taskbar.
- Select Security Configuration Wizard from the Tools menu in Server Manager.
- Click Next on the welcome screen.
- On the Configuration Action screen, check Create a new security policy, and click Next.
- On the Select Server screen, click Next. The local server name should already be displayed.
SCW will now process the local security database. You can click View Configuration Database if you want to see the current settings.
- Click Next to continue. Click Next on the Role-Based Service Configuration
- On the Select Server Roles screen, check the Server Roles that are installed on the server. Notice that SCW detects which roles are installed, so in principle you shouldn’t need to manually check any additional Server Roles. When you’re done, click Next.
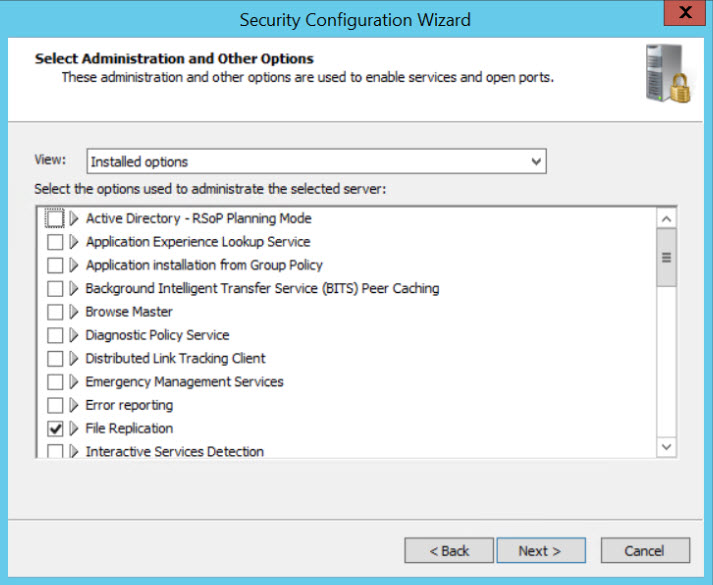
- Repeat this procedure on the Select Client Features, Select Administration and Other Options, and Select Additional Services
- On the Handling Unspecified Services screen, you can choose whether to leave the startup mode of these services untouched, or disable them. I recommend that if you’re not sure, to check Do not change the startup mode of the service, and click Next.
- On the Confirm Service Changes screen, you can see the current startup type for each service and compare it with what will be set in the policy SCW is creating. Click Next to continue.
- Click Next on the Network Security
- On the Network Security Rules screen, review the selected rules, and click Next.
- Click Next on the Registry Settings
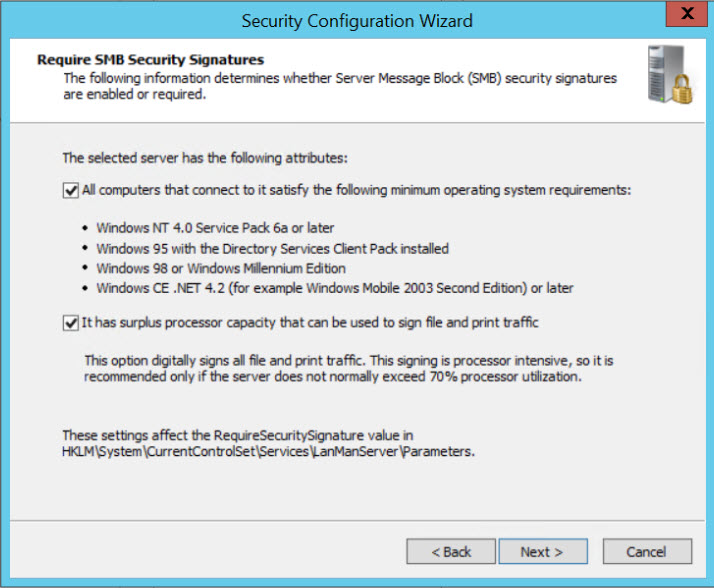
- Answer the questions by checking the appropriate boxes on the Require SMB Security Signatures screen, and click Next. This will set the NTLM configuration in the registry for you automatically.
- Do the same on the Require LDAP Signing, Outbound Authentication Methods, and Outbound Authentication using Domain Accounts screens and click Next.
- Review the registry settings on the Registry Settings Summary screen, and click
- Click Next on the Audit Policy
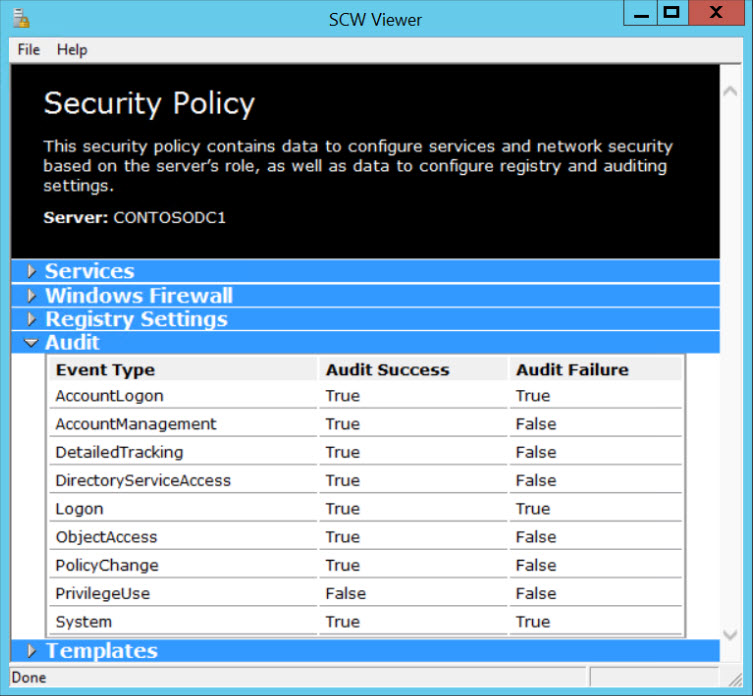
- On the System Audit Policy screen, choose from one of the three auditing objectives, and click Next.

- Review the audit policy on the Audit Policy Summary Note that you also have the option to set System Access Control Lists (SACLS) to audit access of the file system. If selected, this option cannot be rolled back using SCW. Click Next to continue.
- On the Save Security Policy screen, click Next to continue.
- On the Security Policy File Name screen, give the policy a name, and optional description. You can also view the policy, and include any additional settings configured using .inf security templates. Click Next to continue.
- Finally, on the Apply Security Policy screen, select Apply later or Apply Now, and click If you choose Apply later, you’ll need to rerun the wizard to apply the policy to the local device.
- Click Finish to close SCW.
If you need to edit the policy just created, apply it or roll back the applied policy, start SCW again and choose the appropriate option on the Configuration Action screen.